By default, aspect ratios and cropping are handled by filling the template image hole with the image, with the centers aligned. Furthermore. The software will automatically rotate images to fit into an image hole, no matter which orientation the image hole has been drawn on the template.
INFO
Cropping in Timestone Software is performed on the image previews. When the software needs to print, the original image files are opened, cropping is applied and printing is performed. On the other hand if the photographer has a need for a set of cropped images, they can exported from Images Mode with the cropping an other adjustments applied.
In all cases the original files remain untouched.
Manually Adjusting Cropping in Images Mode
To manually adjust cropping in Images Mode:
Clicking the image crop tool (an icon of a cursor and bisecting arrows)
Select the image or images to crop
Adjustments are made via the Crop/Scale area on the left toolbar or by clicking and dragging the image in the image field and using the mouse wheel to zoom in or out
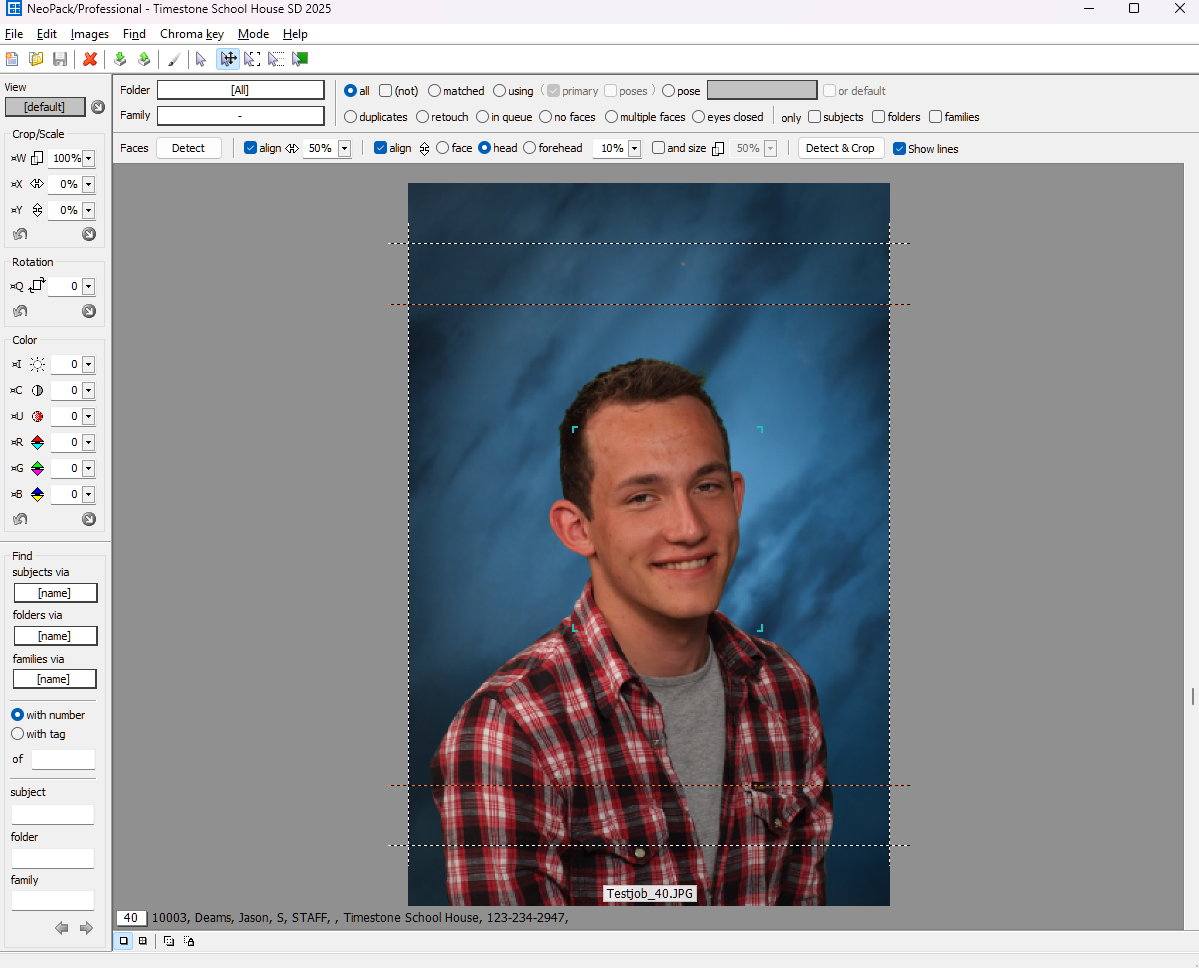
Figure 1: An uncropped image in Images Mode
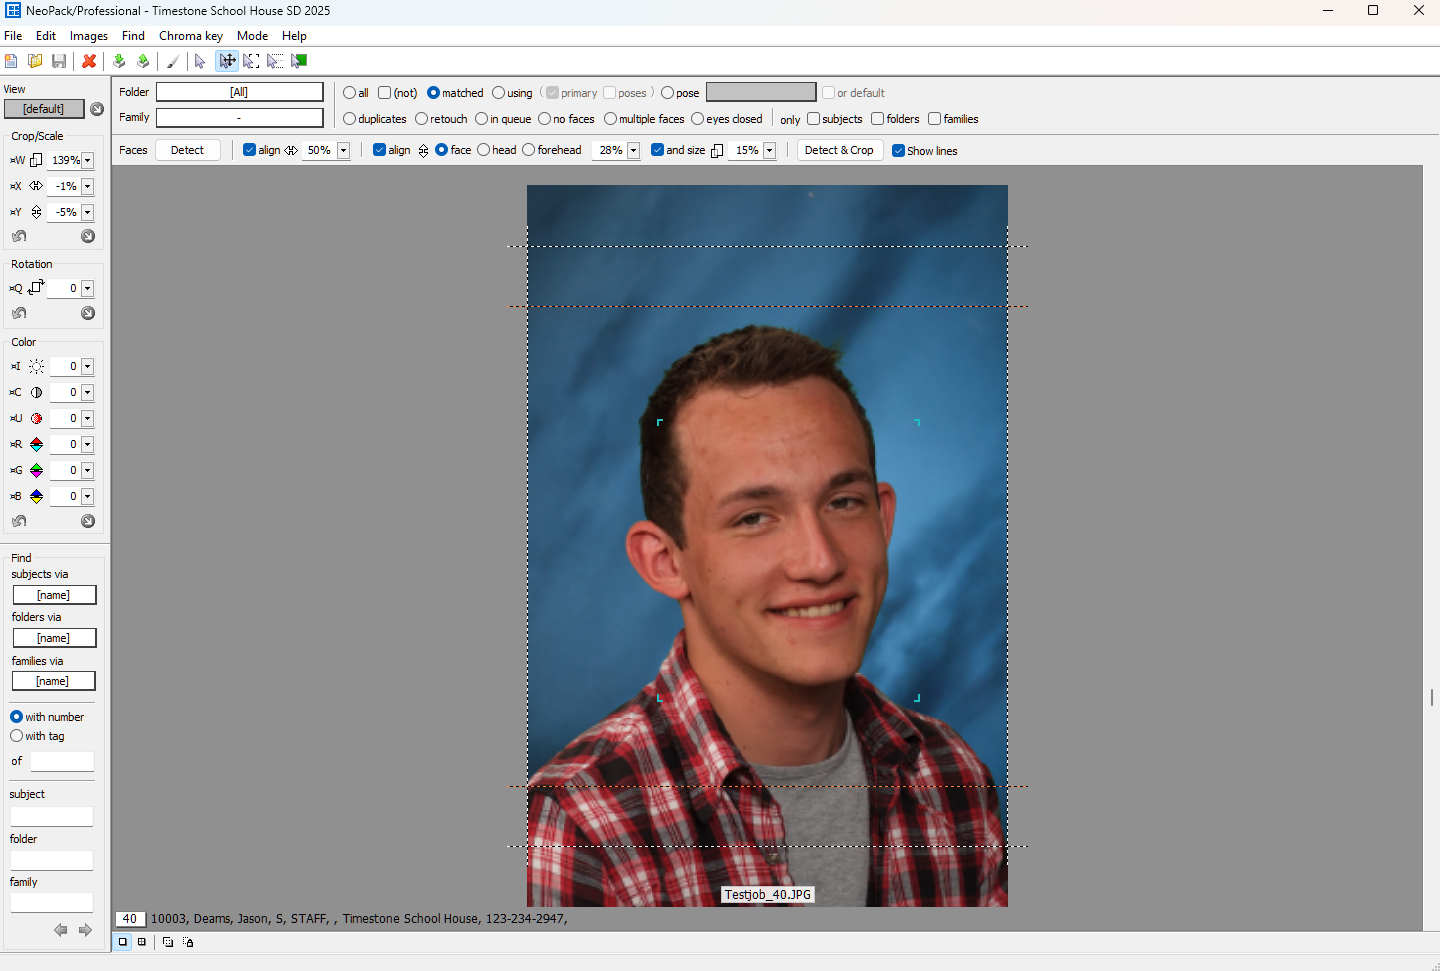
Figure 2: A cropped image in Images Mode
Applying a crop across multiple images
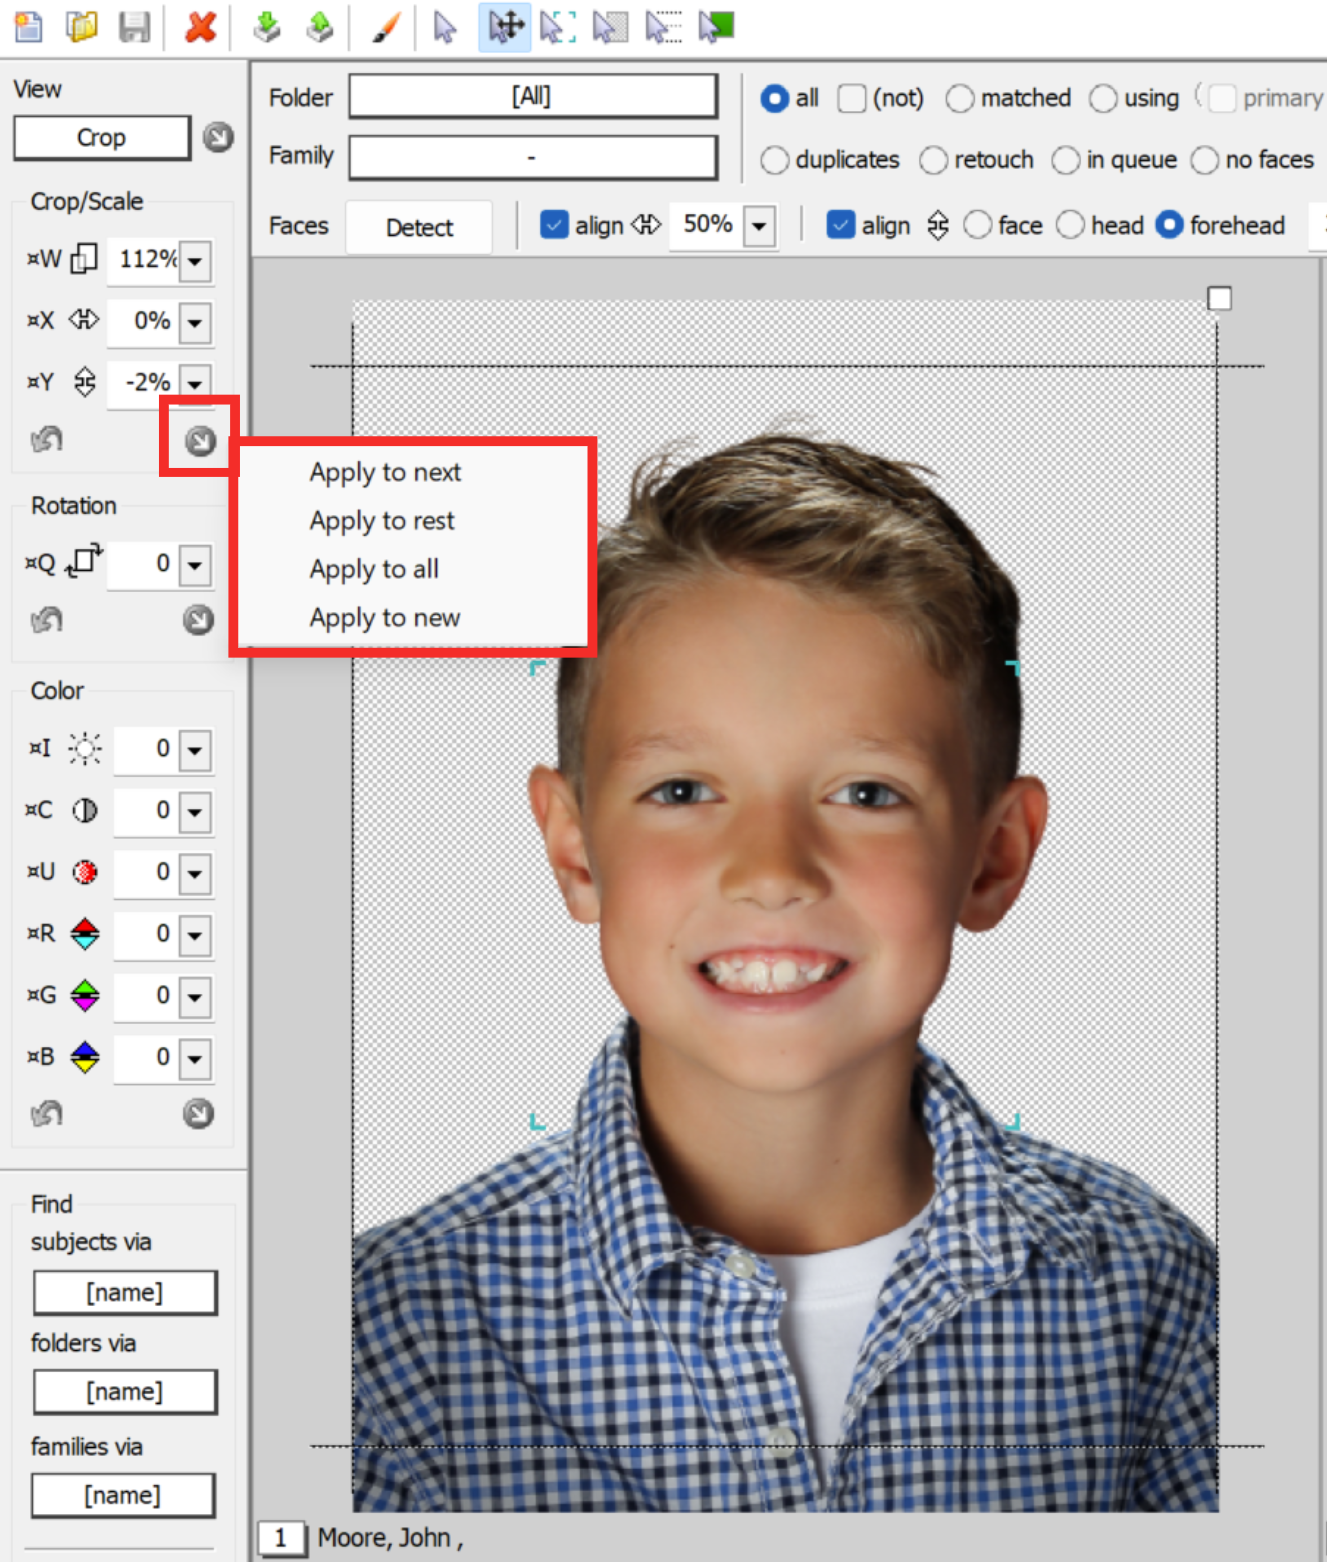
Using the steps above will allow the user to crop as many images as are selected by the user; however, once an image is cropped, it is possible to “copy” that crop to additional images by clicking the Circled arrow icon on the right of the Crop/Scale area and applying the crop with one of the following options:
Selection
Result
Apply to next
Applies the crop only to the Next image
Apply to rest
Applies the crop to all following images
Apply to all
Applies the crop to all images in the job
Apply to new
Applies the crop to all new images brought into the job
Figure 3: The circled arrow icon and Apply crop options highlighted in red
Adding Aspect Ratios
The user may also set up different aspect ratio guides. under Edit> Aspect ratio and head guides…
TIP
For aspect rations that are commonly used for most jobs, it is advised to define them in tsAdmin.
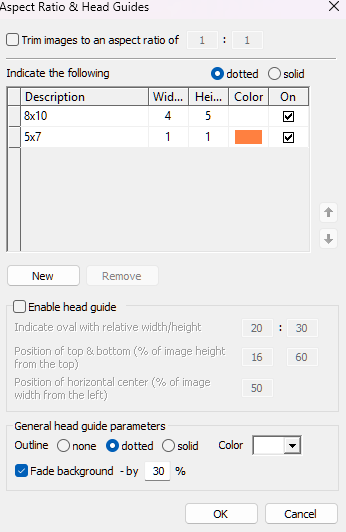
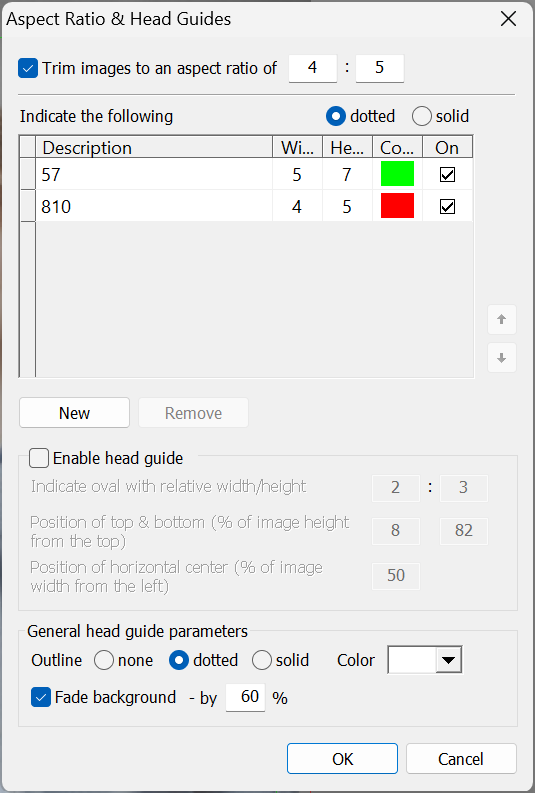
Figure 4: The aspect ratio and head guide options
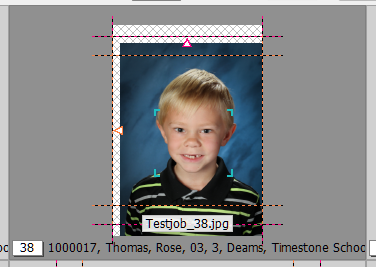
The user can set their most common aspect ratios and select a colour for the guidelines and the associated bleed warnings to appear. These guides are helpful when cropping and can provide the user with instant feedback. In the example image below, note the Orange 5×7“ guide, the Pink 8×10“ guide, and the warning arrows that indicate that the image is cropped and is not to the bleed of the Aspect ratio/Crop lines.
Figure 5: An image that has been cropped and shows the bleed warnings on the displayed aspect ratios
Trim Images
The Trim Images feature allows users to ‘trim’ images to a designated ratio before applying the aspect ratios described above. Trimming is applied before cropping. Therefore, if the trim is set to a 4×5 ratio, the image is first adjusted to fit that ratio. Any subsequent cropping is then performed using the trimmed version of the image.
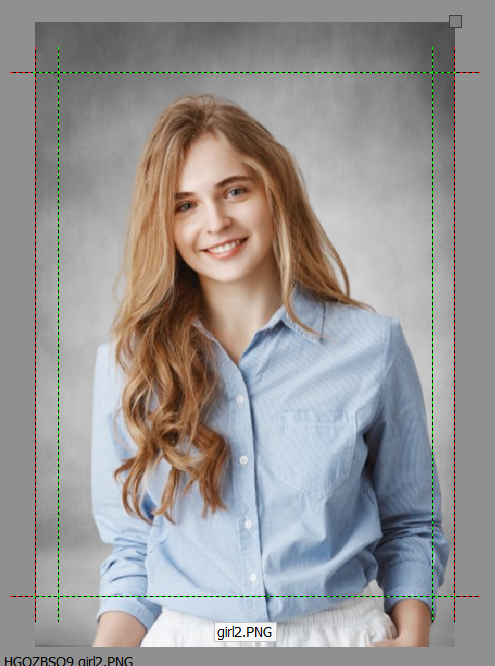
Figure 6: Trimming images to a 4:5 aspect
Keeping the subject in the same vertical position
An advantage of trimming the images is that the subject (notably their head) remains in the same vertical position. When subsequent aspect ratios require cropping it is taken from the sides not the top and bottom.
Consider aspect rations of 4:5 and 5:7 as shown above. An 8×10” print would normally have the subject much higher in the frame than in a 5×7” print because it has effectively cropped in from the top and the bottom. By applying a 4:5 trim first, both prints would have the subject in the same vertical position. The 5×7” crop would take space from the sides. The subject would therefore have the same amount of headroom in each print.
Figure 7: A trimmed image
Image Views
If the user has a common crop that they employ for certain Products, such as IDs or composites, they can create a view. Views can be cropped without changing the default image preview. Different products can then be directed to use different views to achieve the required cropping.
Further Reading: Image Views
Timestone Software’s applications support multiple “Views” where images can have multiple versions, each with its own cropping and scaling.
It is possible to use face recognition to help crop and align all the faces in a selection of images.
WARNING
This is only viable when there is one subject per image.
In Images Mode with the Crop Image tool active, select the images and click Detect Faces. Once the faces are detected, blue corner brackets will appear around the detected faces. Three adjustment areas are available, expressed as percentages of the total canvas:
Align Faces to the Left or Right
Align Faces up or Down
Size faces
Click Detect and Crop to align and crop the images.
TIP
For best results, the user should detect faces frist. Then check for mutliple faces, removing any artifact faces, and check for images with no faces before processing the crop using Face Detection.
Further Reading: Face Detection and Automatic Cropping
Face detection and auto-cropping are available in all applications with image mode, making it possible to process images in bulk to a common size and position.
The default auto-rotation can be nullified by making use of the Different Orientations Versions on specific item templates in the template designer.
NOTE
Images in item designs are never rotated; however the entire item will rotate to fill the hole on a pack layout.
This is achieved by creating a vertical and horizontal template option and selecting the correct orientation of the image, and then drawing the canvas in the alternate direction.
This is best explained with an example:
The user has mixed orientation images from an event, but all images in the final product should be printed horizontally.
In the template designer, create an item template (sizable in this case)
Click the Different orientation icon and then select the horizontal option.
Create the horizontal version with a vertical image hole.
Select the vertical option.
Create the vertical version with a horizontal canvas with a horizontal image hole.
Save the template design.
Place any print order using that item template to have the system crop the vertical image to horizontal.
This item template can now be used to crop any vertical image to horizontal, while not affecting the horizontal images.
Further Reading: Templates with Horizontal and Vertical Orientations
Item designs, both fixed and sizeable, may be designed with both vertical and horizontal orientations.
A product is any item produced in the apps. Simple prints, package prints, trader cards, groups, composites and digital files are all examples of products.
Products are of different types. Portrait 'type' products often relate directly to a pack layout template. Other product types relate to a genre, such as composites, groups and digital image.