In general terms, retouching can be handled in one of two ways.
Flagging a subject as requiring retouching
Ordering a package containing a retouch product
Flagging a subject for retouching
Subjects may be flagged as requiring retouching by utilizing one of the following methods:
Manually in Poses Mode
Scanning the /%R+ barcode
Once a Subject has been marked for retouching, the subject’s image name in Details Mode will be underlined. It is important to understand that this makes no distinction as to which image or images are to be retouched.
Note
Flagging a subject for retouching gives no indication as to which images are to be retouched.
Furthermore this method cannot be used in conjunction with the Timestone Internet Ordering System (IOS)
Manually in Poses Mode
To manually flag a subject for retouching in Poses Mode:
Navigate to Edit> Mark/Unmark Retouching
The keyboard shortcut Ctrl+R
The /%R+ barcode
To flag or mark a subject for retouching, simply find and select the subject, then scan a 'retouch barcode'.
/%R+ - flags the subject for retouching
/%R - removes the retouching flag from the subject
The retouch product type
It is possible to order retouching as opposed to simply marking a subject for retouching. This is achieved with the Retouch product type that can be added to any package in any offer and subsequently ordered online with IOS.
Since the retouch product is ordered for a specific image or images, this can be indicated to the user in the production applications.
Key points
Retouching product type that can be added to a package
Does not require a template
Retouch orders are easily distinguished in Orders Mode and in Fulfill
Fulfill orders requiring retouching are held to avoid premature processing
Defining a retouch product
As with other products, the retouch product is defined in the Products object of the Timestone Administrator (tsAdmin).
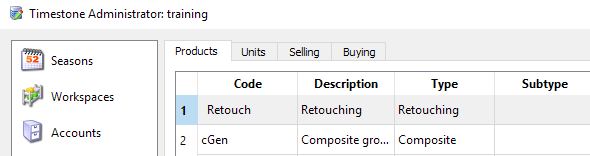
Figure 1: Adding a Retouch product
The important attribute of a retouch product is the Type. This must be set to Retouching
Hint
It is possible to define as many retouch products as needed such as 'standard' and 'detailed' retouching.
Adding a retouch product to a package
Retouch products are added to packages in the normal way. The product may be used alone in a package or in combination with other products. Retouch products do not have a print quantity or download attribute.
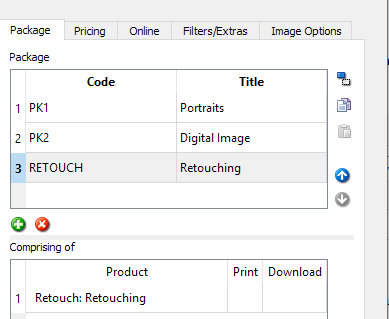
Figure 2: Adding a retouching product to a package
Working with retouch - Images Mode
A filter in Images Mode can be used to display the images for any subjects for whom retouching has been flagged or who have ordered a package with a retouch product. Note that the filter will display all images for the subjects in question.
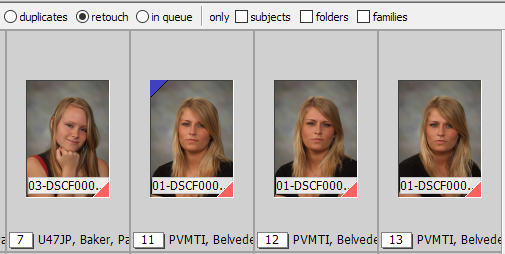
Figure 3: Filtering for retouch in Images Mode
Attention
Filtering for retouch in Images Mode shows all images for any subjects requiring retouching. It does not display specific images.
Working with retouch - Orders Mode
A Retouch images tab in Orders Mode offers many features to assist the user when working with retouch orders and images
Key points
Lists any orders that include a retouch product and displays the subject's images
Lists any subjects flagged for retouching with /%R+ and displays their images
Ordered images appear at the beginning of the film strip
Images can be edited (retouched) through an external editor from within Orders Mode
A blue indicator is displayed once an image has been edited
A retouching complete action releases the images for printing/uploading with Fulfill
A show completed filter toggles between showing all orders or just those remaining to be completed
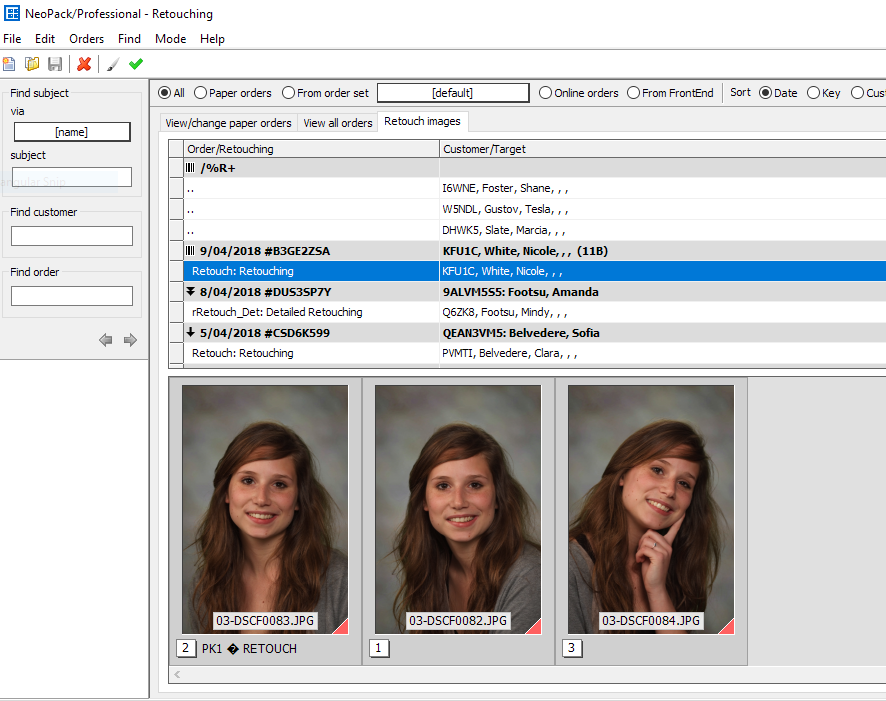
Figure 4: The Retouch images tab in Orders Mode
Any Subjects flagged for retouching with the /%R+ barcode are grouped together and displayed at the top, followed by Orders involving a retouch product.
Retouching images from within the software
A feature of the software is the ability to edit images in an external image editor, such as Photoshop, from within the application itself. This is available in many areas of the software, including:
Images Mode
Poses Mode
Fulfill
Retouch images tab in Orders Mode
To enable this feature, the external image editor needs to be specified in File>Options for each application on each workstation. This is achieved by entering the path to the editor’s executable file (.exe) used to launch the editor.
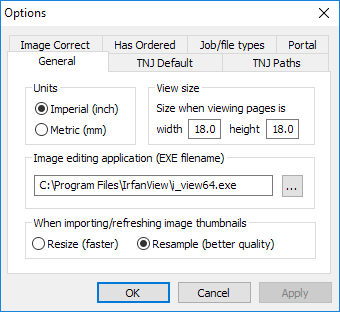
Figure 5: Specifying an external image editor
To retouch images, simply select the image or images and click the paintbrush icon on the toolbar or use the Control-E keyboard shortcut. The editor defined in File>Options will launch with the selected images open.
Important
Images edited in the manner described above are automatically refreshed as the user returns to the application and clicks the 'Continue' window. The images will then be displayed with a blue triangle in the upper left corner.
If images are edited externally to the software they should be manually refreshed in Images Mode. These images are not displayed with the blue indicator.
Marking retouching as completed
Orders can be be marked as having their retouching completed by clicking the green 'tick' icon on the tool-bar or using the Shift+Ctrl+R keyboard shortcut. A filter is available to show or hide completed orders.
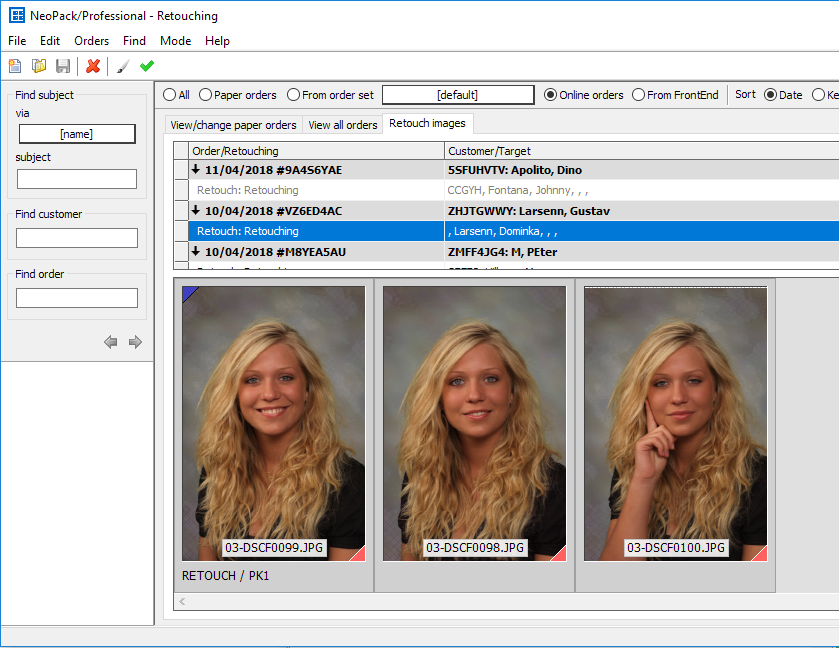
Figure 6: A retouched image with blue indicator.
Retouching complete
Marking retouch orders as completed releases them for print or download in Fulfill.
Multiple orders can be selected and marked as 'Retouching completed' in one step. This is especially useful if images have been retouched externally to the software.
Retouch orders and Fulfill
Because of the automated nature of Fulfill, especially with respect to uploading digital products, special handling is required with retouch orders. To this end, orders in Fulfill requiring retouching to one or more components are 'held" and displayed in yellow.
Held orders in Fulfill can be marked as Retouching completed either in Orders Mode as described above or in Fulfill directly. To do so in Fulfill:
Select the order by selecting its yellow header line
From the menu, select Edit>Retouching completed or Shift+Control+R
The order will be released and any digital products will upload
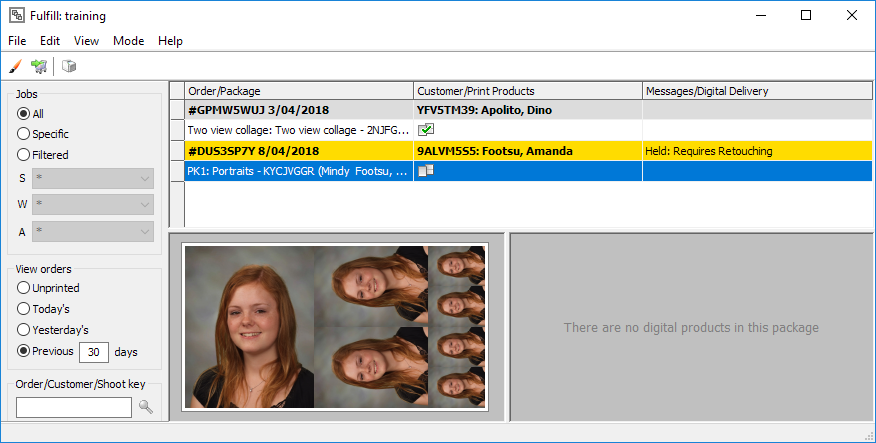
Figure 7: Fulfill showing a Held order
FAQ
What are the two main ways to handle retouching?
Retouching can be handled by flagging a subject as requiring retouching or by ordering a package containing a retouch product.
Once retouched how do you send downloads that are held?
In Fulfill, select the order’s header in the main window and use Shift+Ctrl+R to release it. You can also select Edit>Mark as completed from the menu. If in NeoPack, go to Orders Mode, select the order and either use Shift+Ctrl+R or click the green ‘tick’ icon to mark the retouching as completed and release the order.
Does flagging a subject indicate which images need retouching?
No, flagging a subject does not indicate which images are to be retouched.
Can retouching be ordered online?
Yes, retouching can be ordered online using the Retouch product type.
What happens to orders requiring retouching in the Fulfill system?
Orders requiring retouching are held and displayed in yellow to avoid premature processing.
Is it possible to edit images in an external editor from within the software?
Yes, users can edit images in an external image editor like Photoshop from within the application.
How can I mark retouching as completed?
Retouching can be marked as completed by clicking the green 'tick' icon in Orders Mode or Edit>Retouching complete in Fulfill. The Shift+Ctrl+R keyboard shortcut can also be used.