The site Service Panel allows the user to access order and payment information for any order that has been placed on the site, regardless of the download status of the order.
To access the Service Panel
To gain access to the Service Panel:
Open a web browser window and navigate to https://{yoursite}/service
Log in using your provided username and password
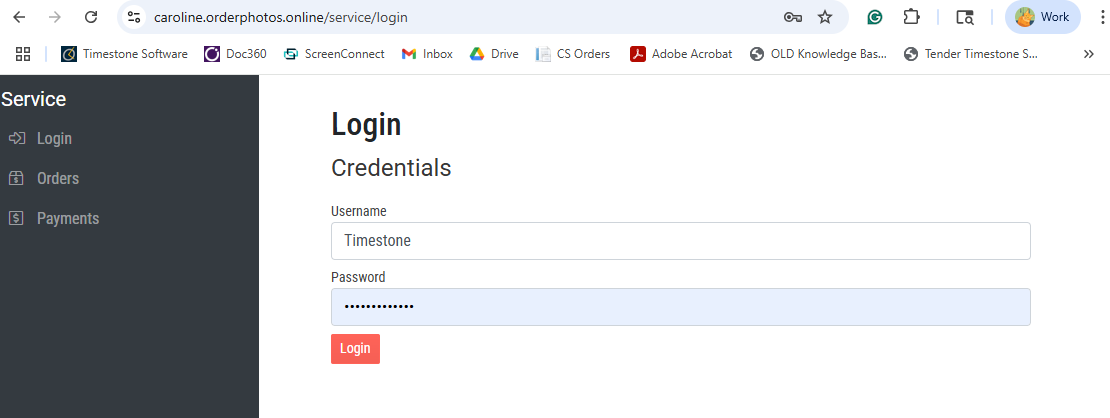
Figure 1: Service panel login page
Once logged in, the user will gain access to the following options:
Orders
Payments
Orders
The orders tab, displays a summary of all orders, sorted in descending date order.
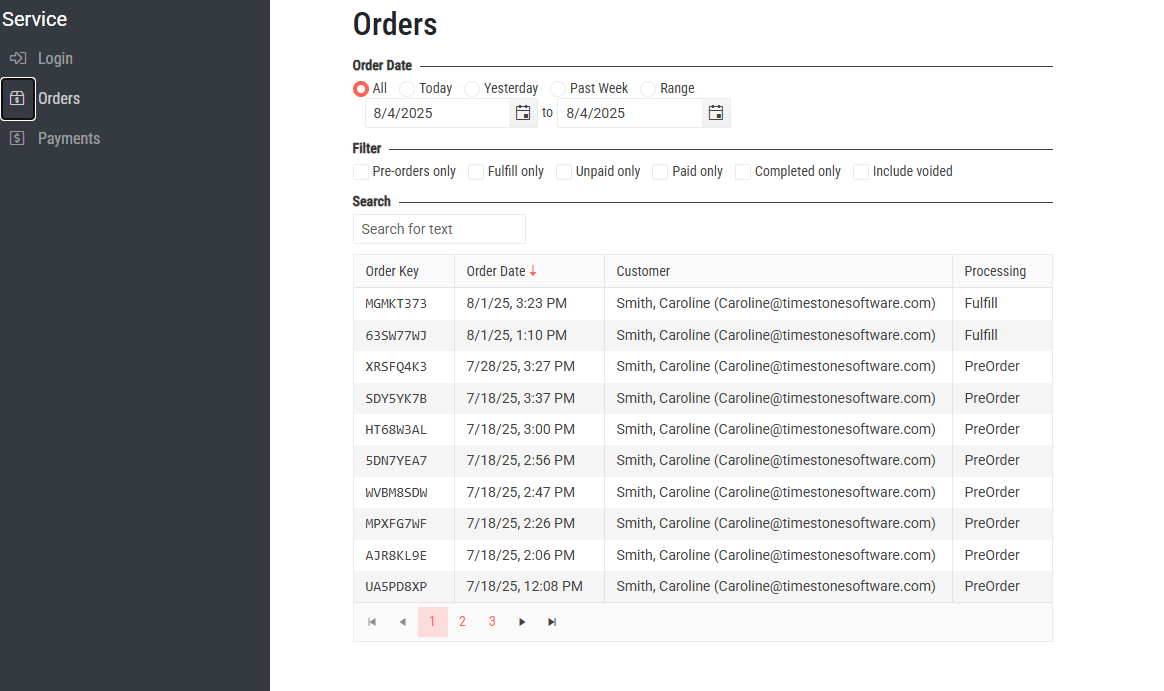
Figure 2: The orders tab of the service panel
Clicking the Order Key for a specific order displays a detailed view of the order and allows the user to make changes to a variety of information before marking the order to be re-downloaded.
Further actions include resending the receipt, advice, or payment email, cancelling (voiding) an order or changing its payment status.
Further Reading: Making changes to customer & order information
In the Service panel, the user can view or make changes to a variety of customer-supplied information.
Filtering orders
There are a variety of filters to control what orders display in the table; orders can be filtered by date or predetermined status filters.
The first section allows the user to only display orders over a designated time. Orders can be filtered by:
All
Today
Yesterday
Past week
A user-specified date range
In addition to date, the order can be filtered by the following pre-determined status:
Pre-orders only
Fulfill only
Unpaid only
Paid only
Complete only
A further option exists to include voided orders in the filtered results.
Search for an order
In addition to filtering the results, the user can search for a specific order by entering text into the Search for text window.
This is a free-form text search allowing any text string that may appear in the filtered results. Common searches include:
email address
customer name
order key
The Order Details Screen
Once an order is selected, clicking on the order key will display the detailed Order screen.
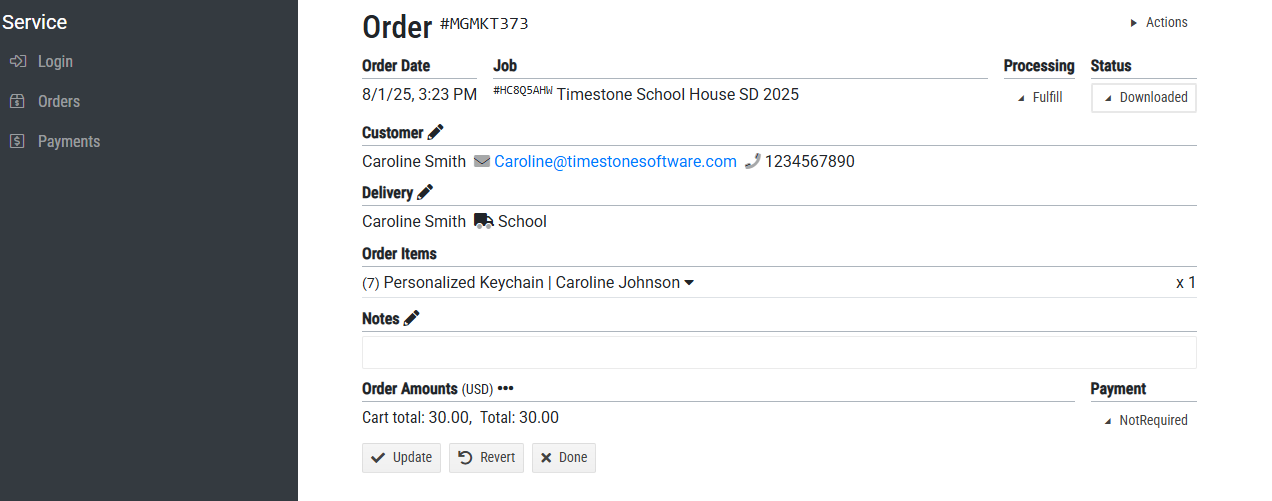
Figure 3: The order details page of the IOS Service Panel.
This screen displays all order information and allows the user to make changes to a variety of information or perform various actions.
The order key, order date, and job information are displayed as static objects at the top of the screen. The following sections are able to be interacted with to make changes, resend emails, or take other actions.
The Actions dropdown, located in the upper right of the screen, provides the user with the following options:
Send Receipt Email
Send Advice Email
Send Payment Email
Cancel (Void) Order
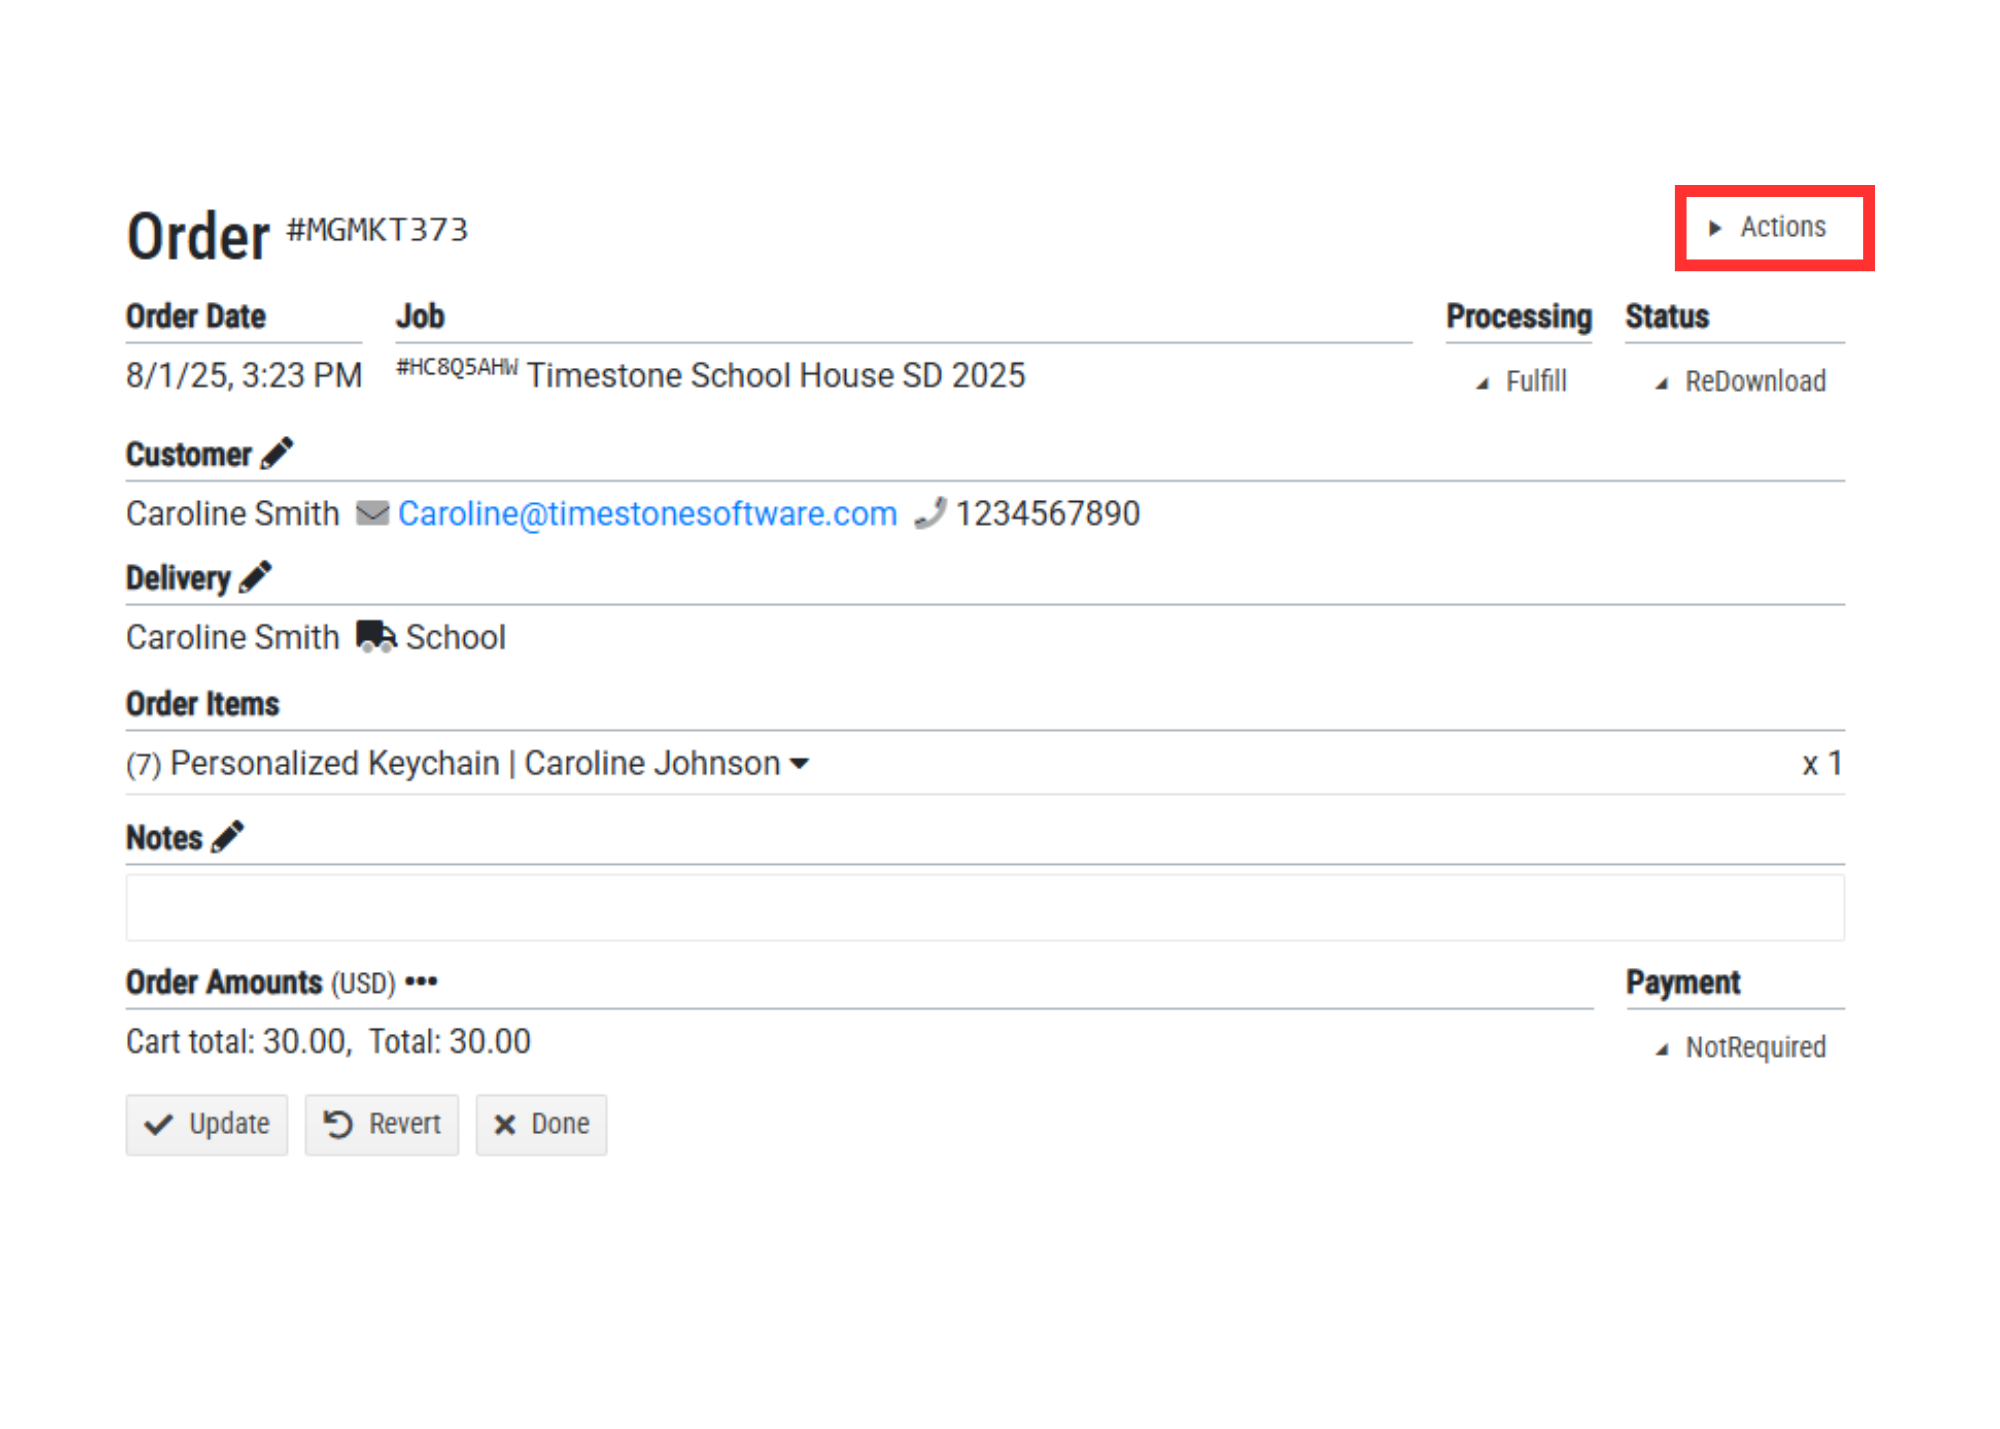
Figure 4: The Actions dropdown on the order details page of the IOS Service Panel.
This area displays the current processing method (Fulfill or Preorder) and allows the user to change that method if needed.
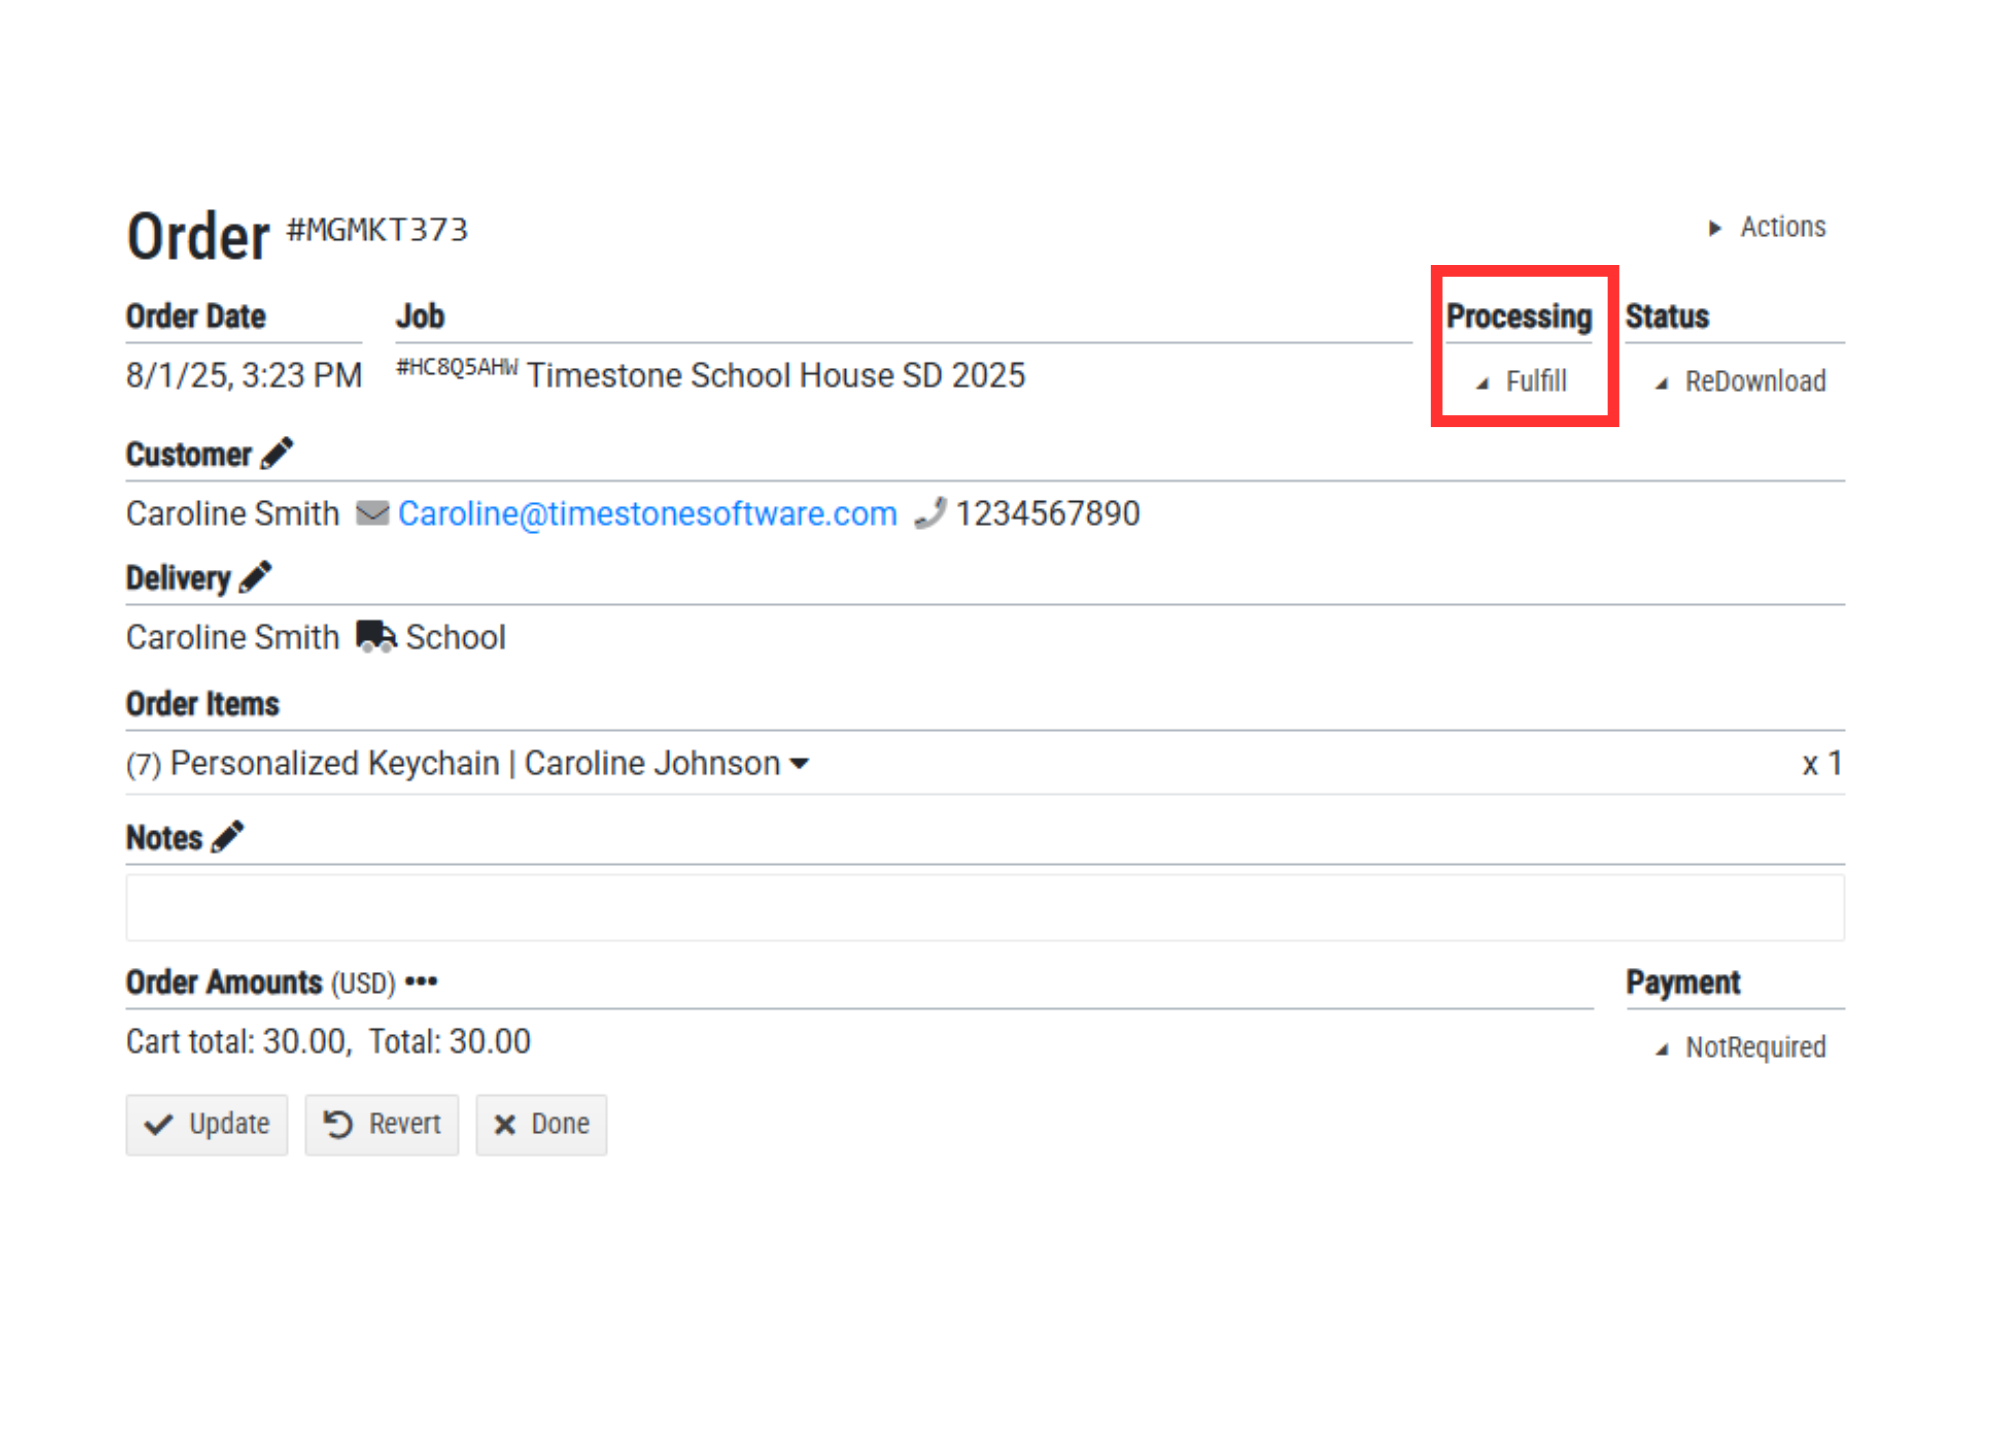
Figure 5: The processing dropdown on the Order page of the Service Panel.
CAUTION
If the processing is changed and the order has already been downloaded, it will be necessary to change the Status to Redownload before clicking Update to submit the changes.
This section displays the current download status of the order and notably allows the user to mark an order for redownloading if needed.
This is an important feature to note, since if the user makes changes to an order that has been previously downloaded, that order will need to be redownloaded for those changes to reflect in the apps.
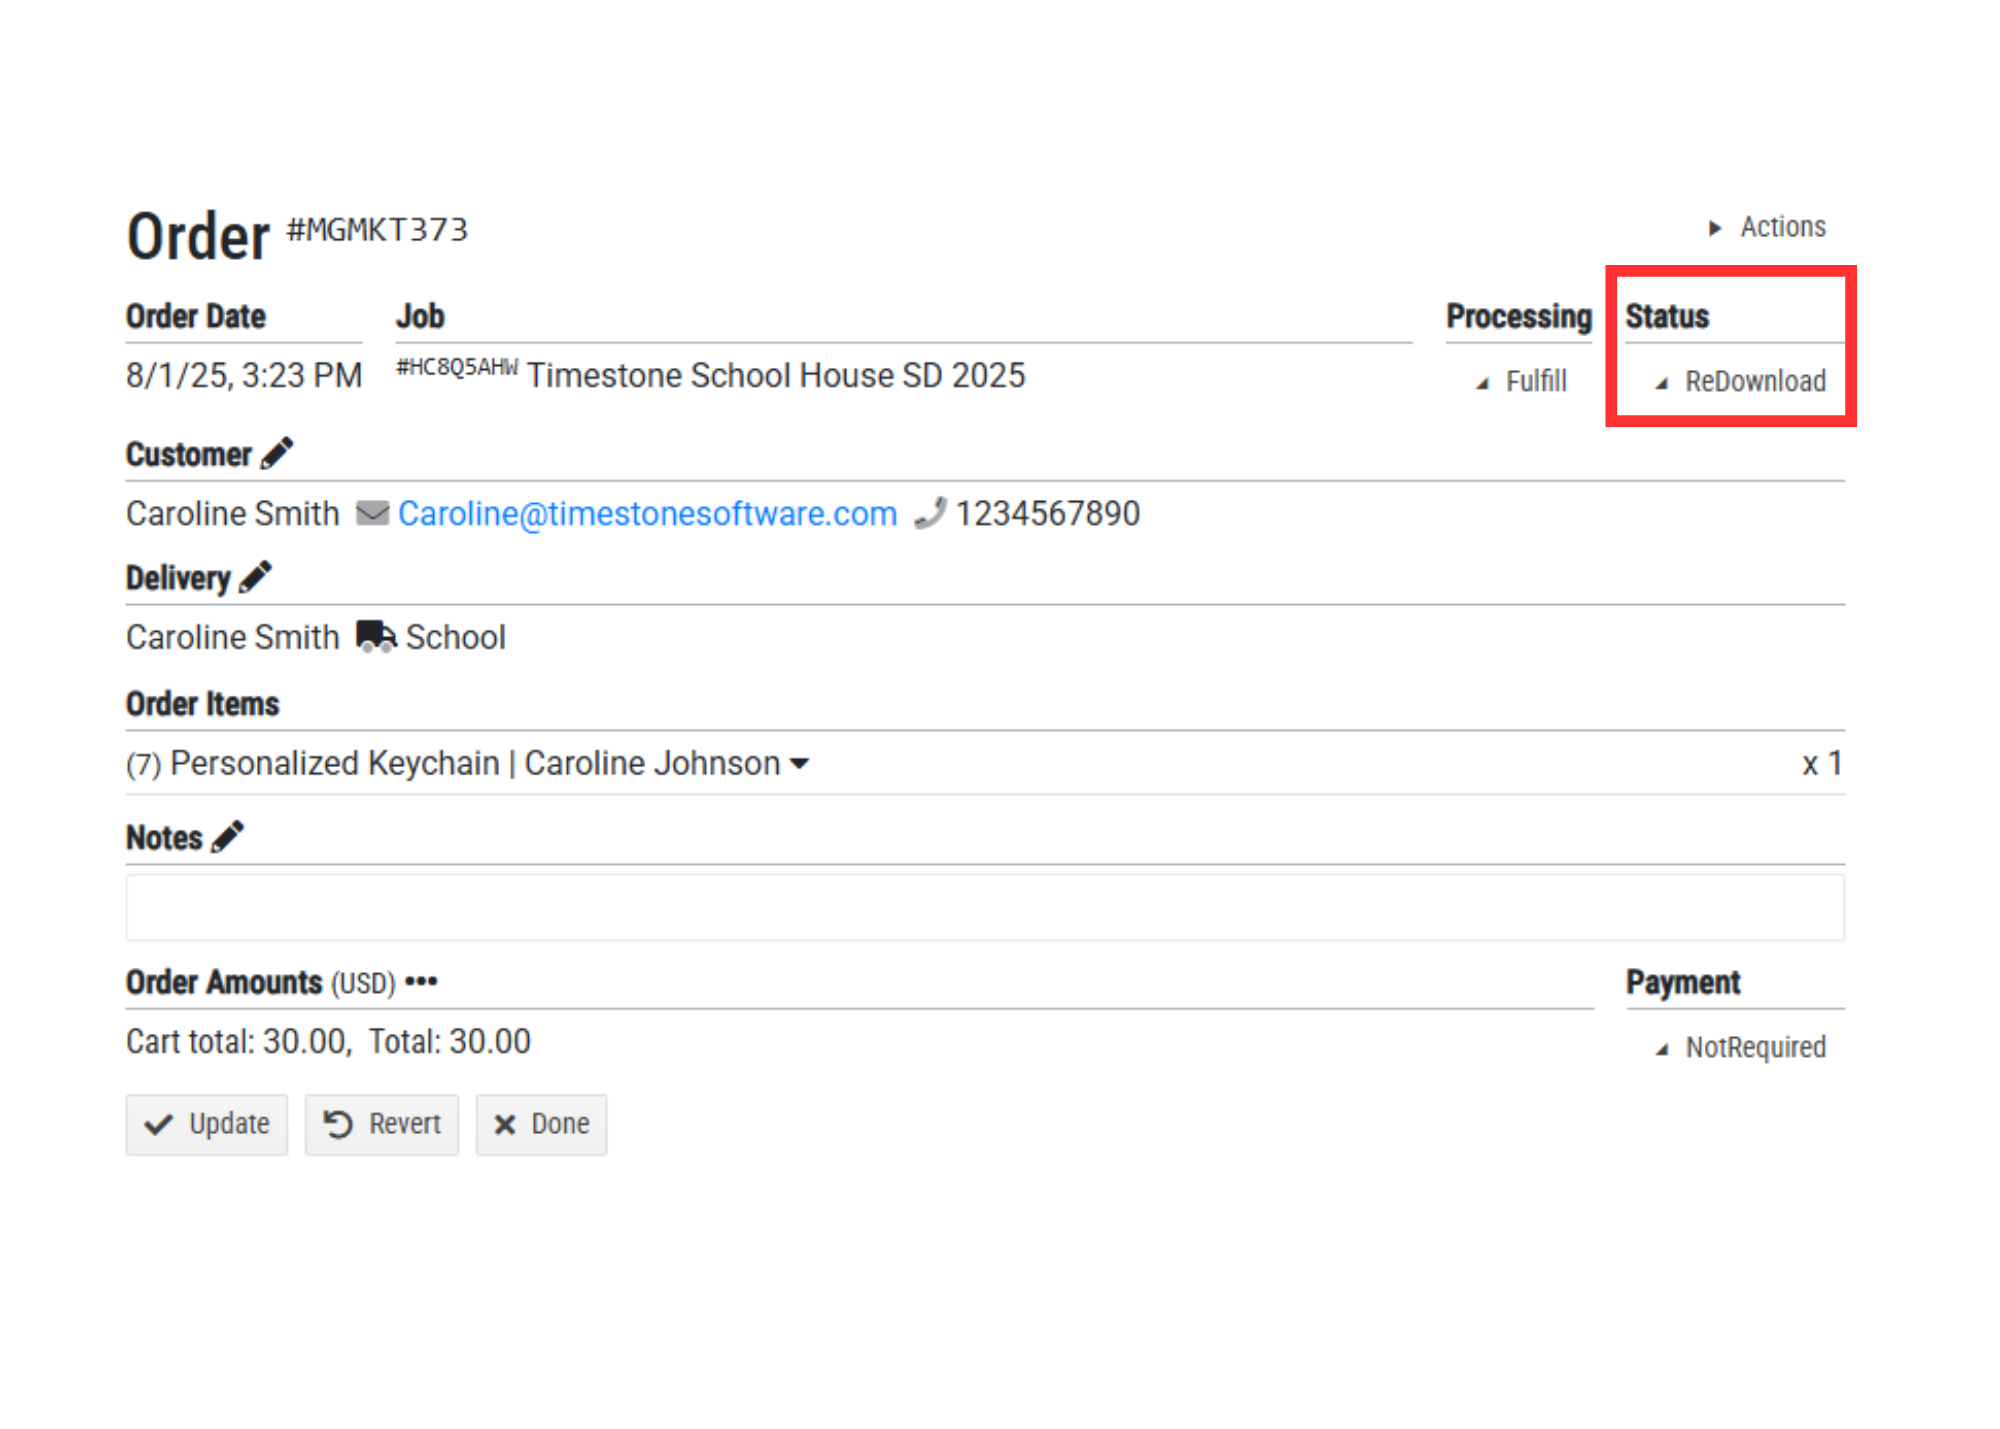
Figure 6:The order status indication area and dropdown menu
This area shows the customer’s name, email, and phone number.
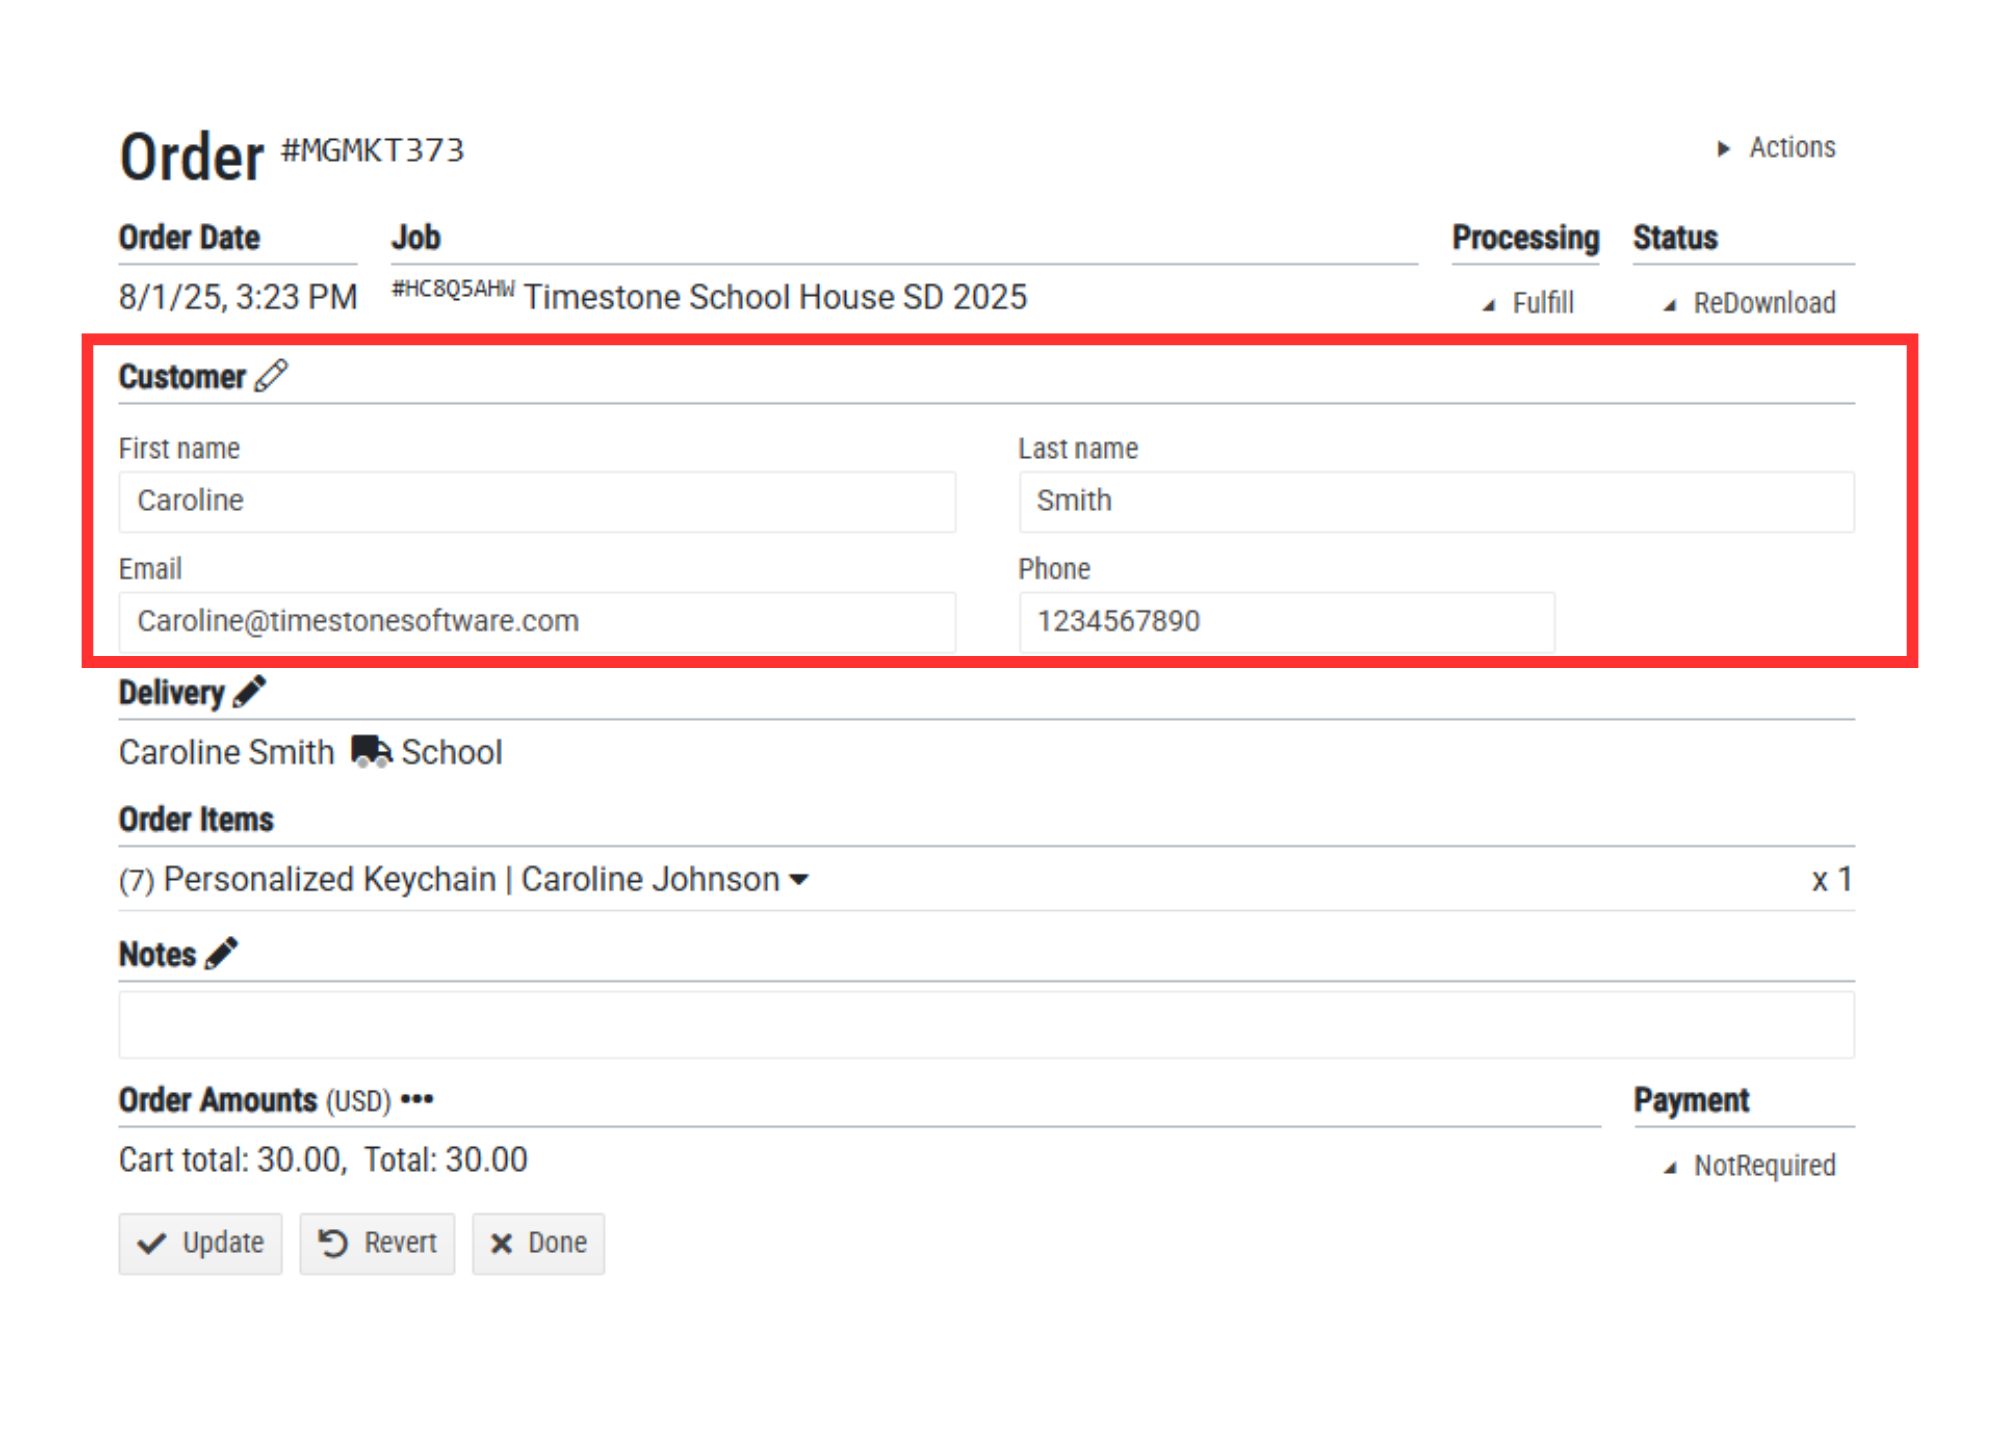
Figure 7: The expanded customer information area
By clicking the pencil icon, changes can be made to the information in those fields.
CAUTION
If changes are made to the customer information and the order has already been downloaded, it will be necessary to change the Status to Redownload before clicking Update to submit the changes.
This area shows the customer’s provided Delivery information, such as the chosen delivery option and the shipping address if one was provided.
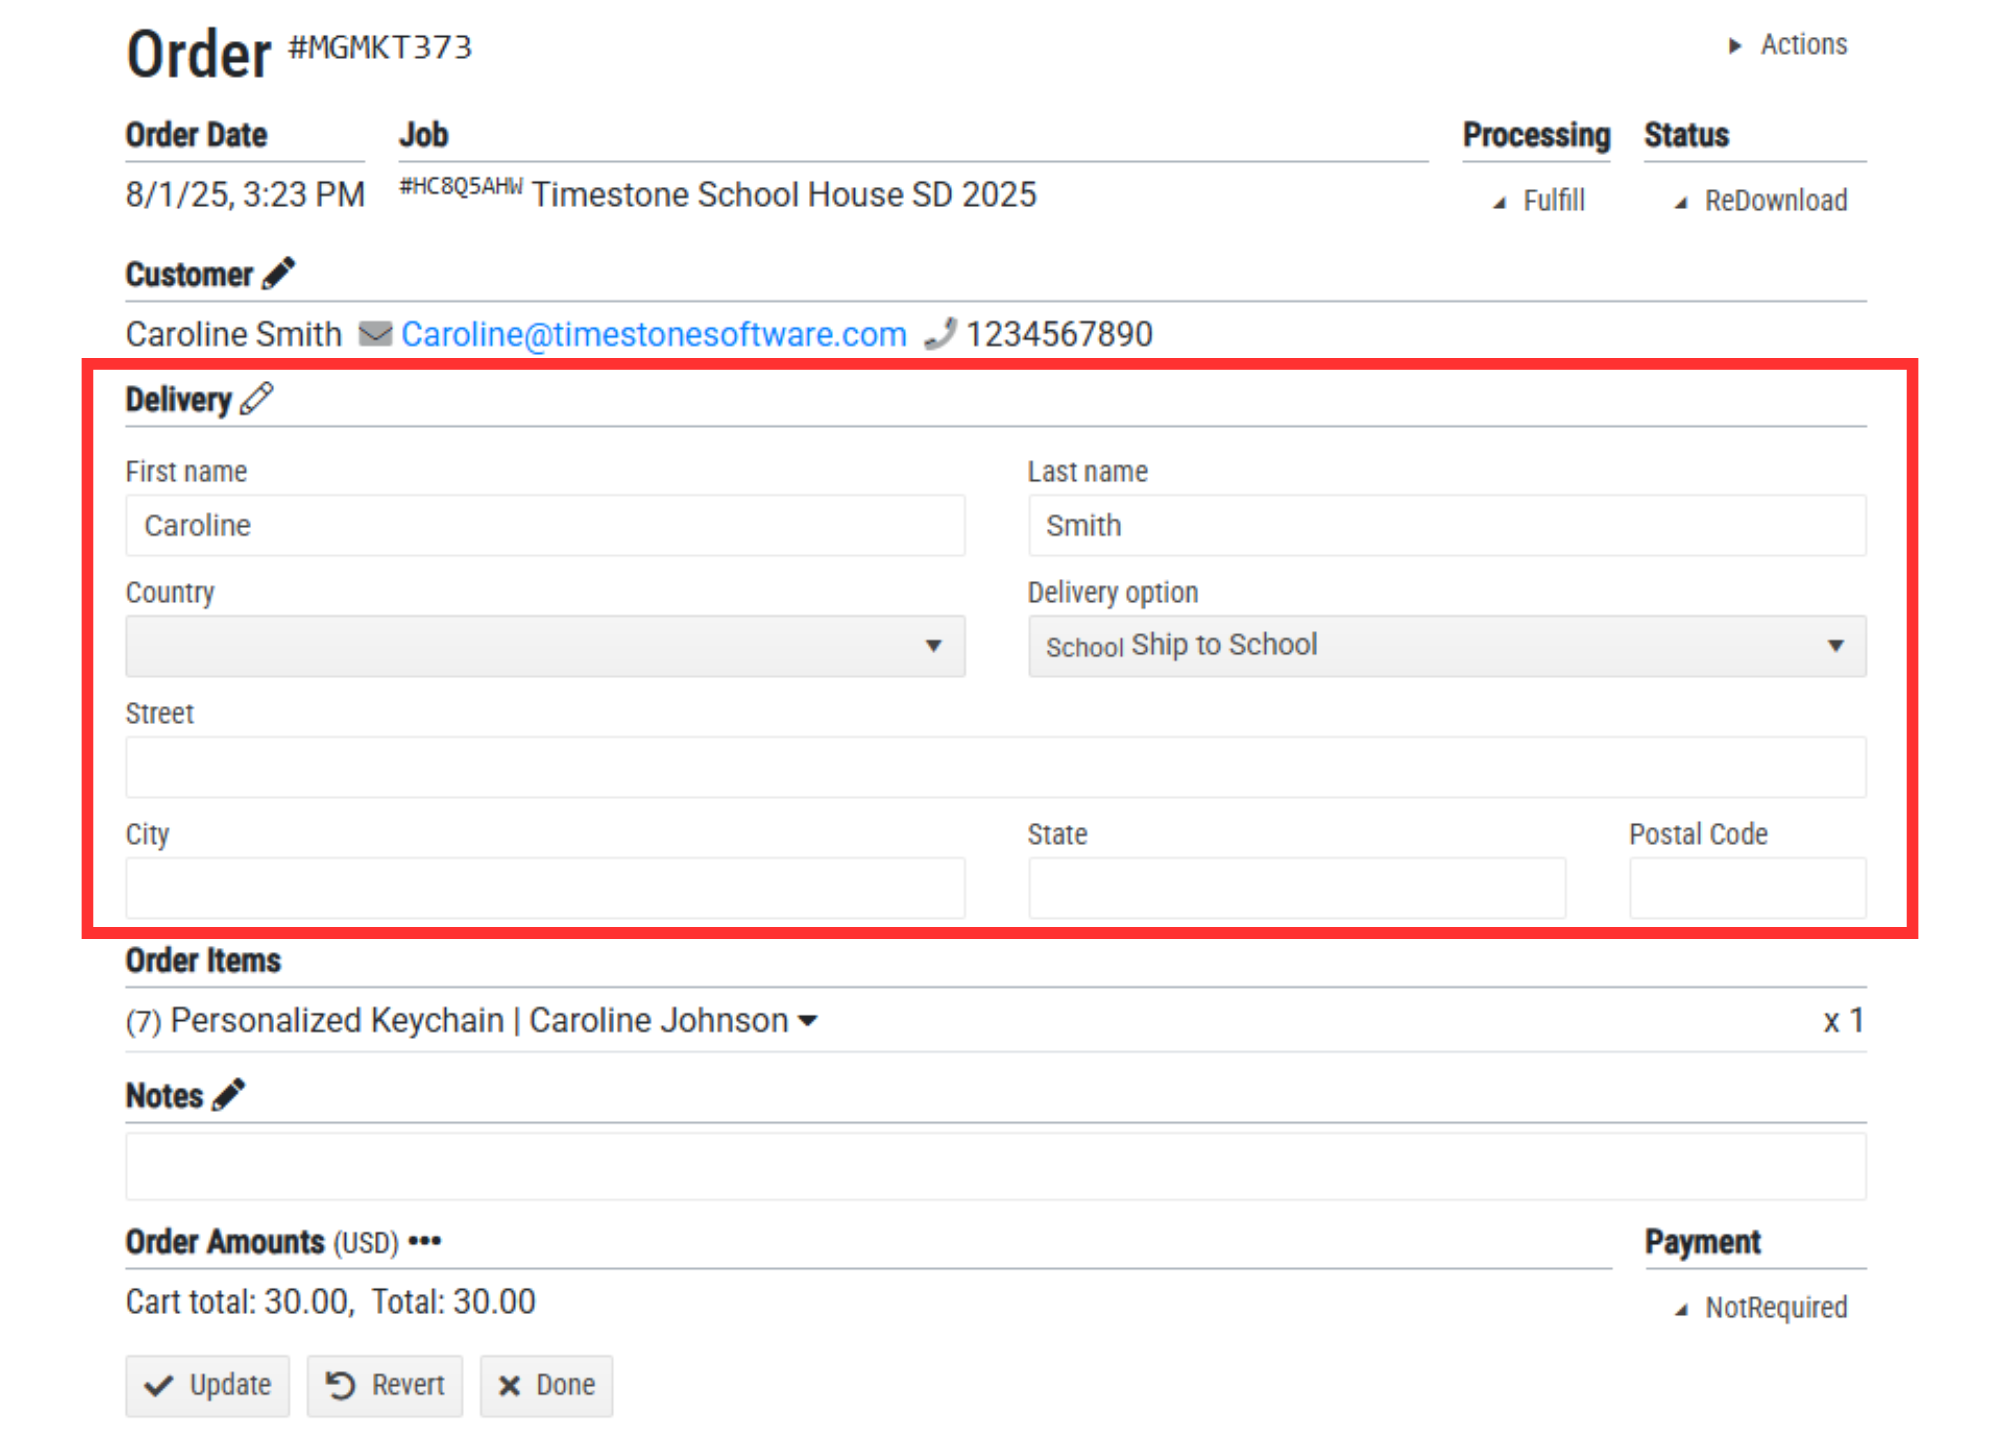
Figure 8: The expanded delivery information area
By clicking the pencil icon, changes can be made to the information in the fields and a different Delivery Option selected.
CAUTION
If changes are made to the delivery information and the order has already been downloaded, it will be necessary to change the Status to Redownload before clicking Update to submit the changes.
All items in an order are included in the Order Items area. Each item can be expanded to see the customizations the customer has selected, including image, background, item, and prompt text responses.
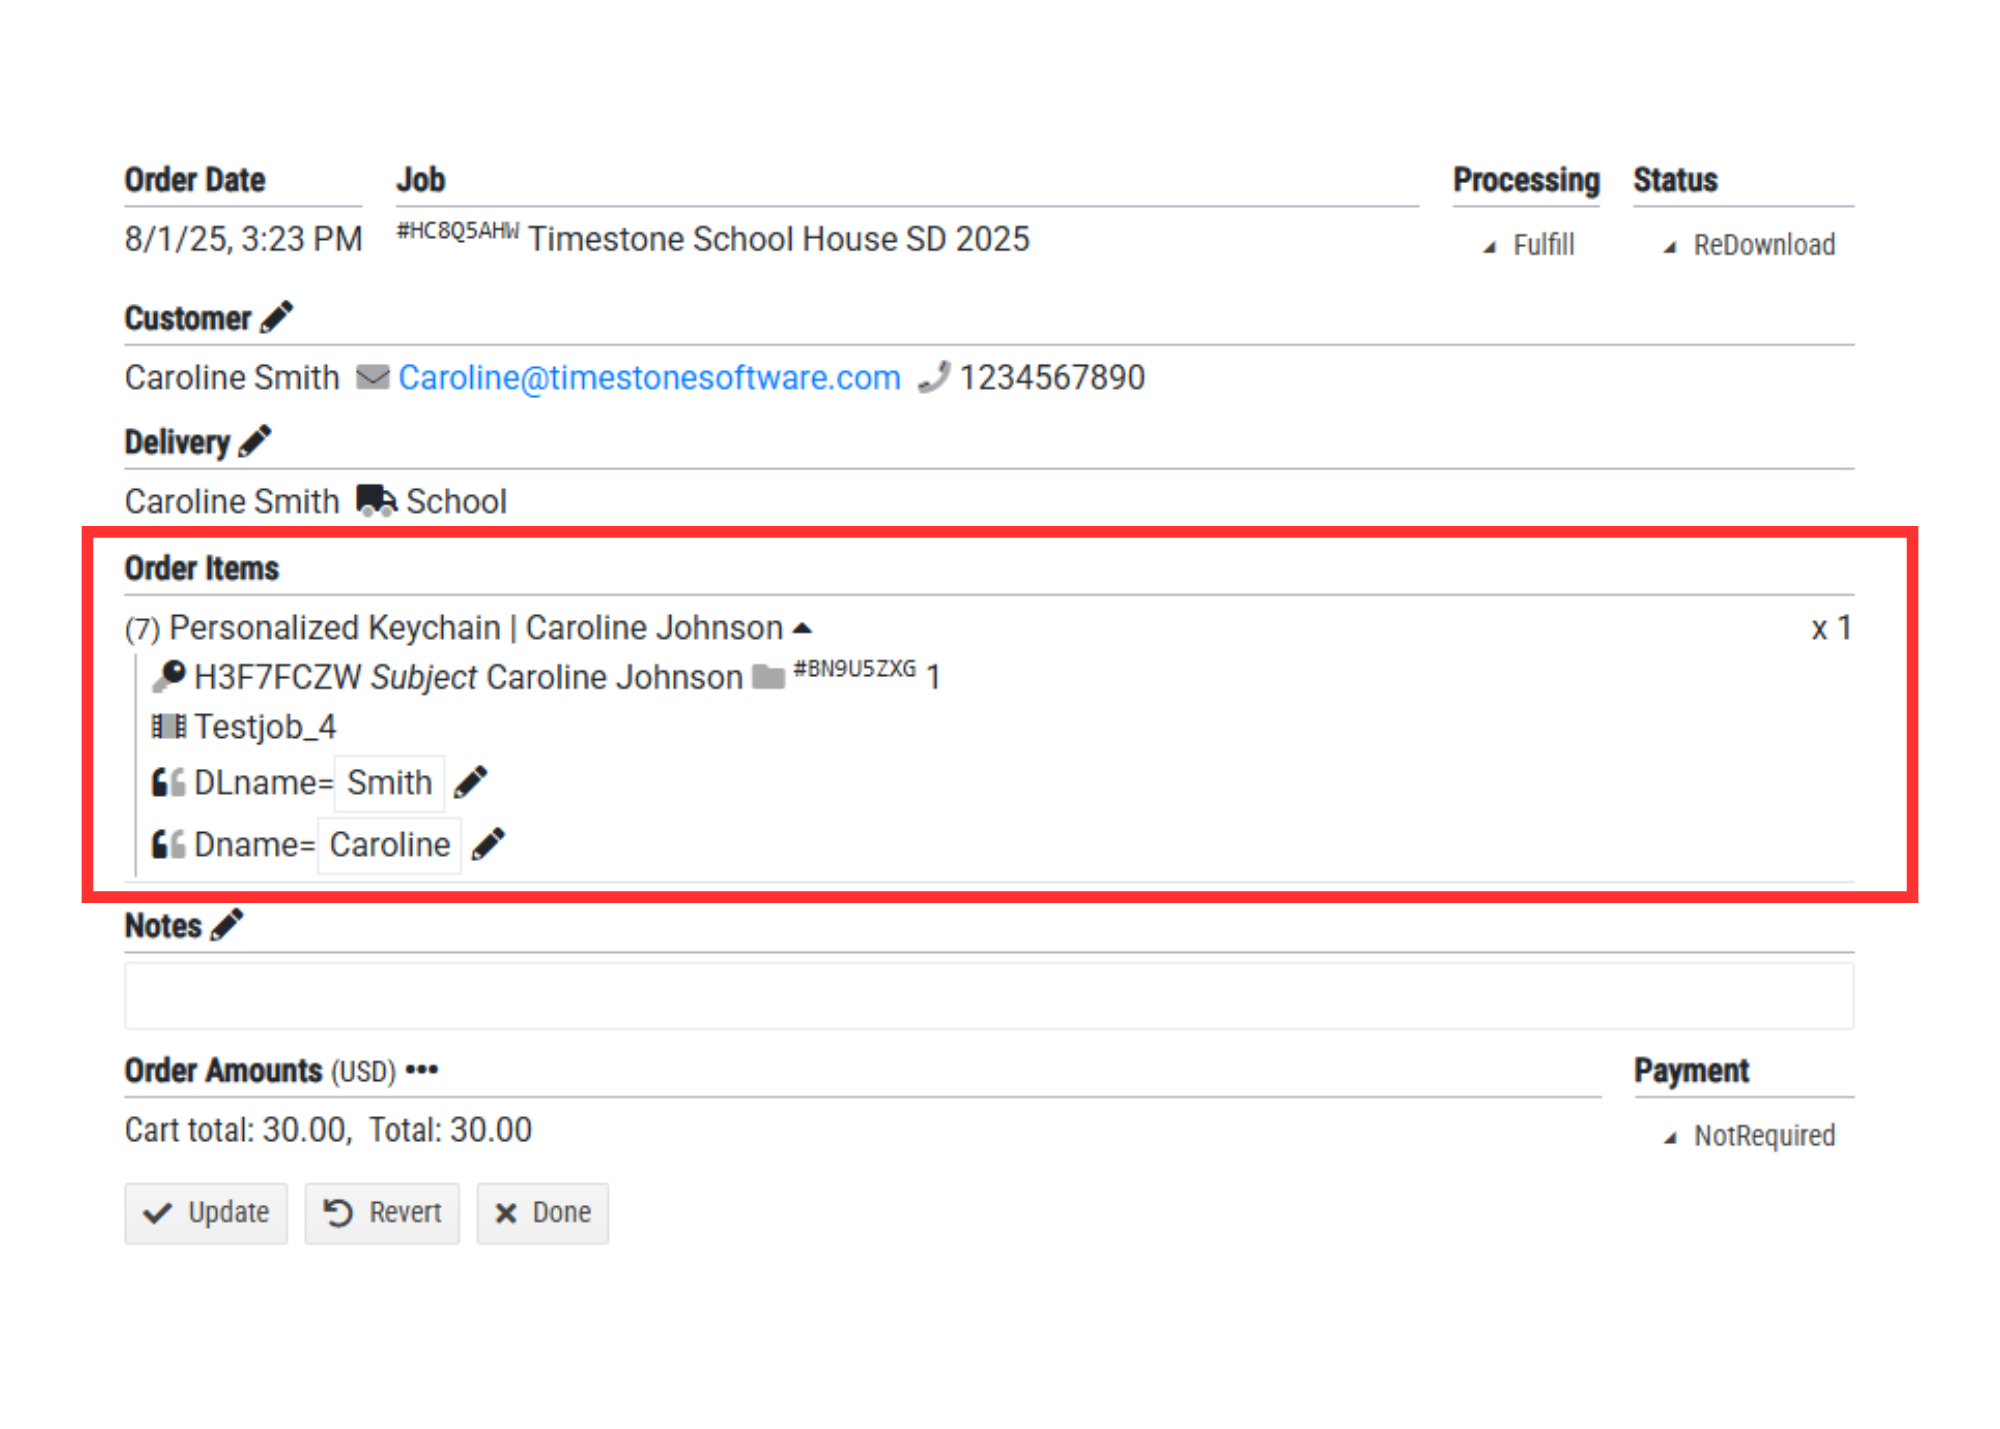
Figure 9: An expanded order item with editable responses to prompt text.
It is also possible to make changes to the Prompt text responses. keeping in mind that the order must be redownloaded to reflect the changes in the apps.
Any notes that the customer has left, or if a note needs to be made on an order.
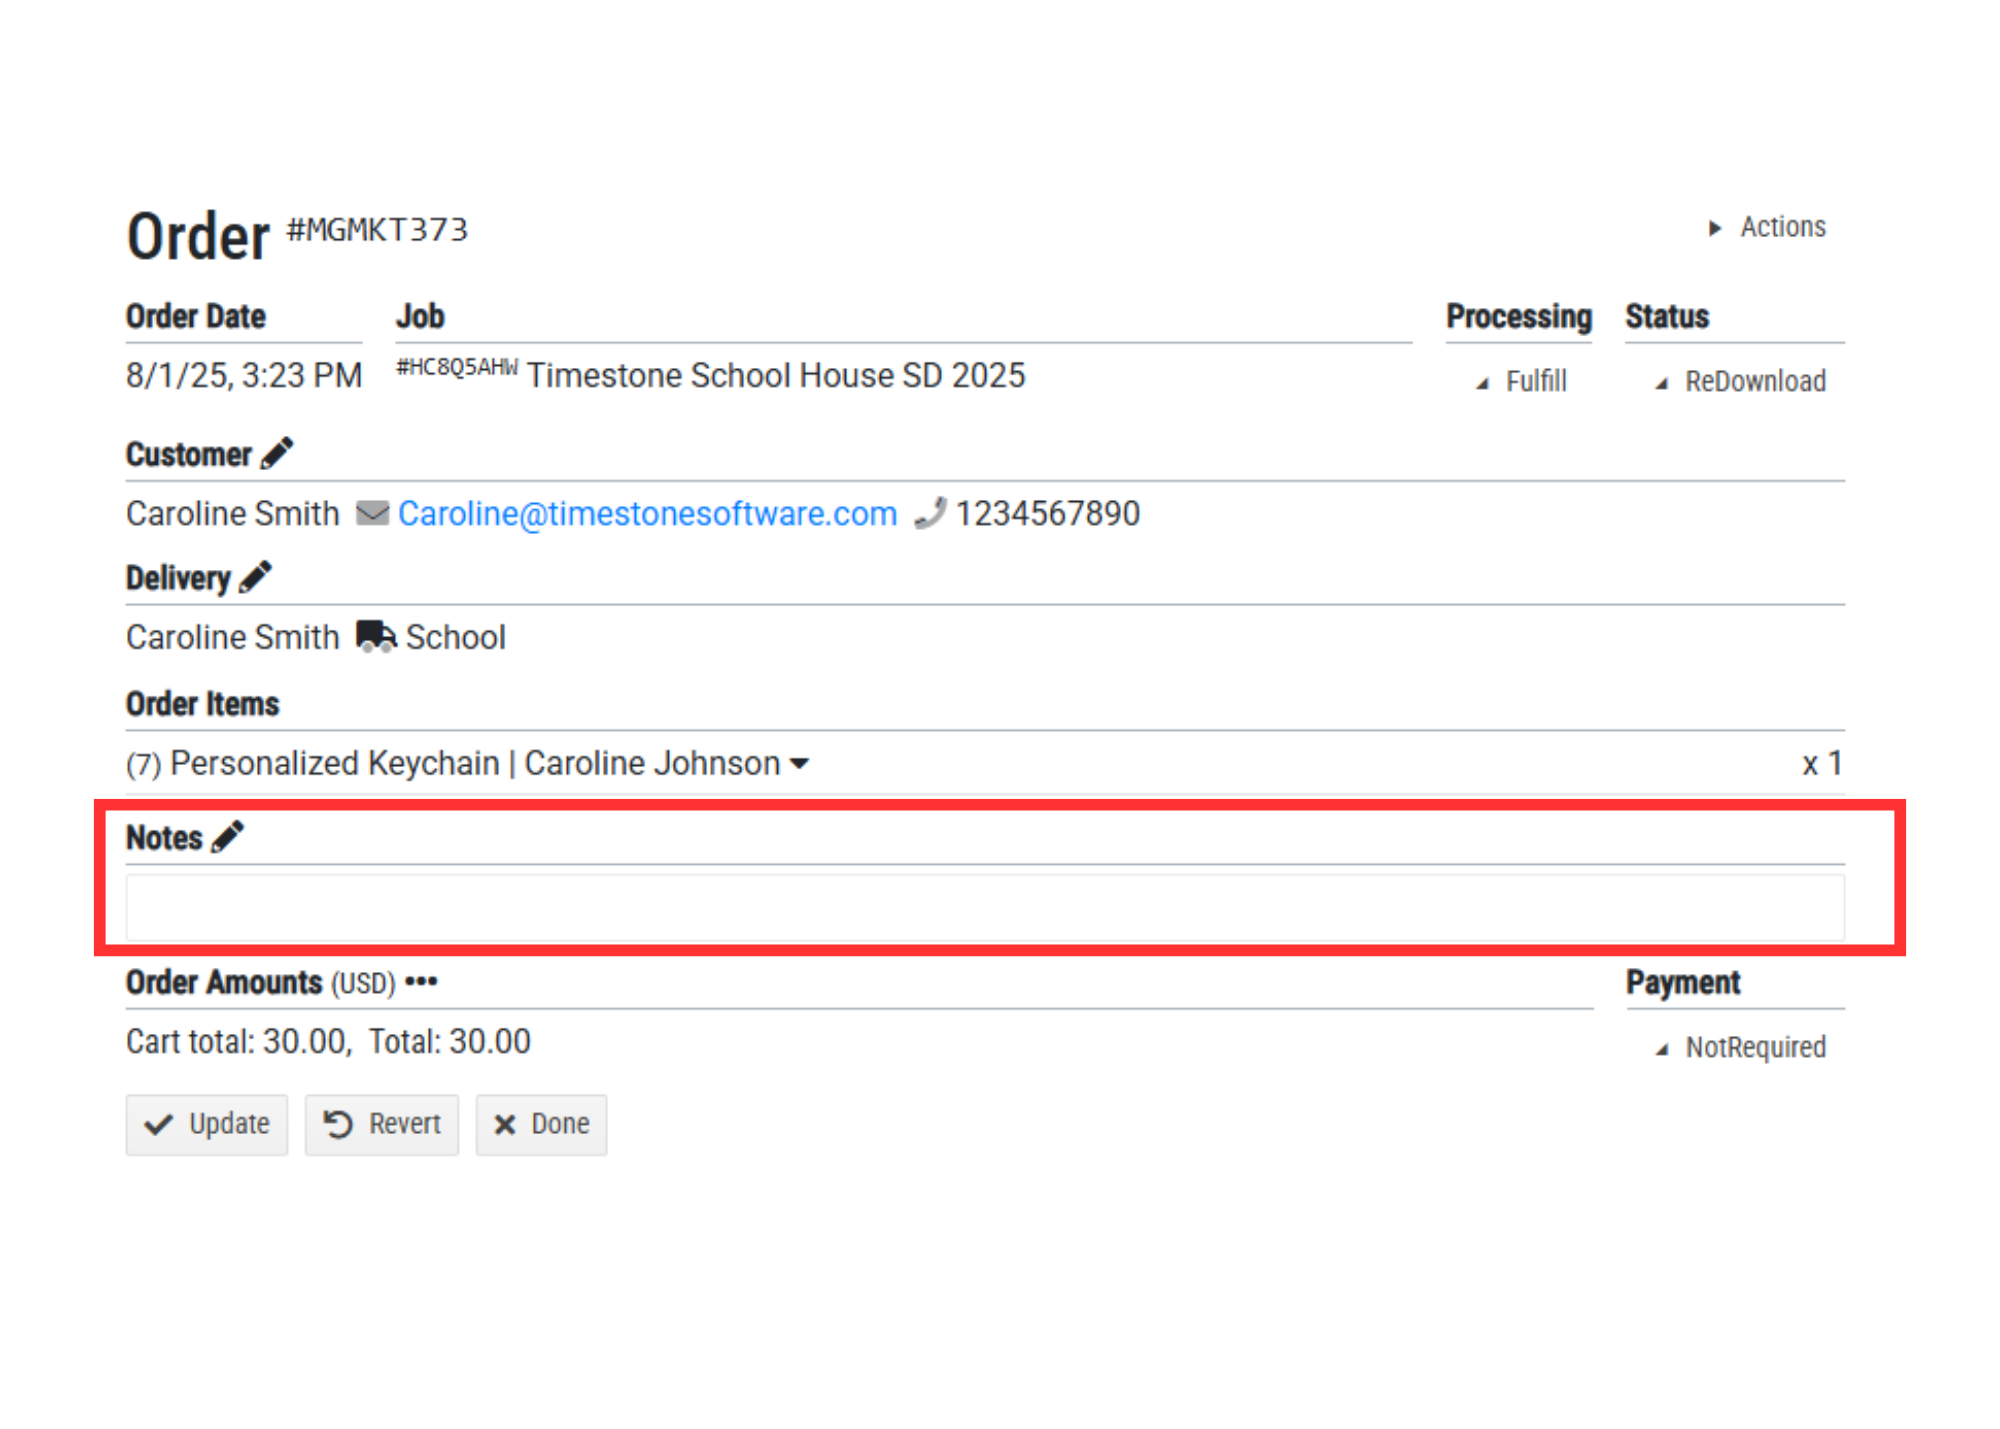
Figure 10: The Notes area
The order amounts area is not editable.
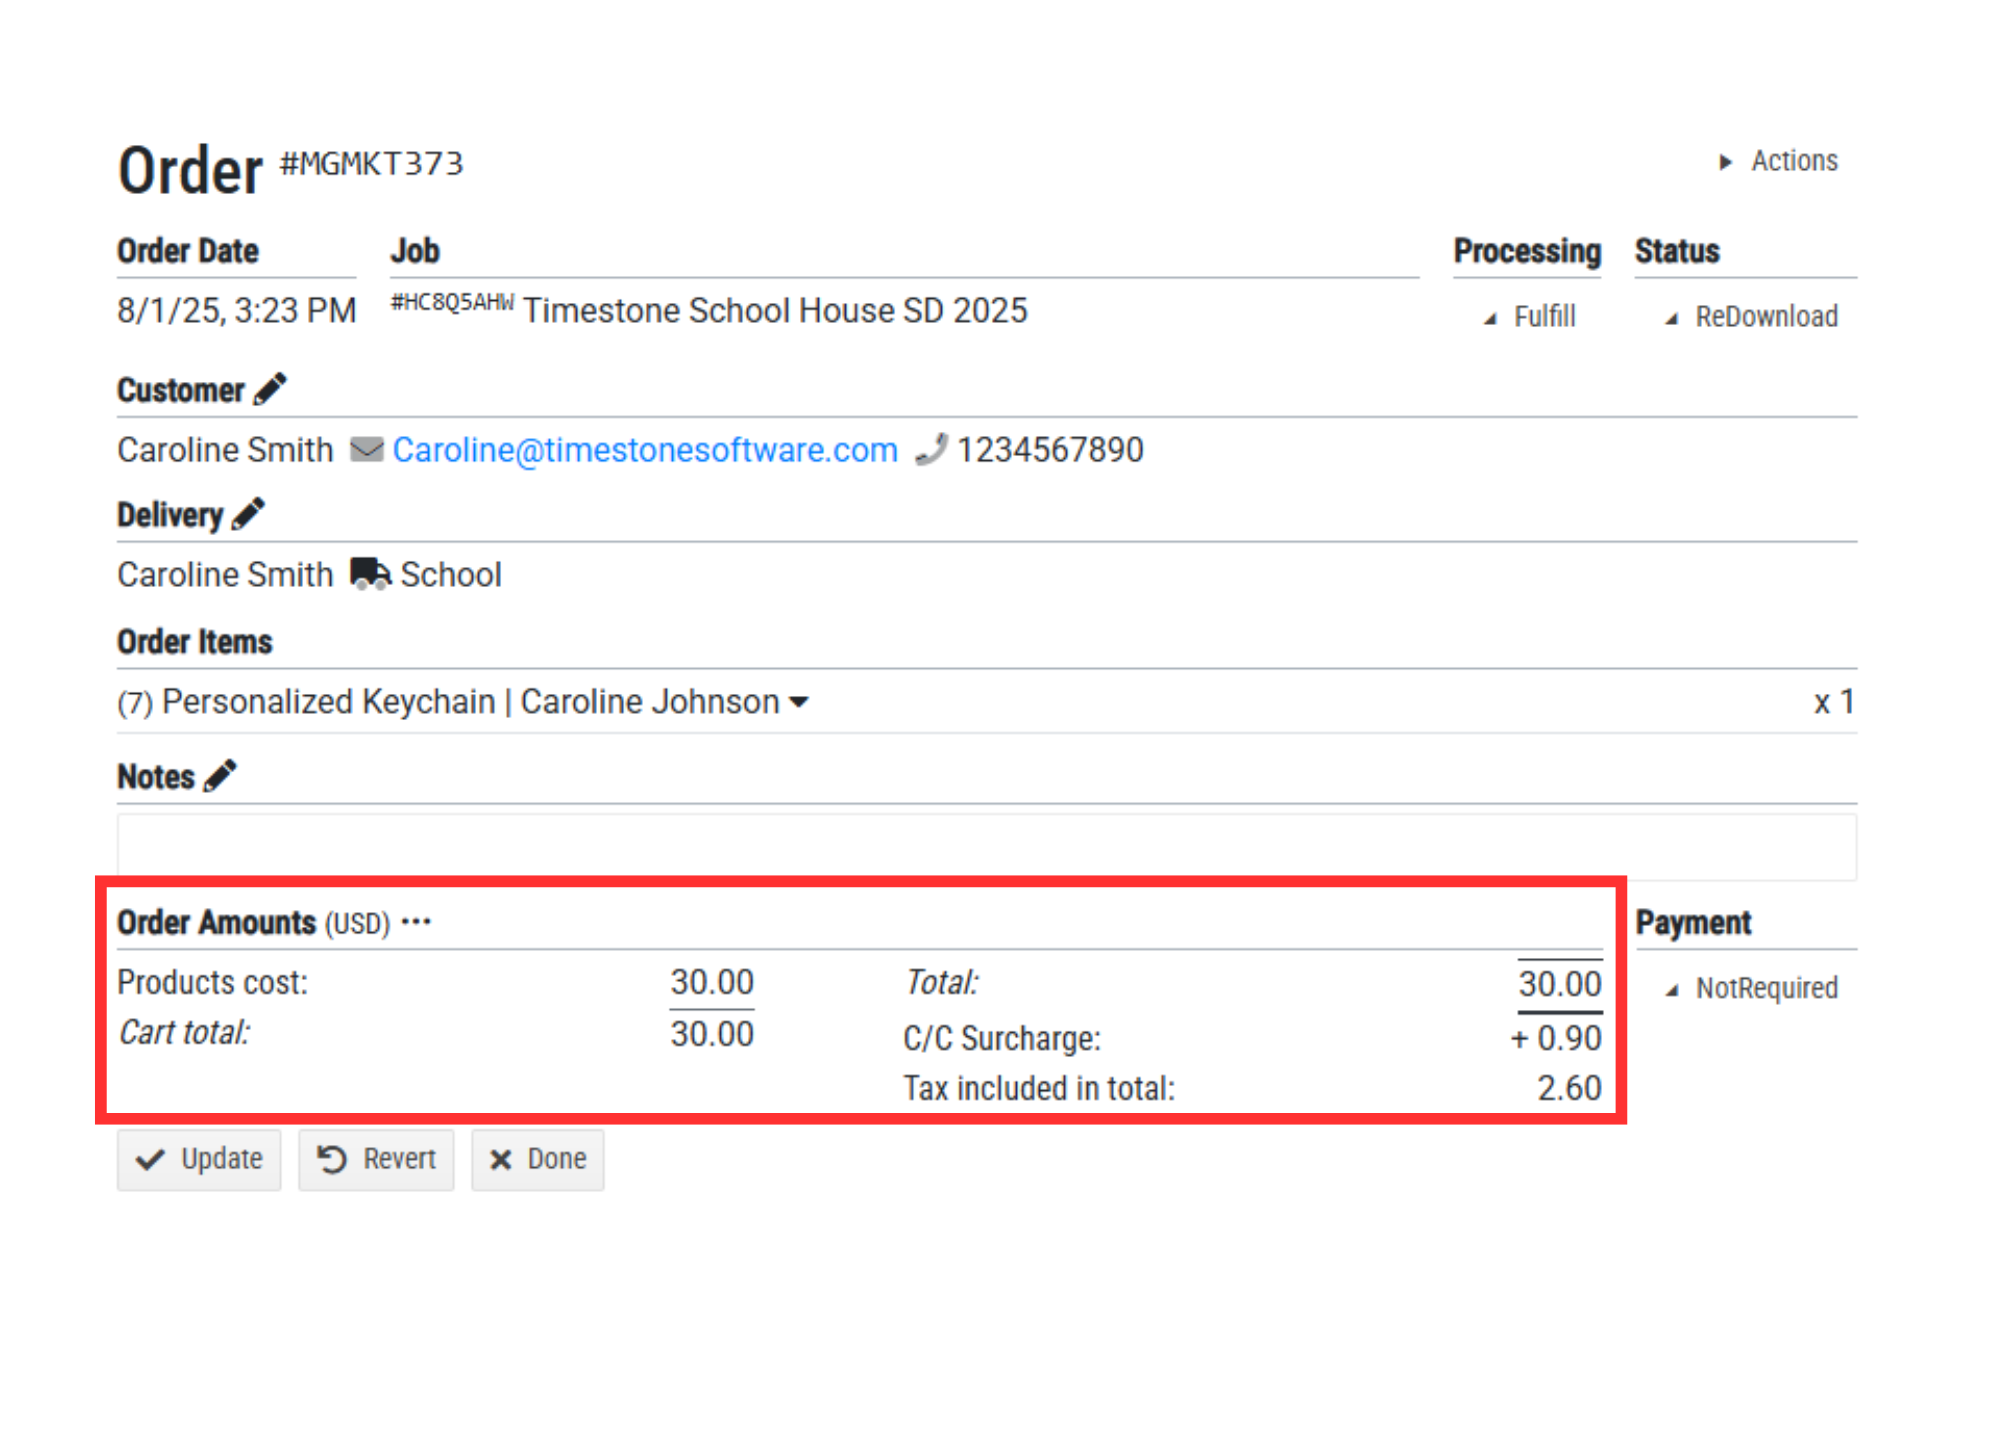
Figure 11: The order amounts area.
The Payment dropdown is located in the lower right, and allows the user to see or override the current payment status of the order.
The choices for payment status are:
Mark as Not Required
Mark as Complete
Change to Pending
Change to Deferred
Mark as Bypassed
Mark As Abandoned
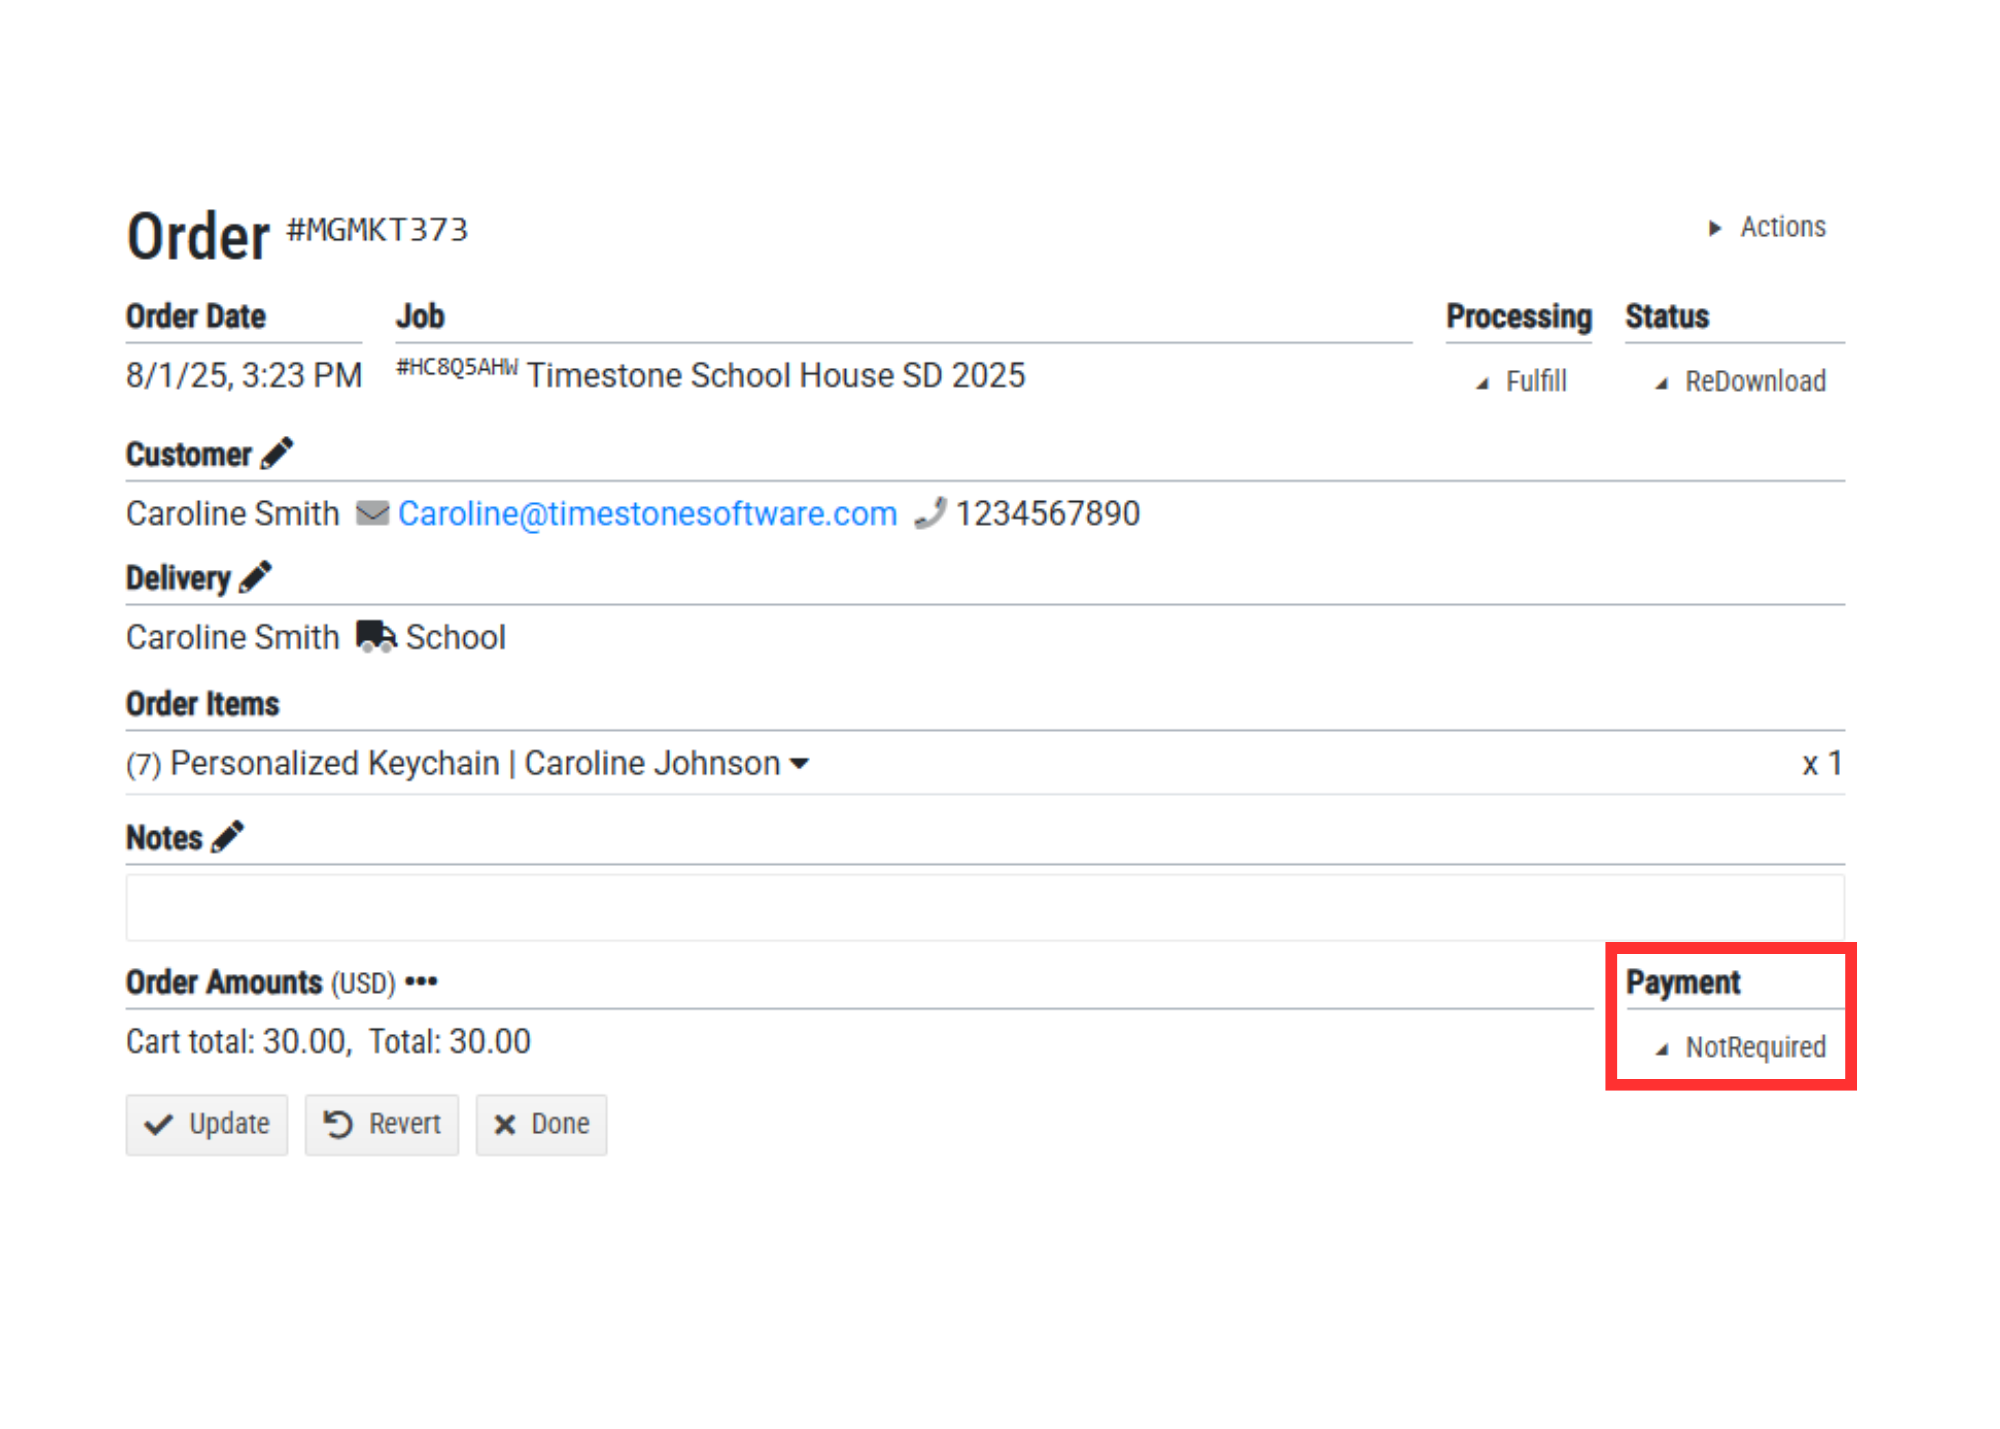
Figure 12: The Payment area
Payments
The Payments tab shows orders that are pending payment.
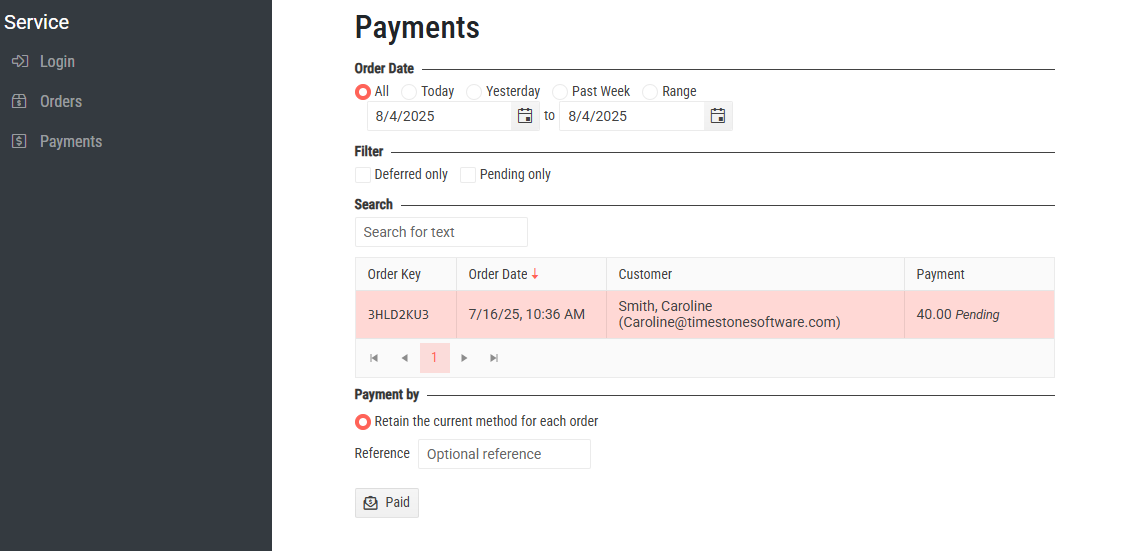
Figure 3: The Payments tab of the service panel
Similar to the Orders tab, the user can choose to display orders from a specific date range and or by two predefined filters, Deferred only or Pending only, or search for a specific order using the Order’s key.
Marking an order as paid
Orders are only downloaded once the system receives confirmation of payment via the payment gateway. Items that are pending payment for whatever reason are searchable here.
To mark a pending order as paid, simply click the Paid button at the bottom of the page. This will remove the order pending or deferred tag from the order, allowing it to be processed as paid and therefore downloadable.
NOTE
Marking an order of as paid will remove it from the payments tab though it will be searchable from the orders tab.
FAQ
What is the Service Panel?
The Service Panel allows users to access order and payment information for any order placed on the site, regardless of the download status.
How do I access the Service Panel?
To access the Service Panel, open a web browser and navigate to https://{yoursite}/service, then log in with your username and password.
What is an ‘Advice’ email?
It is the email sent to the photographer once a customer completes an online order.
Can I filter orders in the Service Panel?
Yes, you can filter orders by date and predetermined status filters such as Pre-orders, Fulfill, Unpaid, Paid, and Complete.
How do I mark an order as paid?
Find the order in the Payments section and click the 'Paid' button at the bottom of the Payments tab.