The Control Panel allows the user to create several objects directly on their website. These include:
Snippets and Popups - to display information and graphics on the site
Topics - used in the Help menu
Conditions - powerful logic to control the behaviour of packages, pricing and more
Coupons - codes used at checkout to reduce the order total
Messages - optional emails sent to customers after purchase
To access the Control Panel
To gain access to the Control Panel:
Open a web browser window and navigate to https://{yoursite}/control-panel
Log in using your provided username and password
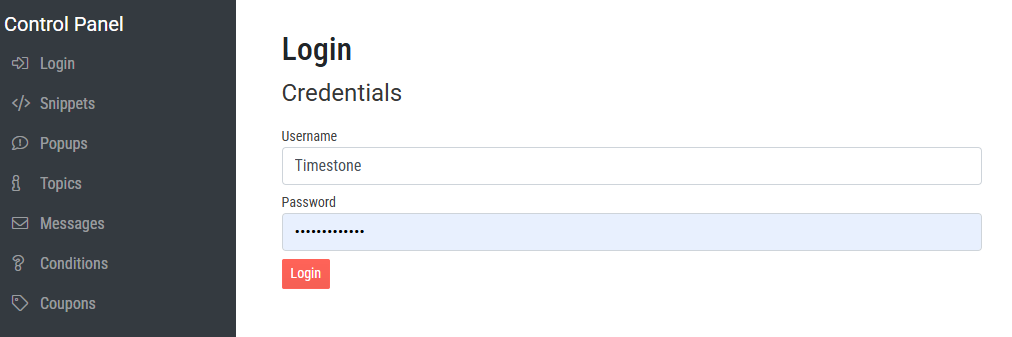
Figure 1: The control panel login page
NOTE
The credentials are provided by the Timestone support staff, and are the same username and password used when connecting tsIOS and Fulfill.
The objects
The Control Panel objects are listed on the left. Selecting an object displays information relevant to that object in the main window.
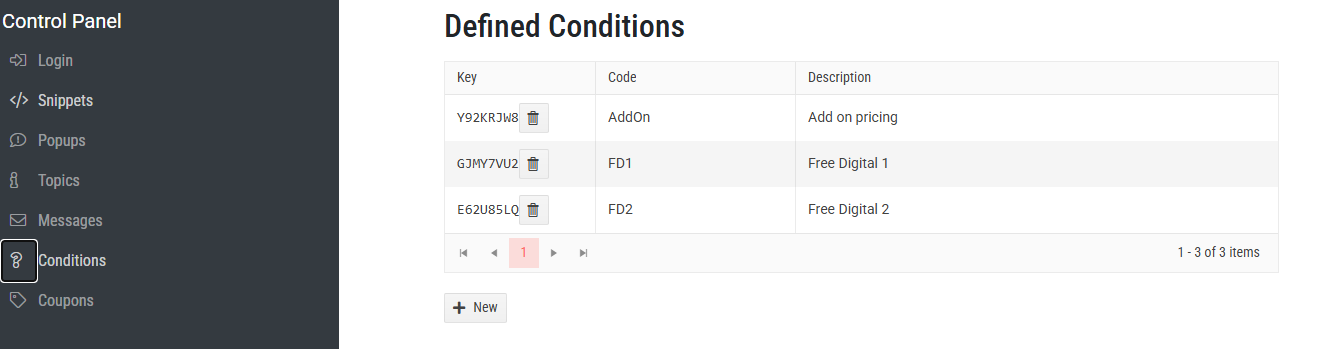
Figure 2: The Conditions page showing a list of created conditions
To create a new element, click the + New button below the table, or to manage an existing element, click on the desired element’s key to display the creation page.
The Coupons feature allows users to create custom coupons for online discounts. Users can define coupon codes that offer fixed or percentage discounts, set expiration dates, and establish minimum spending requirements.
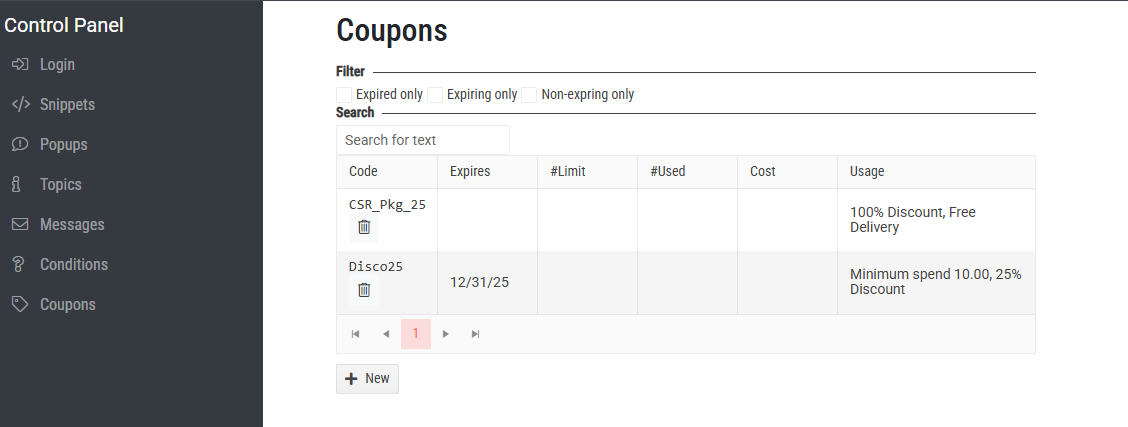
Figure 11: The coupon management tab
NOTE
A notable feature is the ability to create 100% discount codes, which bypass payment, typically for internal use.
Further Reading: Coupons in IOS
The Timestone Internet Ordering System (IOS) includes the ability to generate custom 'coupons' that can be used online to discount an order.
Snippets are used to add text or graphics to a specific area of a site.
Created and managed on the Snippets tab, the user can choose to display graphics or add context or instructions at a specific point on the website.
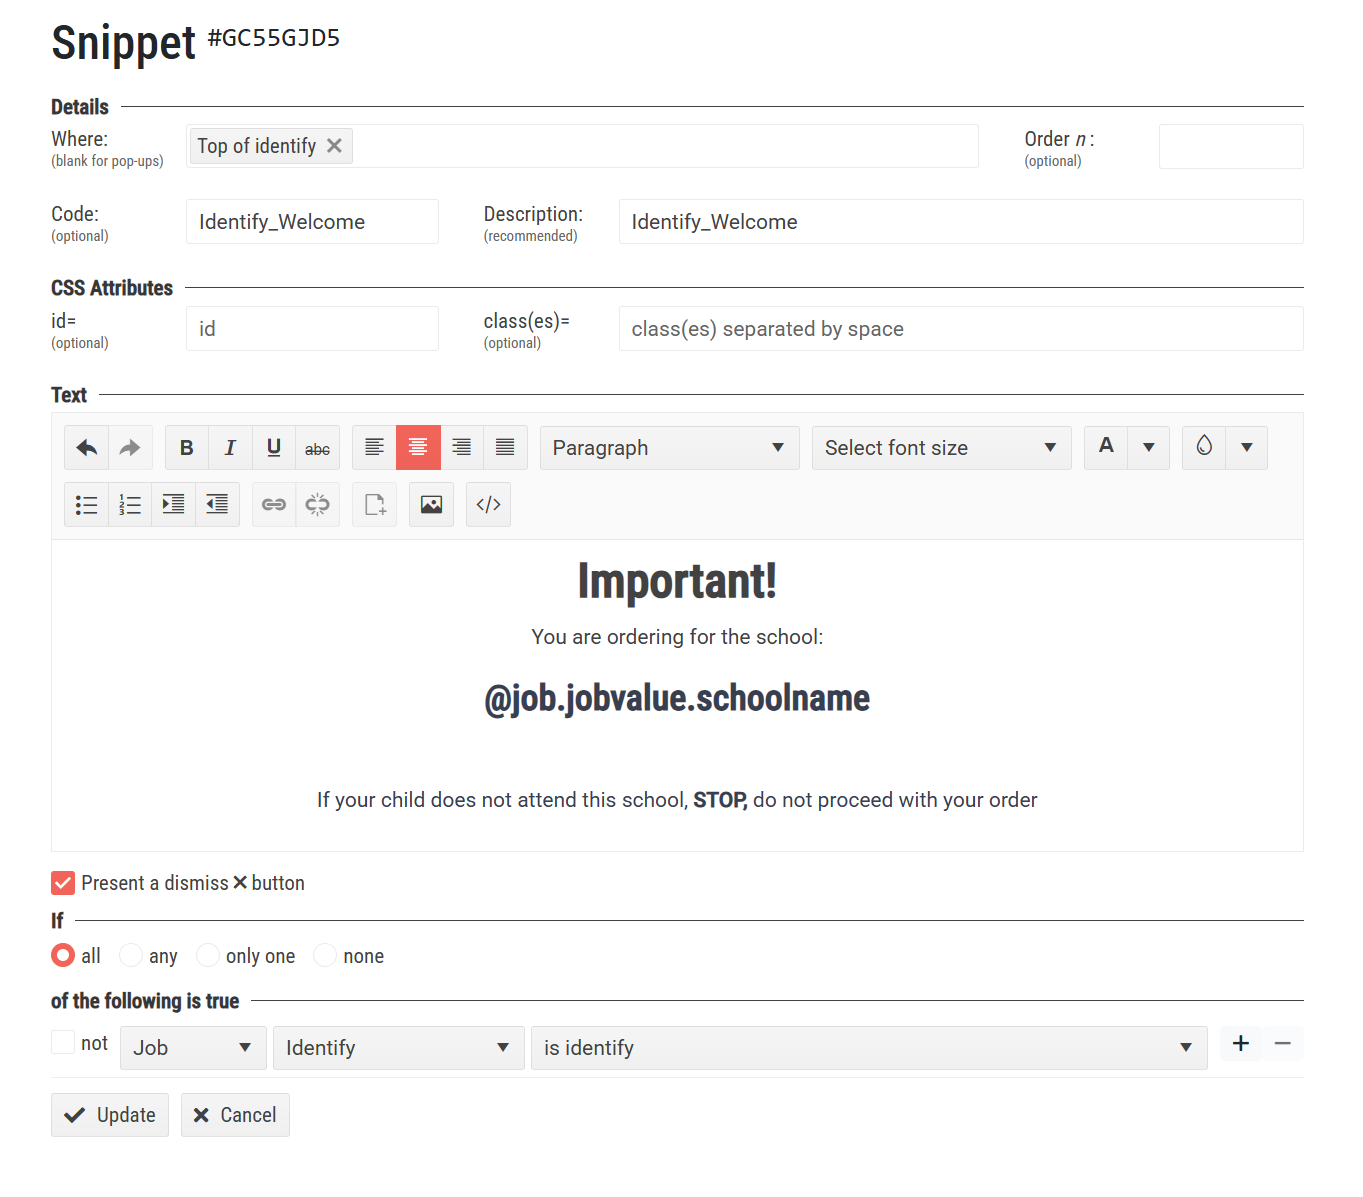
Figure 3: The snippet creation page
Snippets can be made conditional and can include variable text as shown in the example above and below.
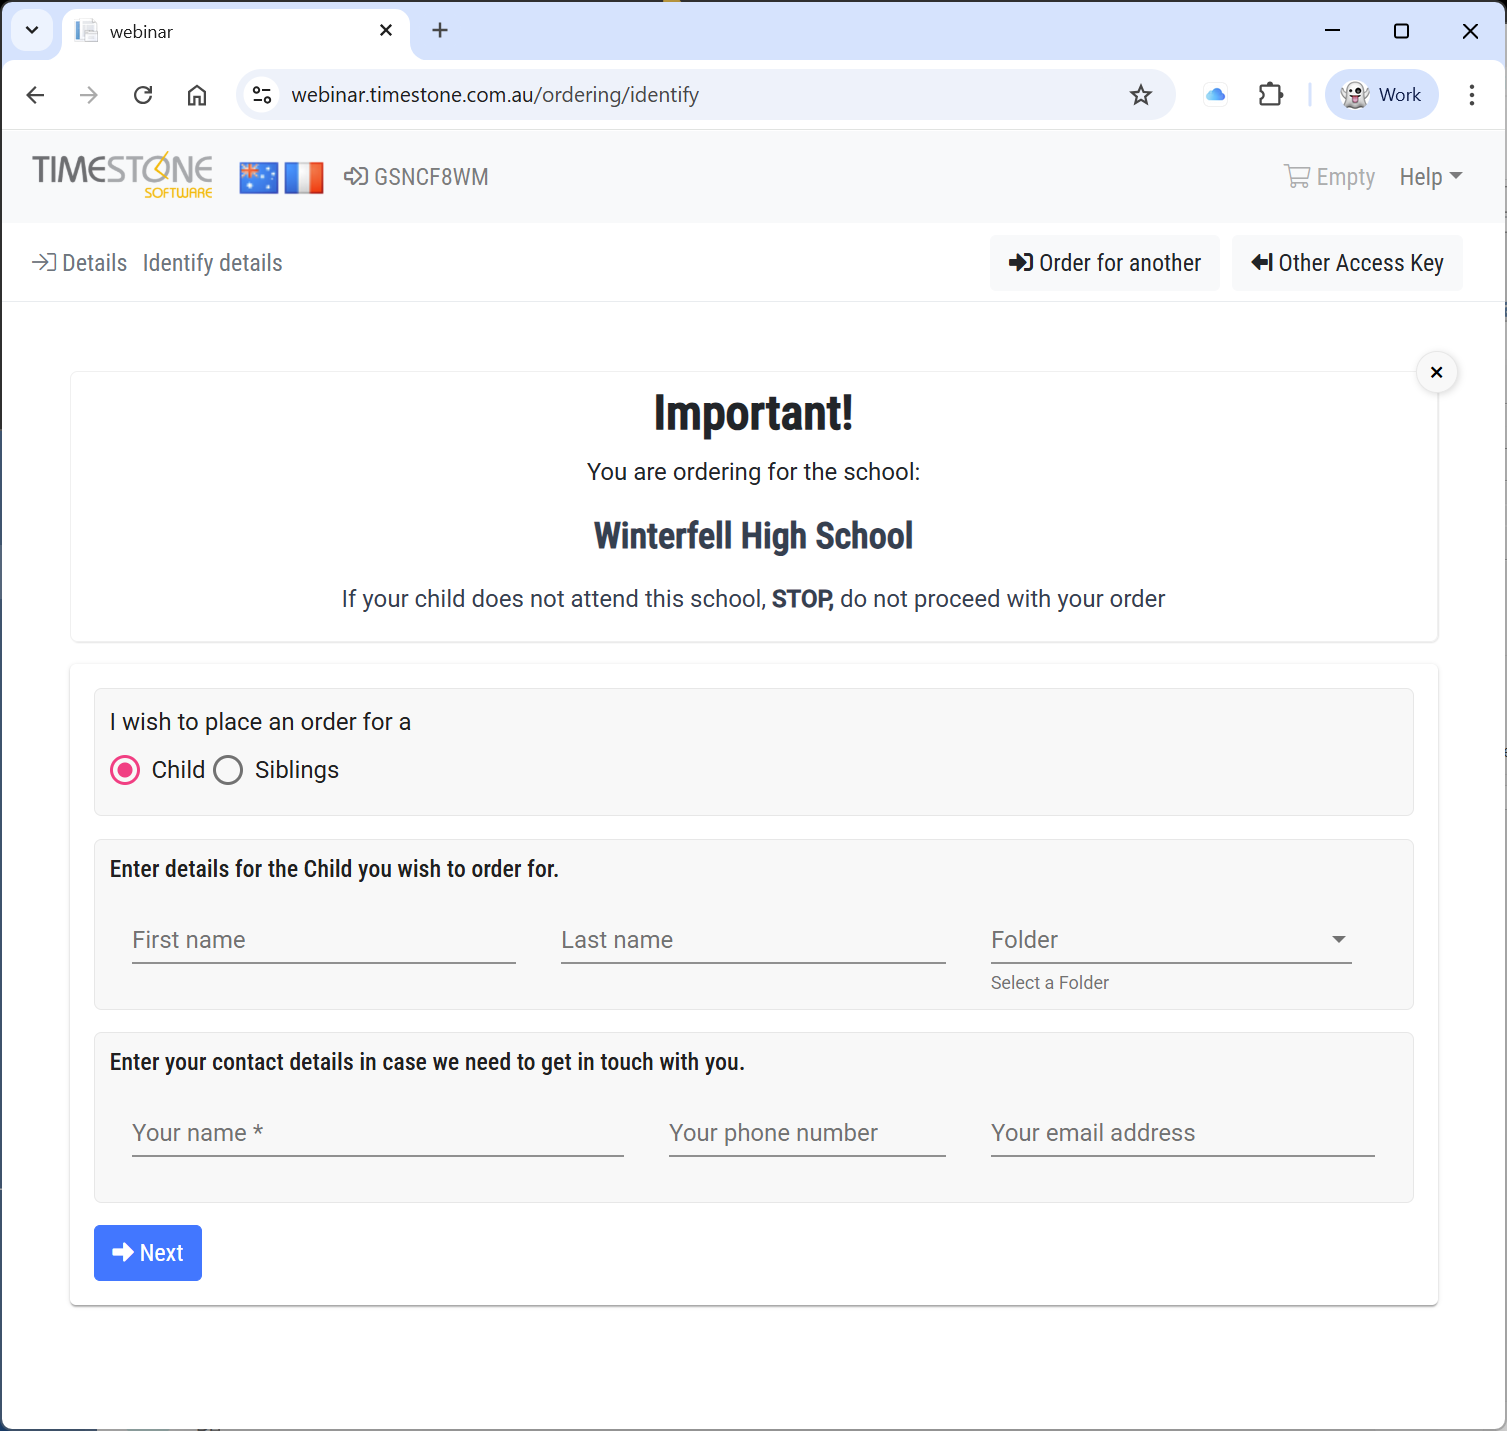
Figure 4: A snippet with variable text and a condition
Further Reading: Snippets
A powerful feature of snippets is the ability to display variable data through the use of @codes.
This tab allows the user to create conditions that apply to offers or products when certain conditions are met. These can be used to prompt Special Packages to appear or to trigger special prices.
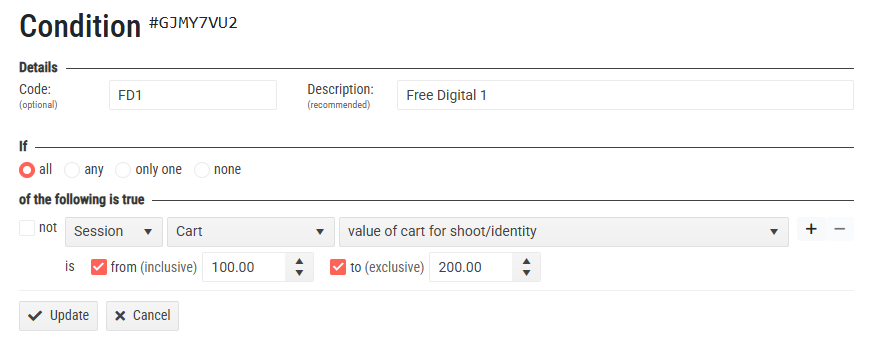
Figure 10: The Condition creation page
Conditions are a highly customizable and important area of the IOS system. Conditions can be created for items, price lists, site elements (snippets, popups, etc).
Conditions can have one of four “If” options (all, any, only one, none), and each phrase can be positive or negative, leading to hundreds of combinations.
There are 7 main categories:
Session
Shoot
Offer
Job
Package
Other
Condition - reference another created condition
Each of these sections has secondary and tertiary options that then prompt specific prompts to allow for extreme detail when creating a condition.
Further Reading: Conditions Use cases
A very powerful feature of the Timestone Software Internet Ordering System is the ability to create conditional price lists where the prices of Packages in an Offer are reduced depending on conditions the user has defined.
Other examples of Conditions can be found on the Timestone Software YouTube Channel in the Conditions playlist
The Messages tab allows the user to send out their own automated emails in addition to a receipt when certain conditions are met.
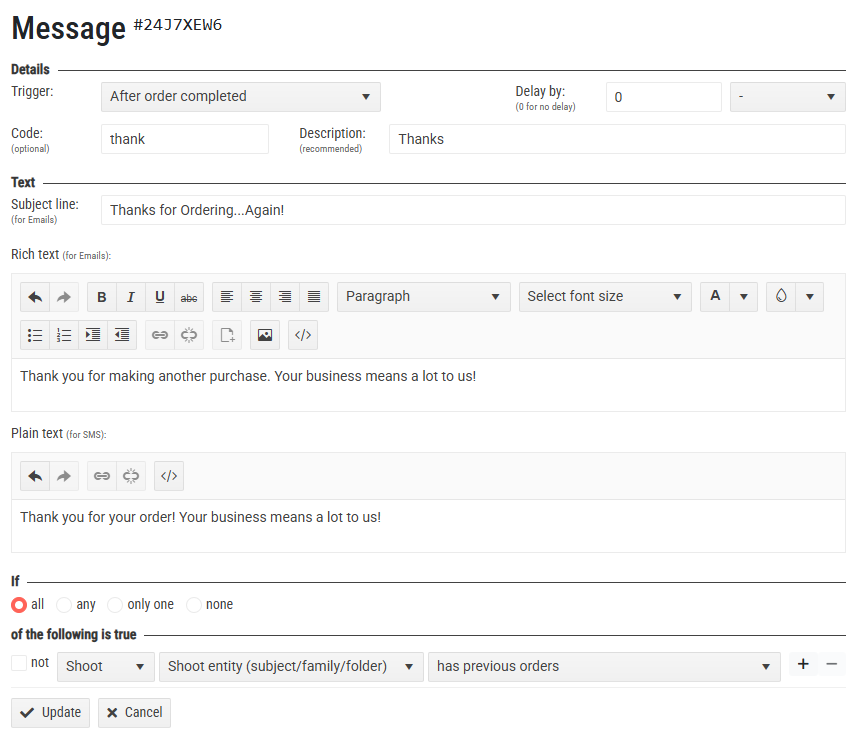
Figure 9: The message creation page
The message can be triggered in one of 3 places:
After an order is complete
After payment is received
The messages can be sent with a delay from 0+ in minutes, hours, days, months, or years.
The Topics section adds items to the Help dropdown.
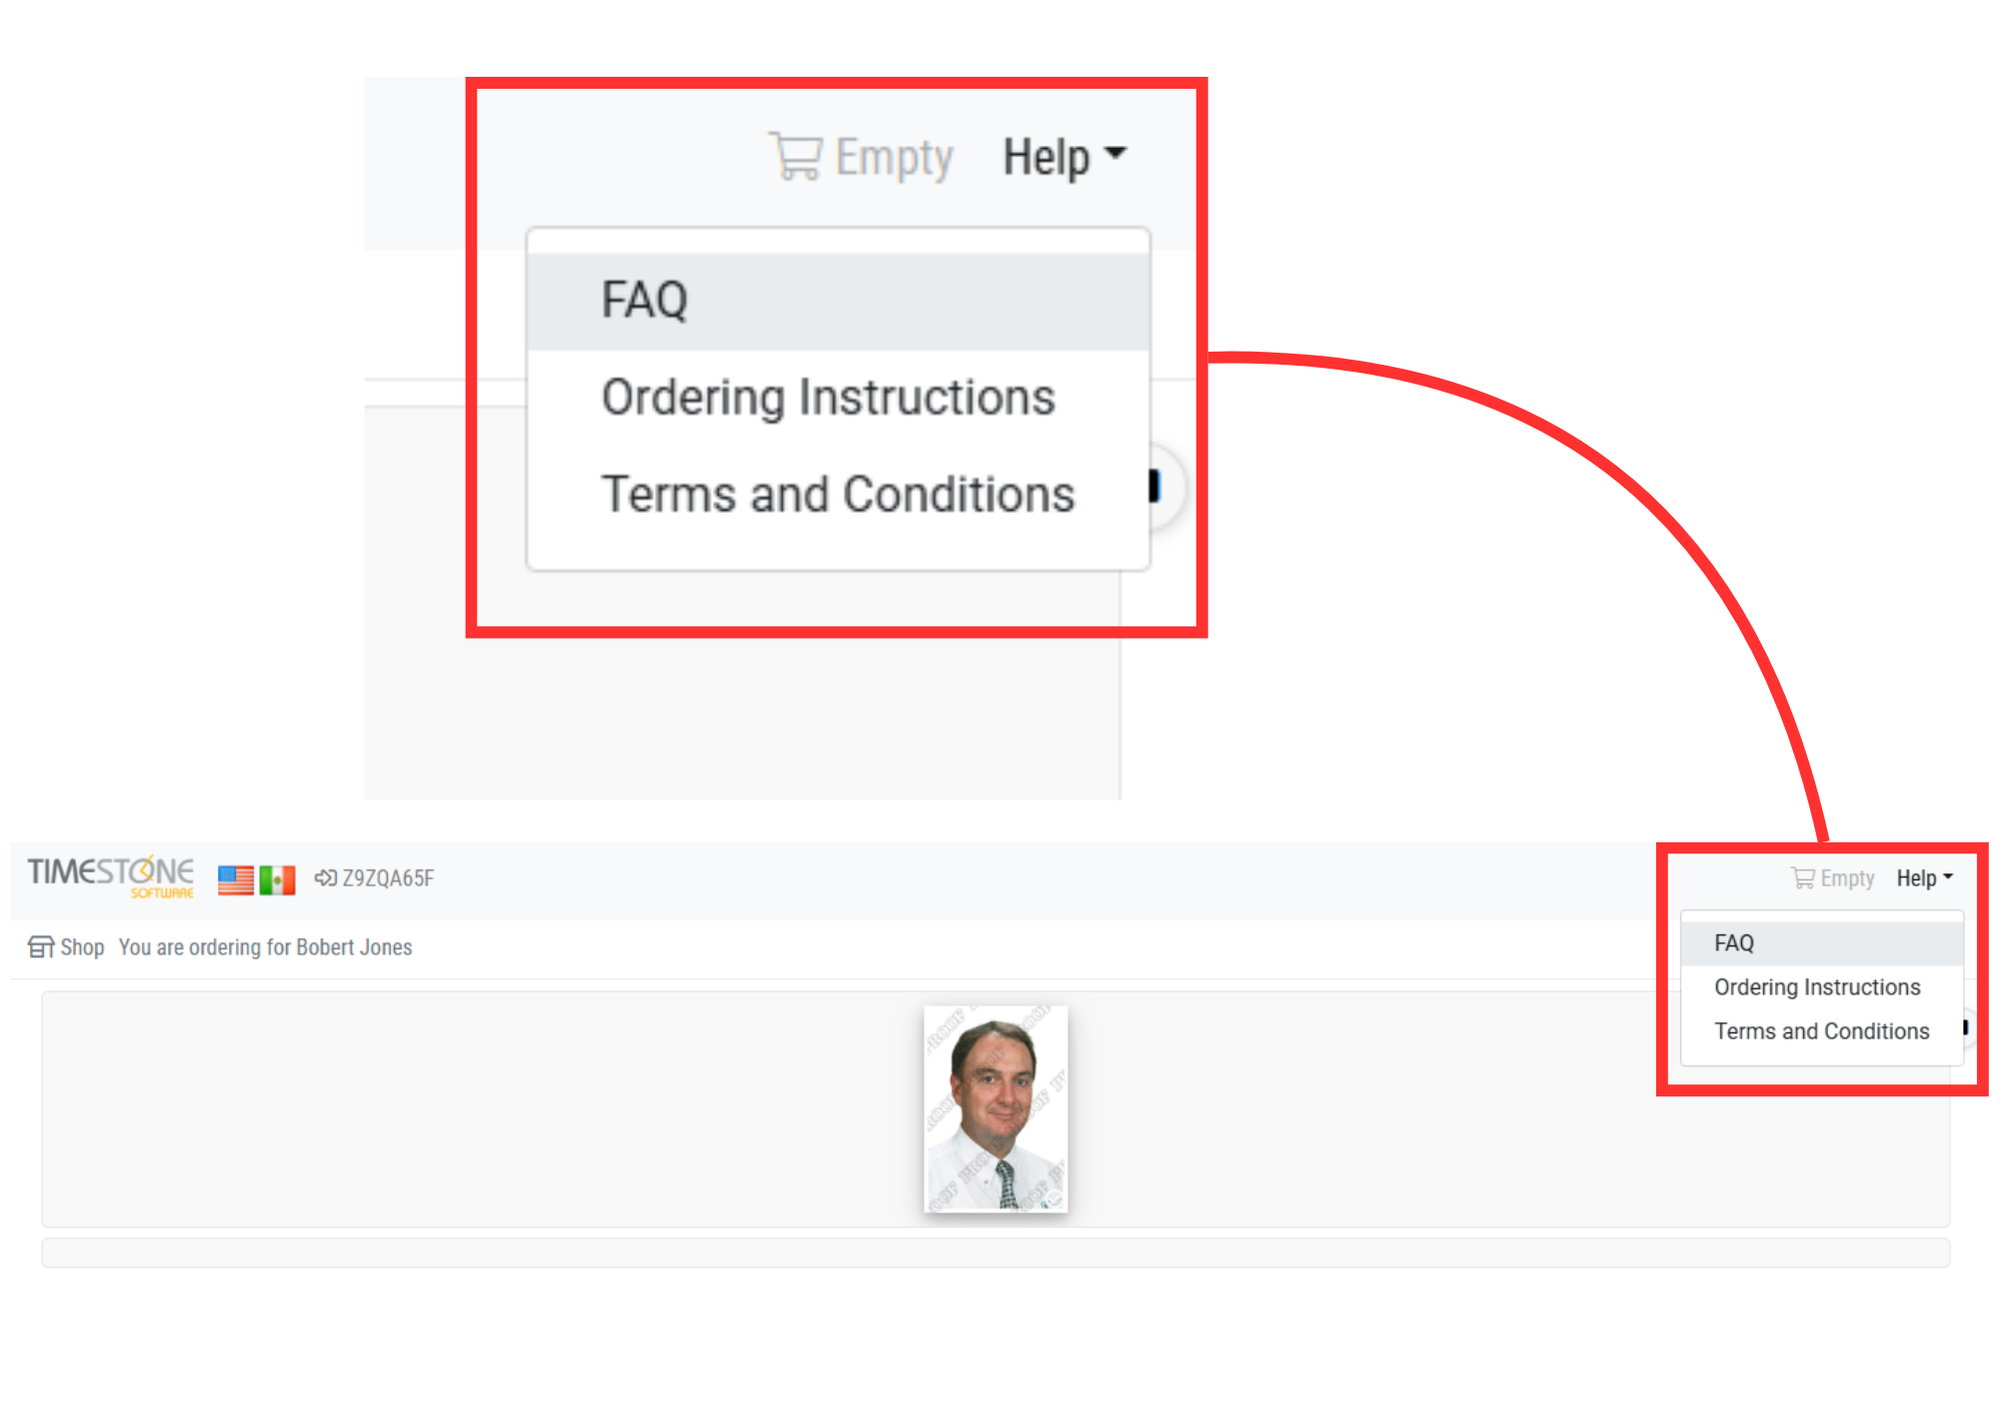
Figure 7: The “Help” topics Dropdown
When selected, the topic will display as a popup over the top of whatever page the customer is currently on.
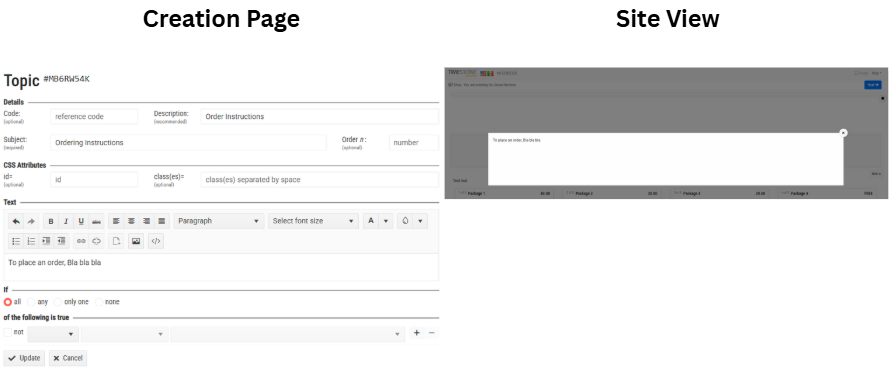
Figure 8: The topic creation page and a topic on the site
Similar to Snippets, Popups can display graphics and both fixed and variable data. They can also be conditional.
Popups appear above the page they are displayed on and must be dismissed before the customer can continue interacting with the site.
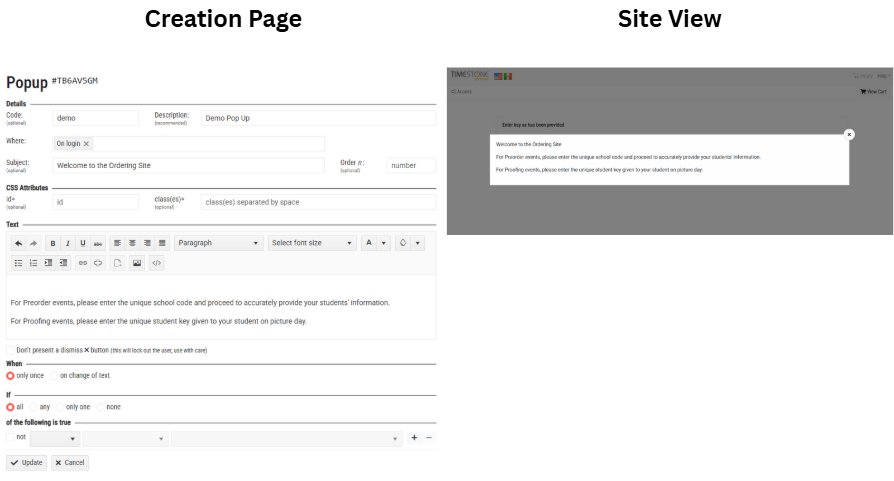
Figure 5: The popup creation screen and a live popup
FAQ
I’m not seeing the changes made to a snippet or a popup on the site?
Try clearing your cookies/cache in your browser to release the previously stored information. Note depending on the nature of the change, it may not be visible until the site recycles overnight.
How can I stop parents ordering in the wrong school when pre-ordering with Identify?
Consider adding a snippet or popup with variable data showing the school name and warning the parent not to continue ordering if their child does not attend this school.