The ability to print products to 'bitmap' as well as hardcopy has been a long-standing feature of Timestone Software.
Products can be printed in a variety of formats (JPEG, PNG, etc.) at the desired resolution (DPI). Multiple options are available to give the user control over the names of the outputted files.
Timestone Software provides two methods for printing to bitmaps.
Bitmap file - a simple print option accessible directly from the Print setup
Generic Bitmap ‘printer driver’ - a more powerful alternative with advanced pathing and naming options
Bitmap file
An option to Print To: Bitmap file is available directly from the Print Setup window.
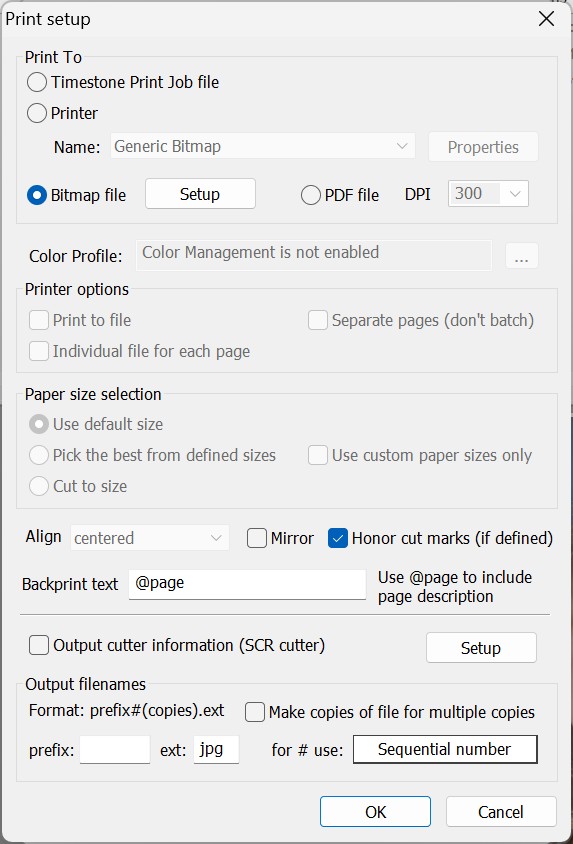
Figure 1: The Print Setup window
The screen grab above shows the Bitmap file option selected. The Setup button adjacent then gives the user further options in the Print Bitmap Setup window shown below.
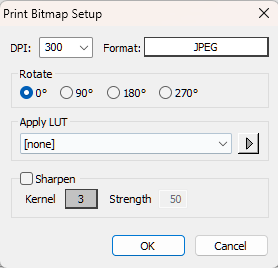
Figure 2: The Print Bitmap Setup menu
Most importantly, the Print Bitmap Setup window is used to select the Format of the bitmap files (usually JPEG) and their DPI. The other options are rarely used.
Output filenames
The Print Setup Window (Figure 1) is also used to set options regarding the naming of the output files and how to handle multiple copies.
Two naming options are available:
Sequential number - files are named with a sequential number
Name - files are named according to fields set in Details Mode>Edit fields>As tags>Uniquely identifying text for item
Further reading: As tags
The As tags feature is a powerful method for controlling how data for a subject is displayed in various sections of the software and how it is used for printing purposes, such as filenames when printing to bitmap and back-printing when printing to hardcopy.
Output destination
The final Print window allows the user to set the Path where the output files are to be written.
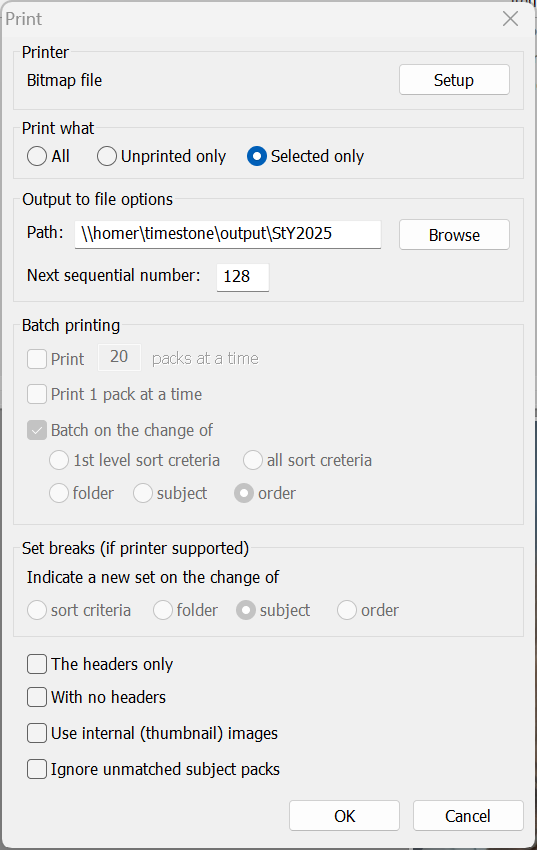
Figure 3: The final Print window
Attention
When printing over a network, the Windows user of the workstation will require read/write permission at the destination.
Generic Birmap Driver
The Generic Bitmap ‘printer’ gives the user greater flexibility when printing to bitmap as it allows for more complex output folder structures and, importantly, the use of @codes to create both output folder and filenames.
The Generic Bitmap driver is listed in the 'Printers' section of File> Print Setup.
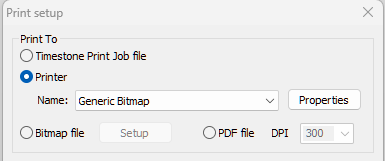
Figure 4: Selecting the Generic Bitmap driver
Configuring the driver
The driver is configured by clicking the Properties button in the Print Setup window. The main components are:
Path - the path to the parent destination folder
Folder tree name - a three level folder tree, each with 5 preset folder name options
Filename - three preset file naming options
Format - a powerful ‘free-form’ option to name folders and files using @codes
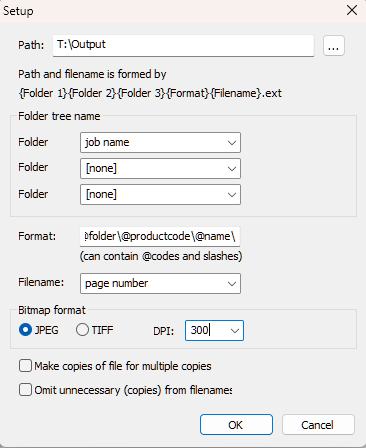
Figure 5: The Generic Bitmap printer setup window
The folder tree
The folder tree name section gives the user the ability to print to a series of up to three nested folders.
Each folder has five options:
None - do not use a folder
Random number - uses a randomly generated 8-digit number
Jobname - uses the current job name
Order number - uses data from 'As tags' for the subject
Page size - uses the dimensions (width by height) of the product
Note
Many users prefer to use the Format option in combination with or instead of the above folder name options.
Naming the files
The files can be named by one of three methods:
Random number - uses a randomly generated number
Page description - uses the subjects 'As tags'
Page number - uses sequential numbering
The Format window
The format window also provides for the creation of nested subfolders along with filenames based on variable data with @codes.
Slashes (forward or backward) are used to designate a new subfolder. If the last parameter does not end with a slash, it is used as the output filename.
Examples
Below are some examples where the format window has been used exclusively - the Folder Tree and Filename sections have been left blank.
The examples assume a parent output directory of T:\Output and a subject Jordan Lane with three products in the queue.
Format | Example |
|---|---|
\@jobname\@folder\@name | T:\Output\GHS2025\Gr8A\Jordan Lane#3.jpg T:\Output\GHS2025\Gr8A\Jordan Lane#2.jpg T:\Output\GHS2025\Gr8A\Jordan Lane.jpg |
\@jobname\@order:key\@lastname - @key | T:\Output\GHS2025\HQGP6AS3\Lane - 9T3TXD5M#3.jpg T:\Output\GHS2025\HQGP6AS3\Lane - 9T3TXD5M#2.jpg T:\Output\GHS2025\HQGP6AS3\Lane - 9T3TXD5M.jpg |
\@jobname\@productcode\@key | T:\OutPut\GHS2025\p4-45\9T3TXD5M.jpg T:\OutPut\GHS2025\p8Wal\9T3TXD5M.jpg T:\OutPut\GHS2025\p810\9T3TXD5M.jpg |
Note
The format window can be used in combination with the Folder Tree and Filename options. The examples above have not done so.
File format and resolution
The Generic Bitmap driver supports JPEG and TIFF only. Any resolution may be set by entering a value into the resolution field; some common values are available in a drop-down list.
Additional Options
Two additional options are available.
Make copies of files - where a product requires multiple copies, a separate file will be generated for each
Omit unnecessary copies from filename - does not append #1 to filenames