The Timestone Cloud Agent is a Windows service that handles communication between the Timestone Software applications and its cloud services.
At the time of writing, it is used by the Knockouts system to manage the sending and receiving of images to this cloud service. In the future, it will also be responsible for the uploading of jobs to, and the downloading of orders from, the Timestone Internet Ordering System.
Where to install the Cloud Agent?
Like other services used by Timestone Software, such as MySQL and the License Server, the Cloud Agent should be installed on a server accessible by all users on all workstations. The Cloud Agent server itself, should have access to the Image server and to MySQL
Three such possibilities, in order of preference, are:
A dedicated server
The File (Image) Server
The MySQL server
Note
Only a single Cloud Agent service is installed. There is nothing to be gained from installing multiple instances of the Cloud Agent.
Server Requirements
As a rough guide the Cloud Agent computer should be at least as powerful as a workstation running NeoPack.
The most important consideration is CPU as the Cloud Agent requires very little hard disk space and is not demanding on RAM. With this in mind the following can be used as a guide with respect to CPU.
minimum quad core for lower volume users
8 core preferred for most users
16 core advised for very heavy users with busy networks
As with all Timestone Software applications, the Cloud Agent is Windows only (Windows 11 or later)
Installation
The Cloud Agent installer is available from the downloads pages of the Timestone Software website. A license is not required.
Installation steps
For the most part, the setup wizard is self-explanatory, and the user simply accepts the defaults as presented.
Two key steps are discussed below.
Step 3: Setup Agent Window
This window is where the user specifies the IP address or name of the server onto which the Cloud Agent is being installed.
Note: the IP address in the screen grab below is an example only. Replace it with the IP address (or name) of your server.
It is strongly recommended to use the default Ports - 8080 and 8081.
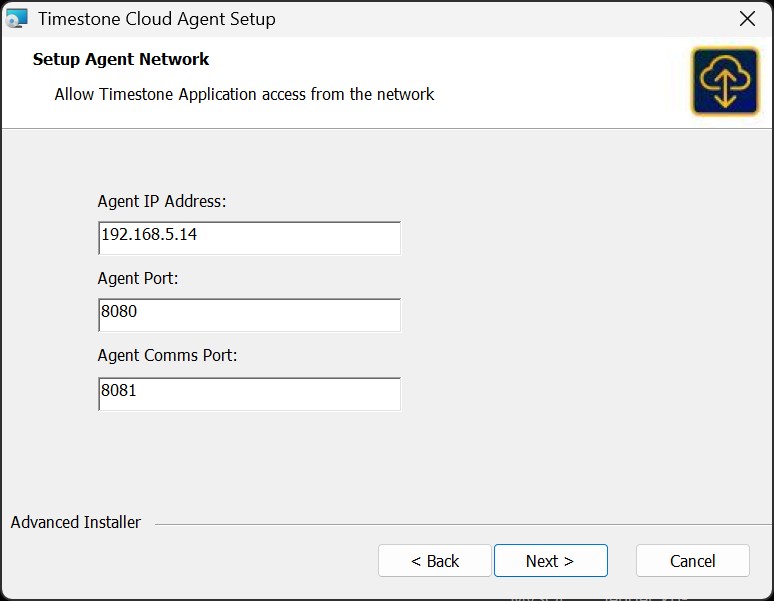
Figure 1: Specifying the IP address and ports of the Cloud Agent Server
Step 4: Agent Service Account
A key step of the Cloud Agent installation process is specifying a Windows user account that has read and write access to:
the computer onto which the Cloud Agent is being installed
The MySQL server
The File server where the images are stored
Essentially. this user should also have the same permissions as other "timestone" users on the network, to enable access to images on network file servers and access to MySQL.
Note: The Domain, User, and Password in the screen grab below are examples only to be replaced by the credentials for your network.
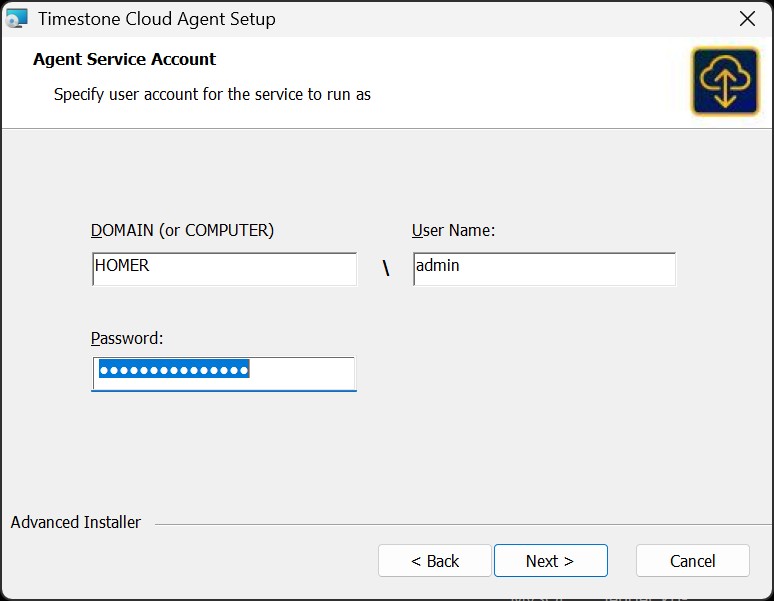
Figure 2: Specify a Windows account for the service
Configuring the Cloud Agent
Once the Cloud Agent is installed correctly, a web browser window will launch to the Cloud Agent Config page.
NOTE
Shortcuts to the Config page are automatically installed onto the Cloud Server however the user should take note of the address of the config page, if wanting to access the config page from other computers.
The address consists of {Cloud Agent server}:{port}/config
Example: 192.168.5.14:8080/config
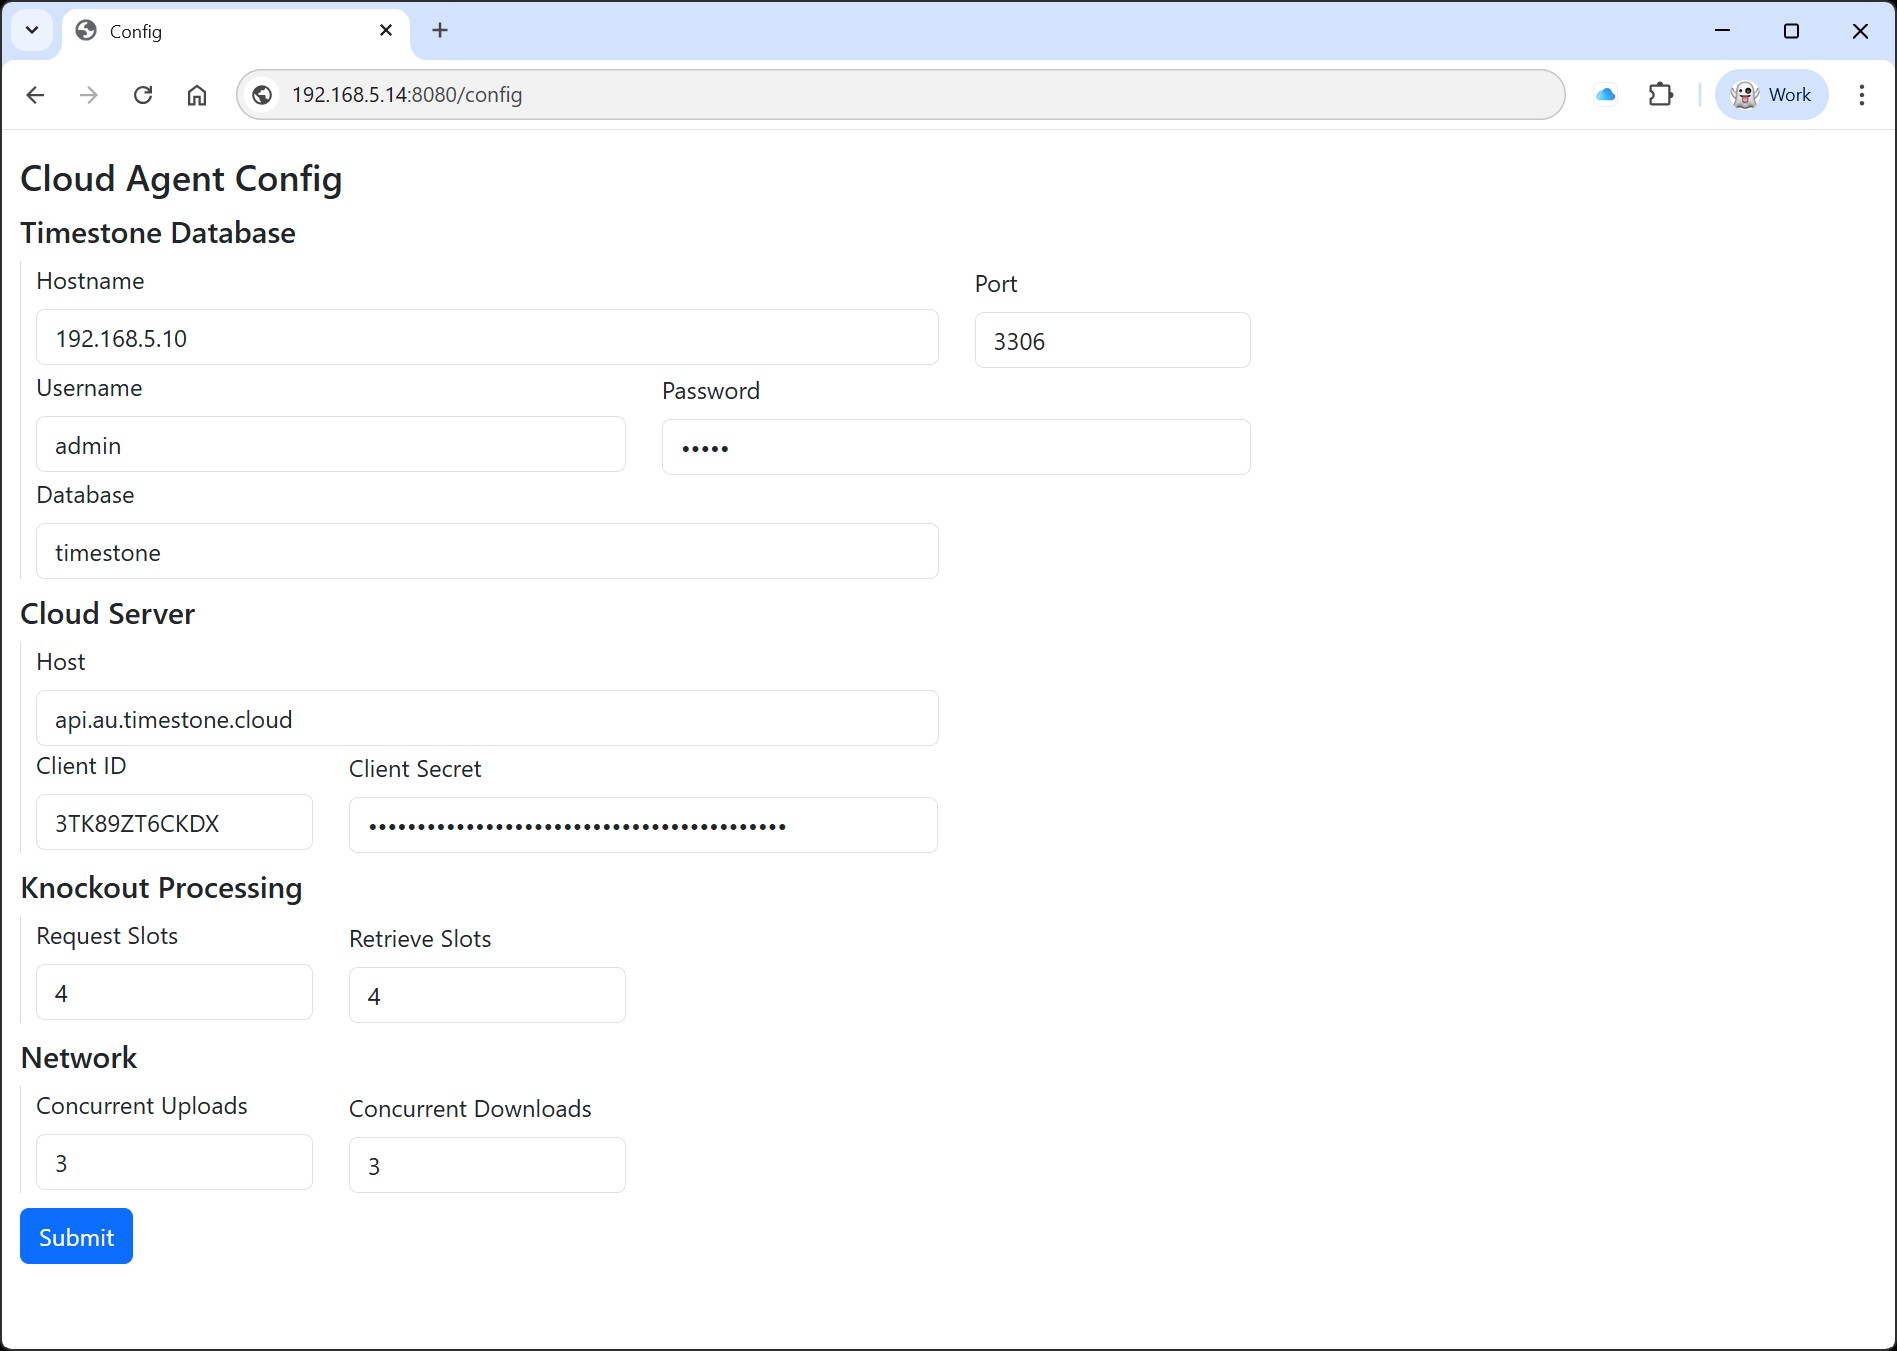
Figure 3: The Cloud Agent Config page
The user will need to enter the following information:
The Timestone Database login
The Cloud Server
Knockout processing
Network
Credentials for the Timestone Database will be the same as those entered into the Timestone Administrator (tsAdmin) connection window.
Name or IP address of the MySQL Server
Port (3306 by default)
Username and Password to access MySQL (use the credentials used to log into tsAdmin)
Database name (timestone by default)
The Cloud Server section is used to enter your Timestone Knockouts account details.
These are provided when signing up for the Timestone Knockouts service.
A representation of the number of images in the Upload (request) and Retrieve (download) queue at any one time.
Very fast systems could increase these values to 5, while slower systems should use no more than 3.
It is recommended that these values be one higher (or equal to) than the Network Concurrent Uploads and Concurrent Downloads values, but not lower.
A representation of the speed and capacity of the Network as a whole, taking into account network speed, processing power of all servers, and Internet speed and bandwidth.
Users with very fast systems and a fast internet service could increase these values to 5. Slower systems should use 2 or 3.
These values should be one lower than or equal to the values in the Knockout Processing slots.
Connecting apps to the Cloud Agent
With the Cloud Agent installed, the Cloud agent’s server address is entered into the connection window when launching the apps.
The Cloud Agent Host
The full address is required complete with port in the format:
http://{server}:{port}
Figure 4 below shows the NeoPack connect window with the Cloud Agent’s address - http://192.168.5.14:8080
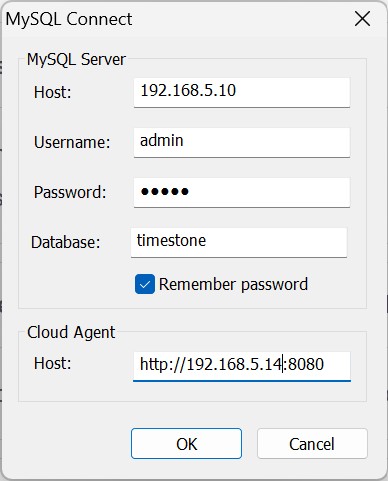
Figure 4: Connecting NeoPack to the Cloud Agent
FAQ
What is the Timestone Cloud Agent?
The Timestone Cloud Agent is a Windows service that facilitates communication between Timestone Software applications and its cloud services.
What resources does the Cloud Agent need in terms of RAM, CPU and hard disk space?
The Cloud Agent requires little RAM and very little hard disk. It is however more sensitive to CPU and therefore the preference is for a 8 core processor.
Where should the Cloud Agent be installed?
The Cloud Agent should be installed on a server that is accessible by all users on all workstations, such as on the File (Image) Server or the MySQL server. The Cloud Agent also needs access to where the images are stored.
Where do I get my Client ID and Client Secret?
These are sent to you when you sign up to the Knockouts system.
Can multiple instances of the Cloud Agent be installed?
No, only a single Cloud Agent service should be installed as there is no benefit to having multiple instances. The exception is if you have multiple databases. A Cloud Agent can only service one database.
I have three ‘timestone’ databases. What do I do?
You will need to install 3 separate Cloud Agents with each one directed to a single database. The different Cloud Agents should be on their own servers but can use the same Client ID and Secret.
What values should I set for Upload and Download slots?
It is recommended to set these values to be one higher or equal to the Network Concurrent Uploads and Downloads values, with a maximum of 5 for fast systems and 3 for slower systems.