Composites can be broadly divided into two categories.
Static Composites - use a consistent layout for all subjects in the composite.
Rotating Composites - feature a Main Block, allowing each subject to take a turn as the focal point, creating a unique page for every subject in the composite.
Composite pages are formed in the Form Pages mode of NeoComposite by combining two templates:
Page template - the overall page with areas for subjects, graphics and text
Subject block template - a template that defines the look of the subjects along with their text (names)
This flexible structure lets users create either uniform pages or dynamic, subject-focused layouts, depending on their needs.
Further Reading: Creating Composite Templates
NeoComposite templates are powerful combinations of graphics, text, and specialty design objects.
Form Pages mode enables users to create composites by selecting a combination of page templates, subject blocks, included subjects, and other settings.
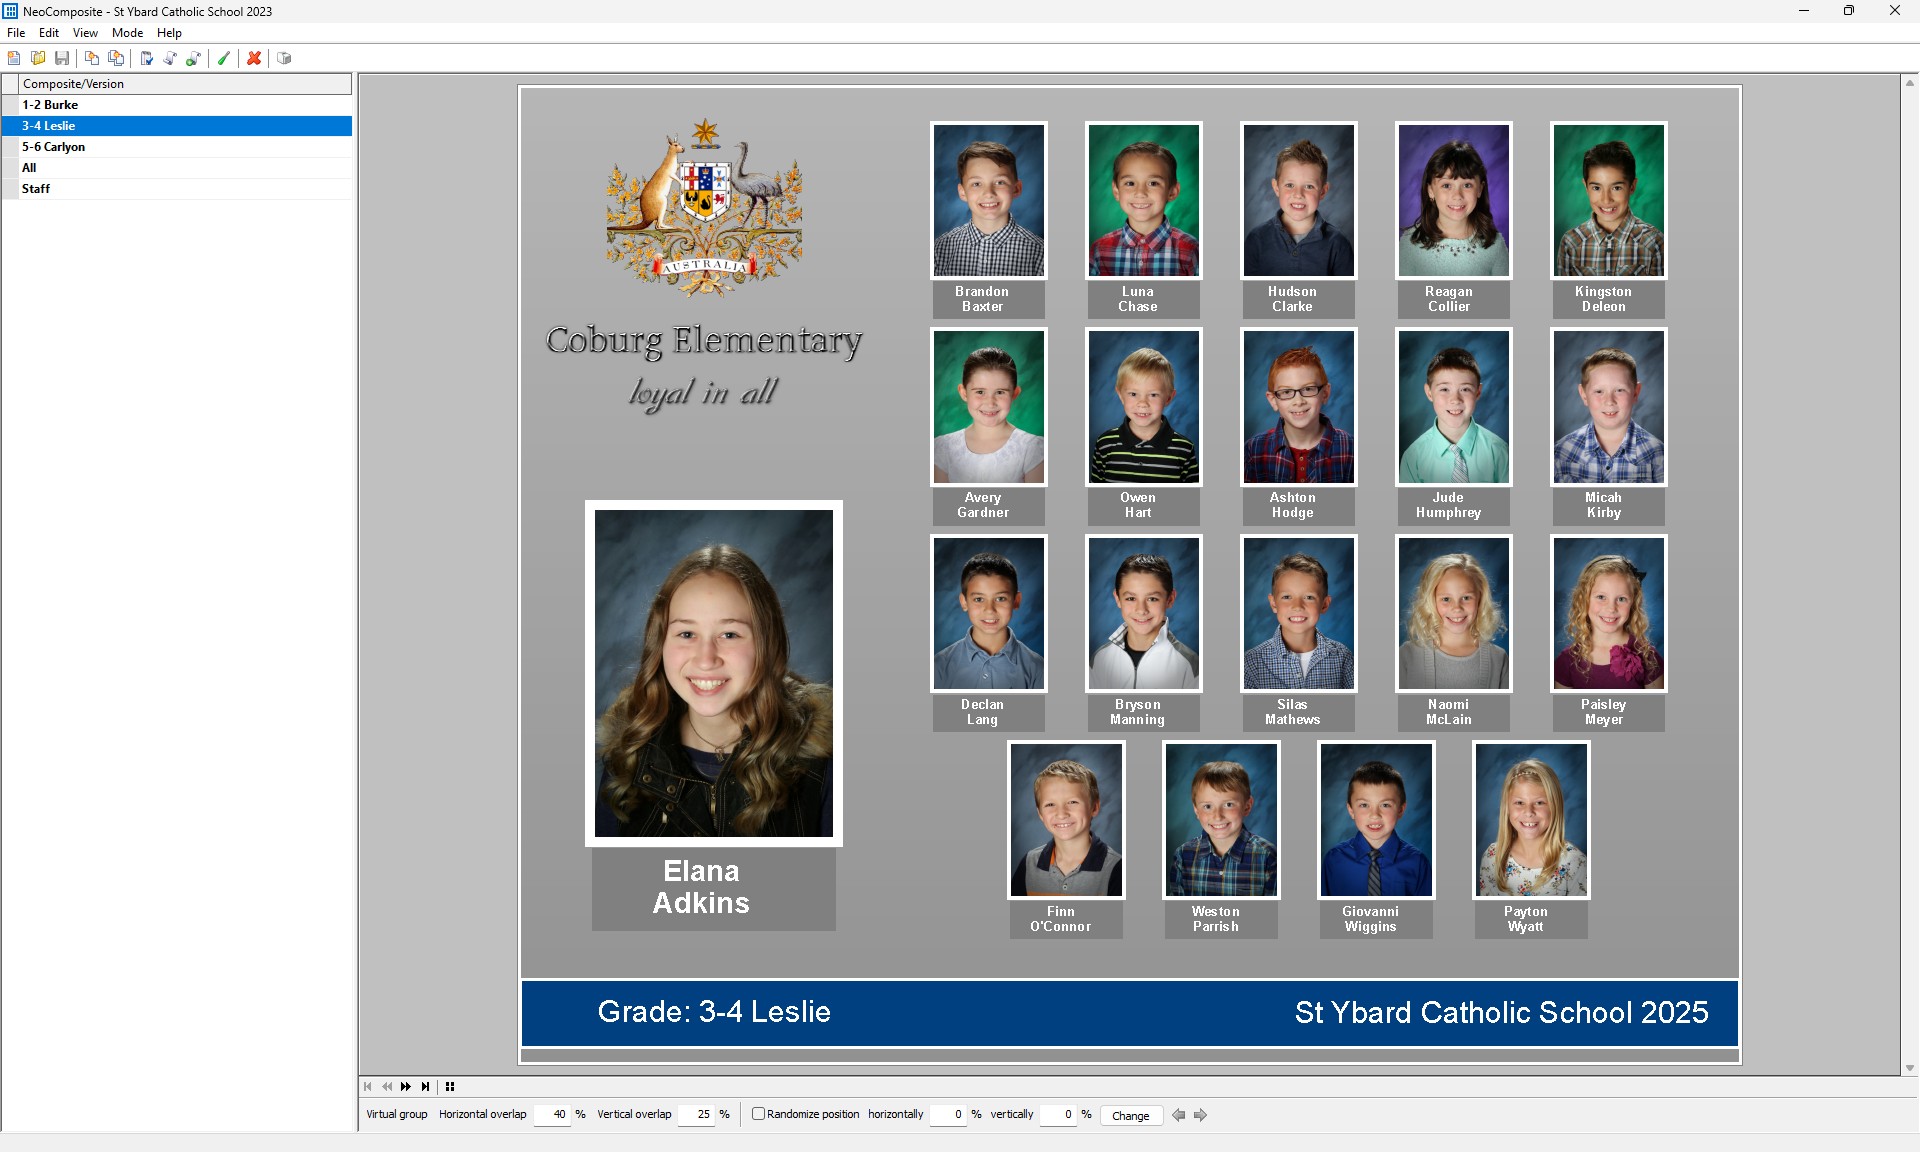
Figure 1: The Form Pages window showing a rotated composite
The window consists of three main parts:
The toolbar
The column of created composite groups
The composite Preview Area
The Toolbar
The most commonly used tools have icons on the toolbar.

Figure 2: The Form Pages toolbar
The buttons are as follows, from left to right:
Button | Description |
|---|---|
New Job | Create a new job file |
Open Job | Opens a job file |
Save | Save a job (only used when working with TNJ files) |
New Composite | Creates a new composite page |
New Composites | Creates multiple new composites in one step |
Subjects to Include | Access the subjects to include menu |
Set Details | Access the composite set details page |
New Version | Create a new version of the current selected composite |
Tweak Page | Open an editable preview of the composite, enabling limited tweaking of objects on the formed page. |
Remove Composite | Remove the created composite |
Print the composite pages |
Creating a Composite
To create a composite:
Choose Edit> New… or click the New Composite button on the toolbar. This will automatically open the Subjects to Include dialog window
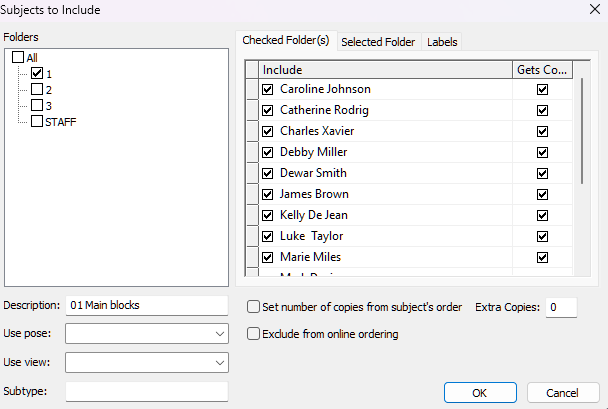
Figure 3: The Subjects to Include window
Choose the subjects to include in the composite by checking the box for the given folder. It is also possible to select/exclude subjects on an individual basis
Select a pose or view, if applicable, alter the description of the composite to give it a custom name, and set a subtype if needed
Click Next to advance to the Composite Set Details dialog window
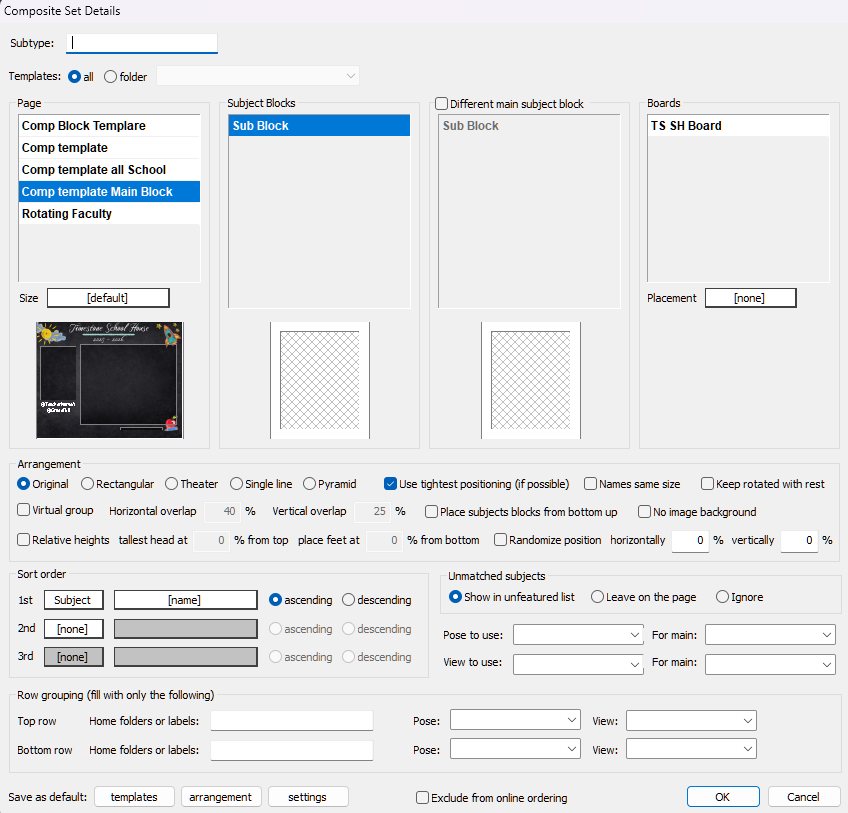
Figure 4: The Composite Set Details dialog window
Choose the desired templates for the Page, Subject Block, Main Block (if different), and Board (if applicable)
Select the Arrangement and Sort Order of subjects
Select what the application should do with unmatched (unphotographed) subjects. There are 3 options:
Show in unfeatured list
Leave on the page
Ignore
Click OK to create the composite
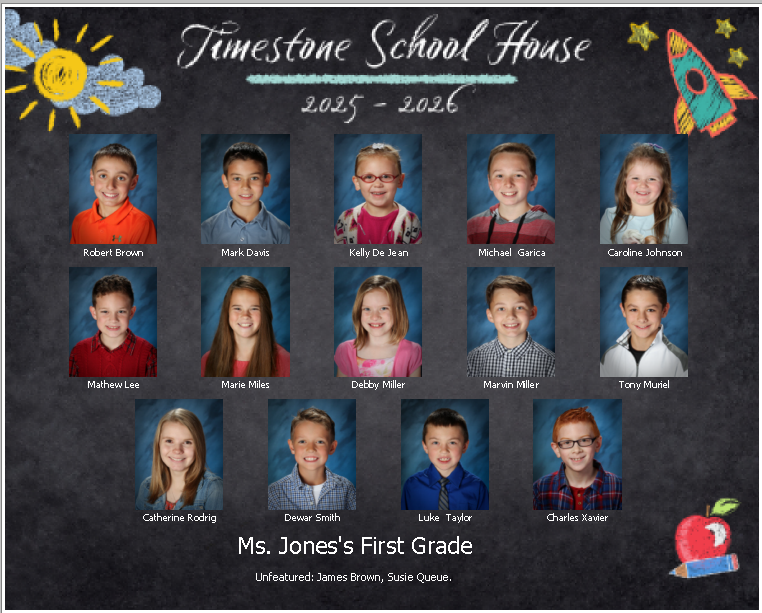
Figure 5: A created composite
Rotated Pages
If a created composite contains a Main block, where the subjects rotate to the “Featured” position, a version of the composite will be created for each subject.
To navigate between the versions, use the Arrow buttons in the lower left of the preview area.
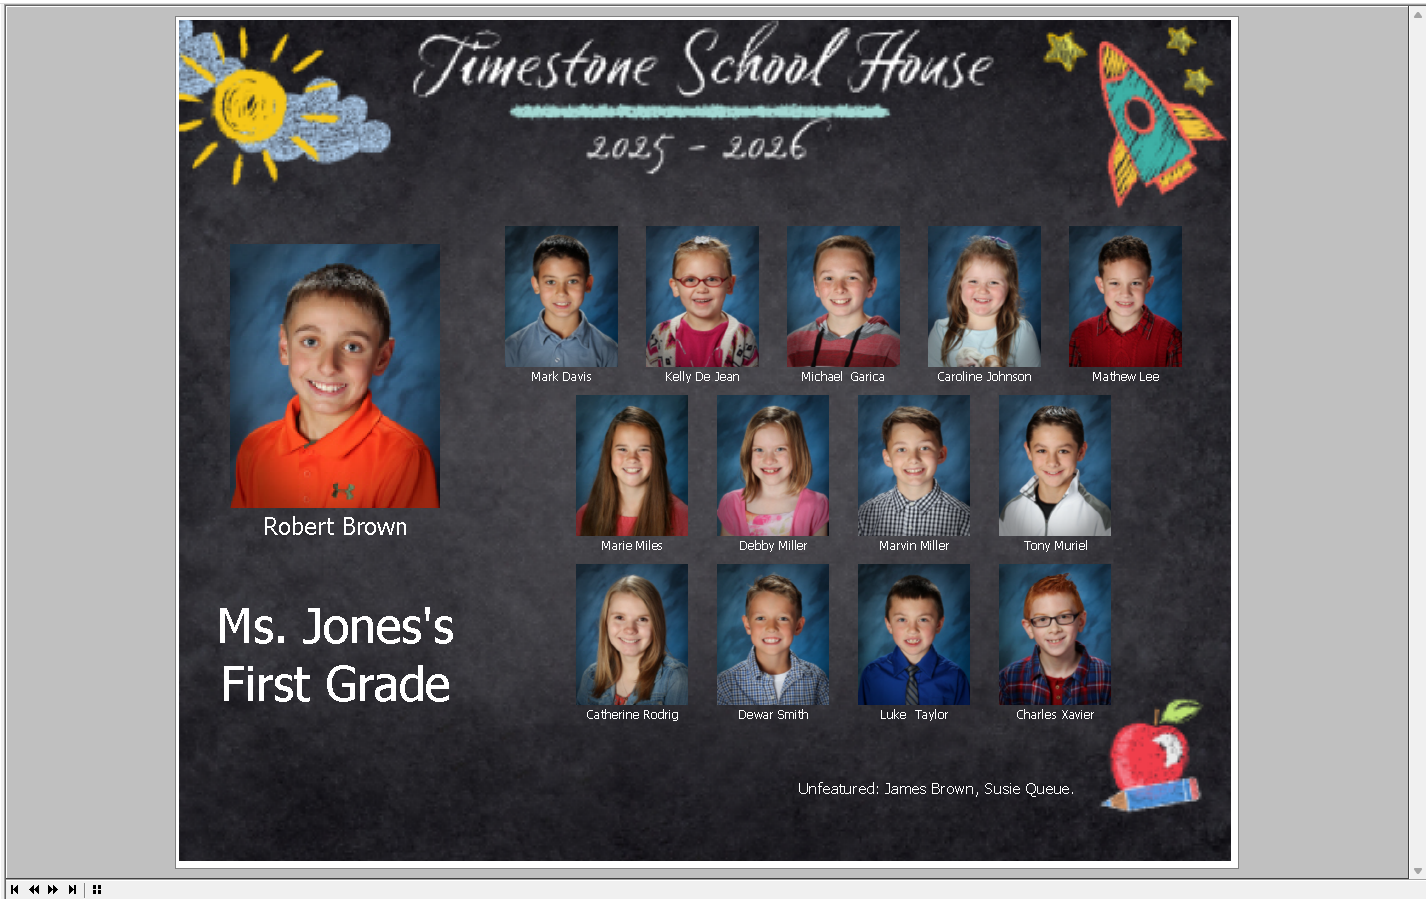
Figure 6: A rotating composite
FAQ
What are the two main categories of composites?
The two main categories of composites are Static Composites and Rotating Composites.
What is a Static Composite?
A Static Composite uses a consistent layout for all subjects in the composite. Each subject’s composite page is identical.
What options do I have for unmatched subjects in a composite?
You can choose to show unmatched subjects in an unfeatured list, leave them on the page, or ignore them.