Rather watch a video than read a document?
A movie accompanies this document
Photographers often need their images to have different cropping and scaling depending on how the images are to be used. The default crop may be fine for most products, but a tighter crop is required for ID cards and composites, while yet another crop is needed for yearbooks or exports.
Timestone Software’s applications support multiple “Views” where images can have multiple crop sets, each with their own cropping and scaling.
Creating Views
Views are created and managed in Images Mode using the images tool panel, as shown in the screen grab below. Creating a new view is simply a matter of clicking the arrow and selecting ‘Add new…” from the dropdown menu. Views can be renamed and removed in the same manner. Once views are created, they appear in and are selected via the dropdown list.
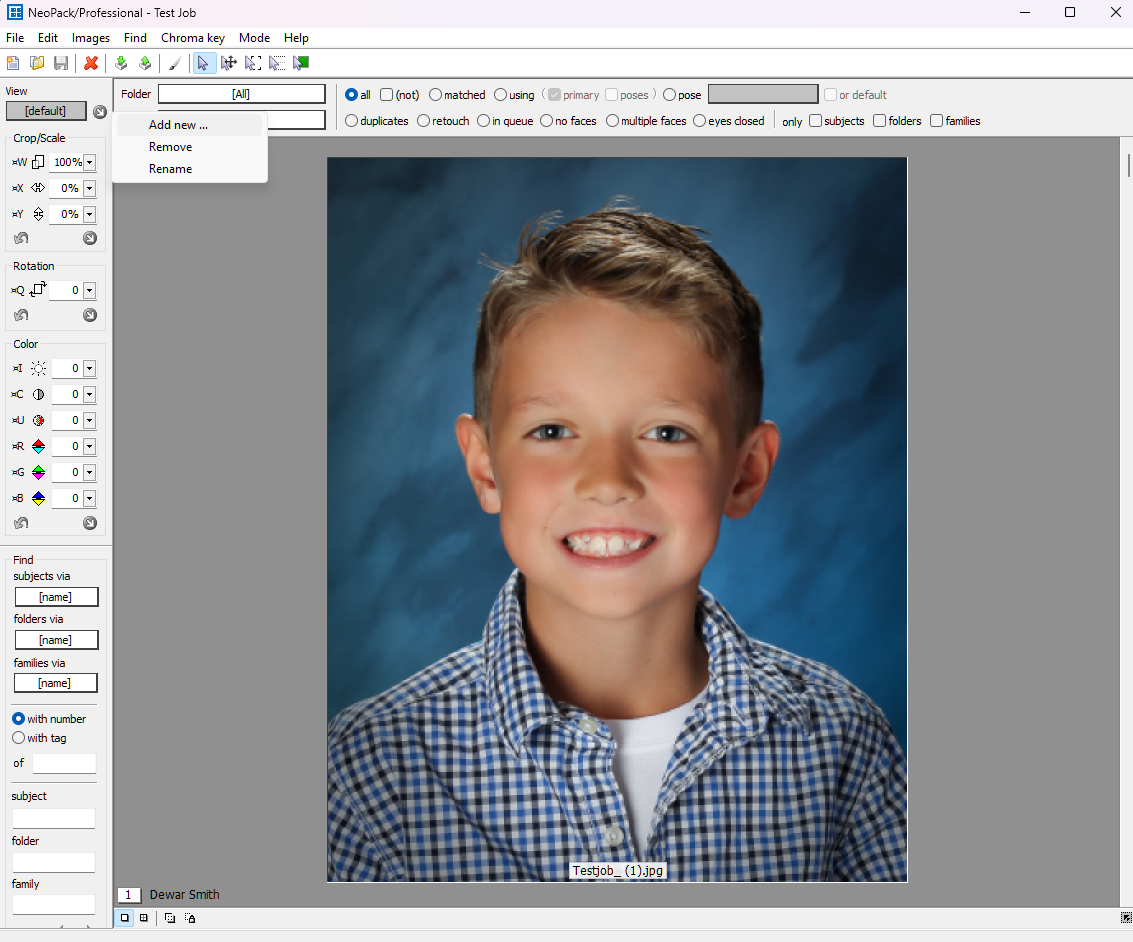
Figure 1: Adding a new view
Cropping and Scaling Views
Images in views are cropped and scaled in the same manner as the default set.
Views are relative to the default crop
It is important to understand that cropping in a view is relative to the cropping in the default view. If the cropping in the default view is altered, it will alter the cropping in the view. However, changing the crop of one custom view will not affect another custom view.
ATTENTION
Cropping in a view is relative to the default cropping. If the default cropping is changed after a view has been created, the cropping in the view will also change.
Consider a situation where cropping in the default view is left untouched (100%). A view is created for ID cards, and the images are cropped to 120%. If the images in the Default view are subsequently cropped to 110%, this will cause the ID view images to have a 130% crop.
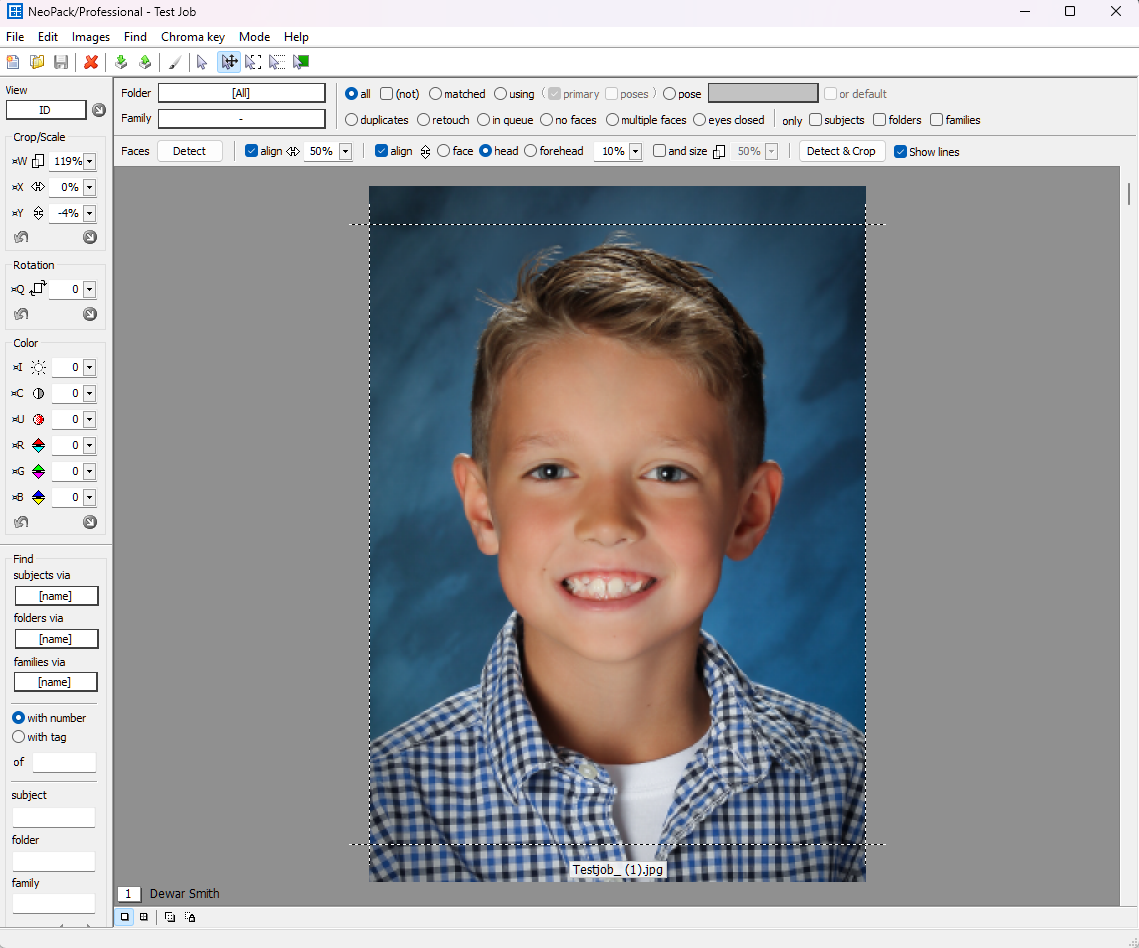
Figure 2: An “ID” view where the image has been cropped tighter than the default scaling.
NOTE
Views only support the independent handling of cropping and scaling. Other image properties such as a colour and rotation are not supported - changing these attributes in a view will change them in all other views including the default view.
Using Views
Using views within the software is very similar to using poses. As such, wherever there is an opportunity to select, specify, or order a pose, there is an equivalent opportunity with views.
This includes:
Setting a view directly in an image hole
Selecting a view when in Point and Click Mode and Item Sheets Mode
Selecting a view when forming composites
Ordering packages with a barcode
Image Holes
It is possible to specify a view to be used in an image hole as shown in Figure 3. This is true for all image hole types, including pack layouts, items, and composite subject blocks.
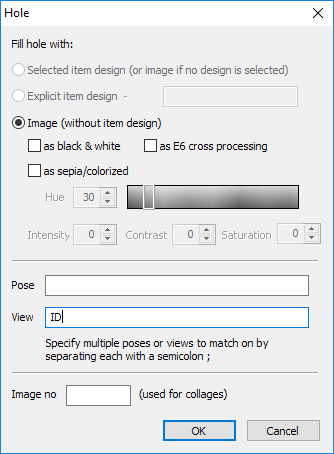
Figure 3: Specifying a view to be used in an image hole
If the specified view does not exist, the default view is used.
Point ‘n Click Mode
Views can be manually selected in Point and Click Mode as shown in Figure 4.

Figure 4: Selecting a view to use in Point ‘n Click mode
Composites and Item Sheets
A view can be specified when forming a composite page or when forming an Item Sheet. Figure 5 shows a view being selected at the same time as subjects when forming a composite group page.
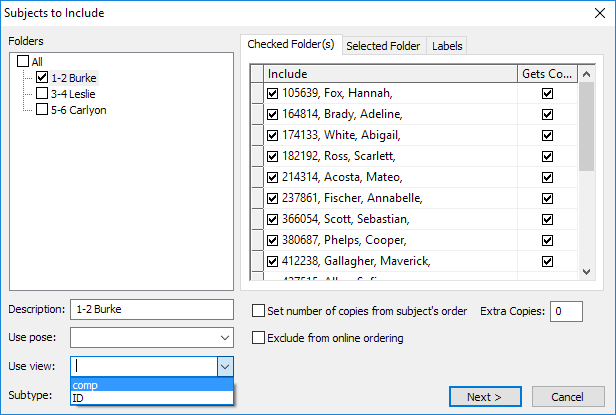
Figure 5: Selecting a View for a composite page.
Ordering a Package
In the same way that packages can be ordered for a particular pose, packages can be ordered with a specific view.
It is important that the user have an understanding of order barcodes, but in the most basic form, the order barcode chain follows the following order:
/%O{Packagecode}/P2{Itemcode}/P3{pose}/P4{View}
In general, the user should think of views as Position 4 (P4).
Examples:
/%OPK1/P4ID - adds a package PK1 using the ID view to the subject’s order
/%O$/P4COMP - A sticky barcode selecting view COMP
Further Reading: Order Barcodes
Order Barcodes may be scanned into Details mode, orders mode, or into CapturePost to capture order information.
Views in IOS
Images displayed in the Internet Ordering System will always be the default view. However, any products that explicitly use a View will display the View in the product.
INFO
Images in the IOS film strip will always be the default view. However products that use a specific view, will be shown with that view.
FAQ
What are Views in Timestone Software's applications?
Views are multiple crop sets that allow photographers to have different cropping and scaling for images based on their intended use.
How do I create a new View?
To create a new View, go to Images Mode, click the arrow in the images tool panel, and select 'Add new...' from the dropdown menu.
Will changing the default crop affect my custom Views?
Yes, changing the default crop will alter the cropping in all custom Views that were created based on it.
Can I independently change image properties like color and rotation in Views?
No, changing properties like color and rotation in a View will affect all other Views, including the default View.
Are Views supported in the Internet Ordering System (IOS)?
Yes and no. Images in the IOS will display the default View, but products that explicitly use a View will show that specific View.
Are Views supported in NeoGroup?
Yes, as of Version 4.11, Views are Supported in NeoGroup.