This article looks at designing and printing a simple item sheet (proof sheet) with a plain background. A more complex proof sheet, complete with background elements, is described in the article Proof Sheets with Multiple Poses.
Throughout this article, we will be referring to the item sheet reproduced below. The template used for this item sheet is available for download here.
Additionally, this article assumes familiarity with the Template Designer and the available design elements.
Further Reading: Designing Templates
Many of the Template Designer’s tools and features are common across apps, even though the templates being created differ.
The Template designer enables the incorporation of various elements, both static and dynamic, into any design.
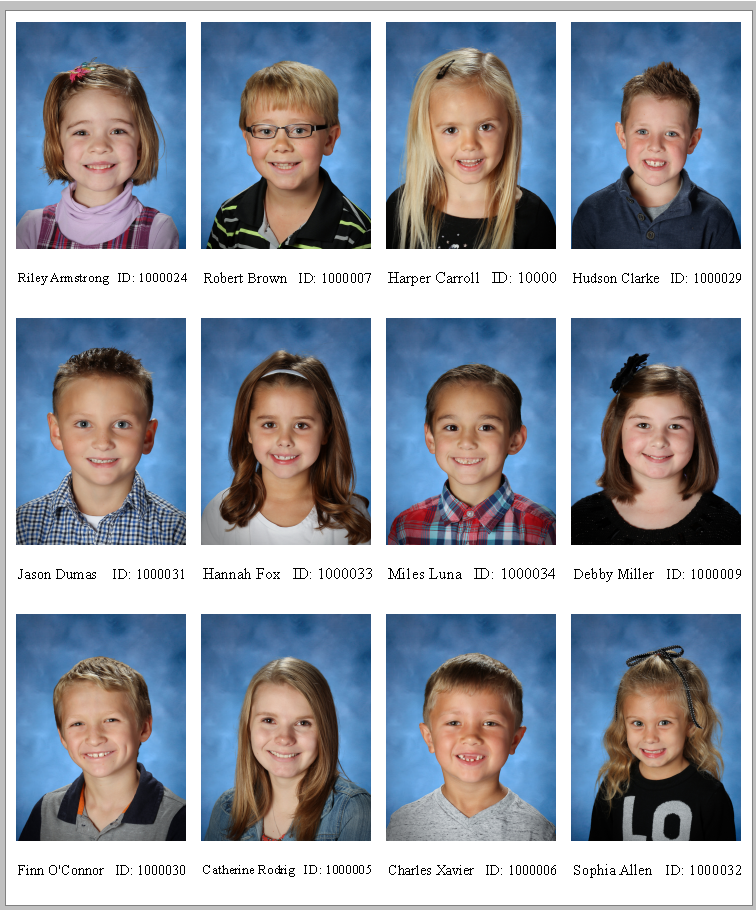
Figure 1: A simple proof sheet
Creating the item template
All item sheets require a Fixed Size Item template. This template is used to populate each subject’s image and information.
To create a Fixed Size Item:
Navigate to the Template Designer (NeoPack)
Start a new template (File>New or select the new template icon from the toolbar)
The New Template Design window appears. Select the option - Fixed Size Item
A blank canvas appears. Click on the canvas to activate, then enter the size of the template. The example above used a size 2.00" x 3.20"
Drag an image hole onto the template and size as desired
Optionally add text boxes, barcodes, and graphics
When satisfied, save the template in the templates directory
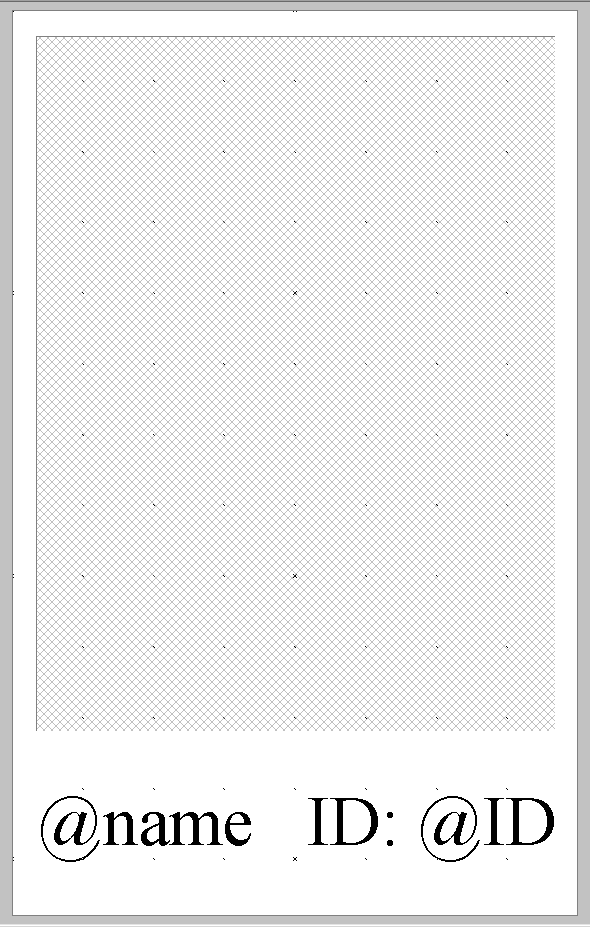
Figure 2: The fixed size item template
CAUTION
The template must be created as a "Fixed Size Item". No other template type can be used to create a proof/Item sheet.
Forming the item sheet
Proof sheets, a type of Item Sheet, are formed in Item Sheets Mode of NeoPack. Users select the subjects to be included in the Item Sheet, the template to be used, and how they are to be arranged on a given sheet. Other settings, such as the sort order and page breaks, are also available.
Attention
Simple Item sheets such as the one described in this document do not allow for any objects on the ‘background’ of the sheet. All information must be part of the item template itself.
Item Sheet Background templates allow the user to add elements to the ‘background’ of the sheet and are used in the example of Proof Sheets with Multiple Poses
Start a new item sheet:
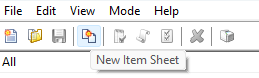
Figure 3: The New Item Sheet button
Navigate to Item Sheets Mode and start a new item sheet (Edit>New or click the New Item Sheet button on the toolbar)
The “Subjects to Include” window appears. Checking the "All" folder automatically selects every subject within the job. Individual folders may be checked and unchecked as desired, and Individual subjects may be selected or unselected as desired from the Checked Folder(s) tab.
NOTE
Selecting subjects here does not specify which images are used for a given subject.
If subjects are matched to more than one image the user will have choices as to which images to use in the Sheet Page Settings described below
Additionally this step does not create the sort order in which subjects are added to the sheet.
Add a Description to the appropriate field to give a name to your sheet. (This can be called on an Item sheet template with @description.)
Click Next to proceed to the Arrangement options.
The "Templates/arrangement" window allows the user to select the item template to be used for the sheet and arrange the item on the finished page. The "Item" section lists all the fixed-size items present in the user's template directory.
CAUTION
If the Item template is not listed here, check you created a "Fixed Size Item" as described above and that Template Paths are correct in tsAdmin.
The user also has the option to select a Layout (Item Sheet Template) or use the "Plain background" option. In this example, Plain Background was checked, activating the parameters for arranging the item on the finished page. Units may be either inches or millimetres; Auto-size page will automatically generate a page size based on the number of items across and down, and the margin settings; or a fixed page size is entered according to the size of the sheet the proofs will be printed on.
Click Next to continue to the “Sheet page settings” Window
Set the sort order. Three levels of sorting are available according to any subject or folder field. Additionally, select which images to include, page break settings, and check "ignore" to avoid including unmatched subjects (i.e., subjects without images) on the page.
Click OK to form the Item Sheet.
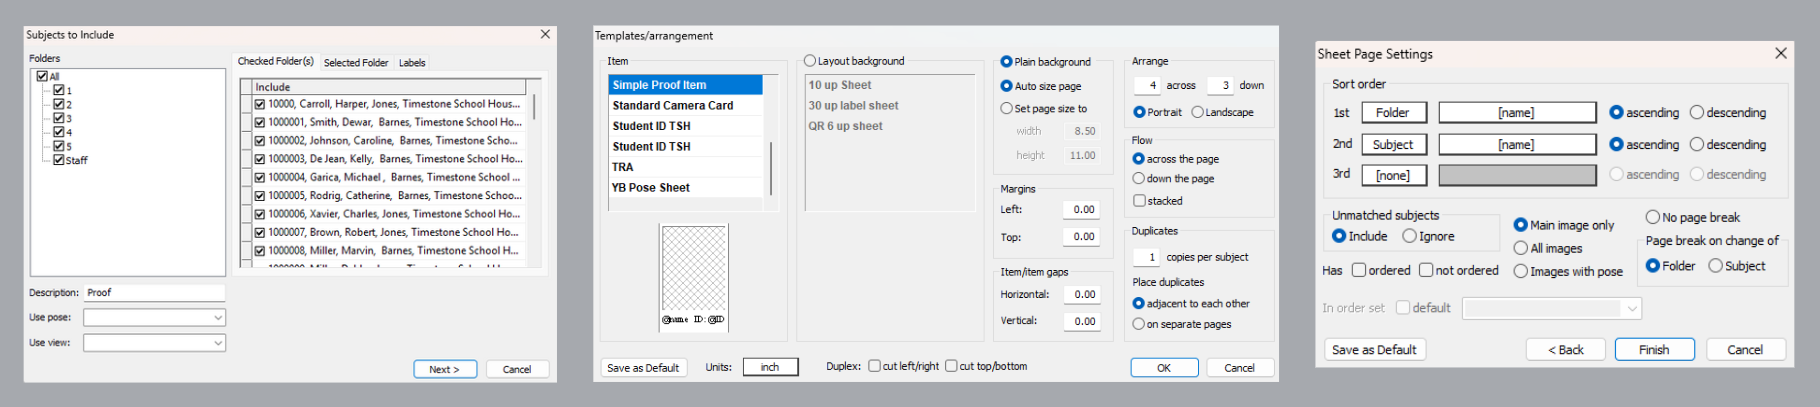
Figure 4: The Subjects to include, Templates/Arrangement, and Sheet Page Settings windows
TIP
Toolbar icon shortcuts allow the use to return to each of the windows shown in Figure 4 above and edit or adjust settings as needed.
To edit information in the Subjects to Include window, click the clipboard icon with a blue check mark.
To open the Template/Arrangement window, click the scroll icon.
To modify Sheet Page settings, click the paper icon with red check marks.
To remove a formed sheet, click the Red X icon.
Printing the item sheet
When satisfied with the appearance of the item sheet, click the Print icon on the toolbar, or select File > Print from the main menu.
Because images on an item sheet are typically displayed at a small size, it is recommended to check the Use internal (thumbnail) images option. This setting uses the thumbnails generated during image import rather than the full-size originals, resulting in faster, more efficient printing performance.
FAQ
How do I create a Fixed Size Item template?
To create a Fixed Size Item template, go to the Template Designer, start a new template, select 'Fixed Size Item', enter the desired size, and add any necessary elements like image holes and text boxes.
Can I use any template type to create a proof sheet?
No, since a proof sheet is a type of Item sheet, you must create the template as a 'Fixed Size Item'; Sizable Item templates can NOT be used.
What options do I have when forming an item sheet?
You can create an item sheet template or allow the system to automatically place the item template in a grid that fills the page size.
What should I do if my template is not listed in the arrangement options?
Check that you created a 'Fixed Size Item' template and ensure that the template paths are correct in tsAdmin.
Can I print an item sheet from PackBuilder?
The procedure for creating an item sheet is identical in NeoPack and PackBuilder. However, item sheets printed directly out of PackBuilder will be subject to printing restrictions. These restrictions are removed if and when the job is printed through NeoPack/Professional.