This article will go through the basic steps involved in producing a multi-pose proof sheet for a single subject, as illustrated below. It is assumed the reader is familiar with assigning pose numbers to images, creating basic proof sheets, and barcode elements.
Further Reading: Assigning Poses & Simple Proof Sheets
Images can be assigned poses; In turn, many Products can be defined to use a particular pose, while a layout with multiple image holes can have a different pose in each hole.
Simple Proof sheets are designed using a single Fixed Size Item template and can be printed without the use of an Item sheet template.
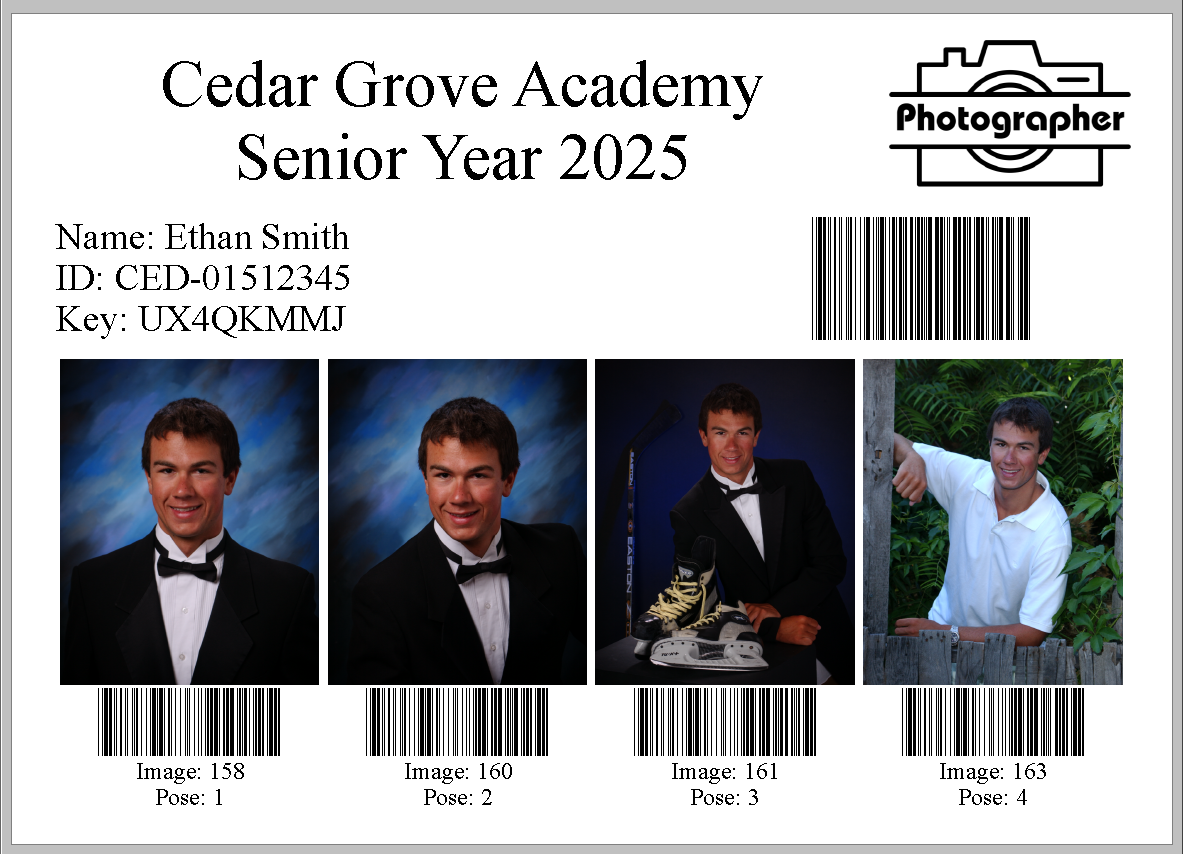
Figure 1: A multi-pose proof sheet
The multi-pose proof sheet illustrated above is a function of two templates:
A fixed size item
An item sheet layout
The templates used in the example above are available for download.
The Fixed Size Item
The fixed size item defines the appearance of the individual pose together with any ancillary information, such as the pose/order barcode and the pose number. Since this will be used on an item sheet, the template MUST be a Fixed Size Item.
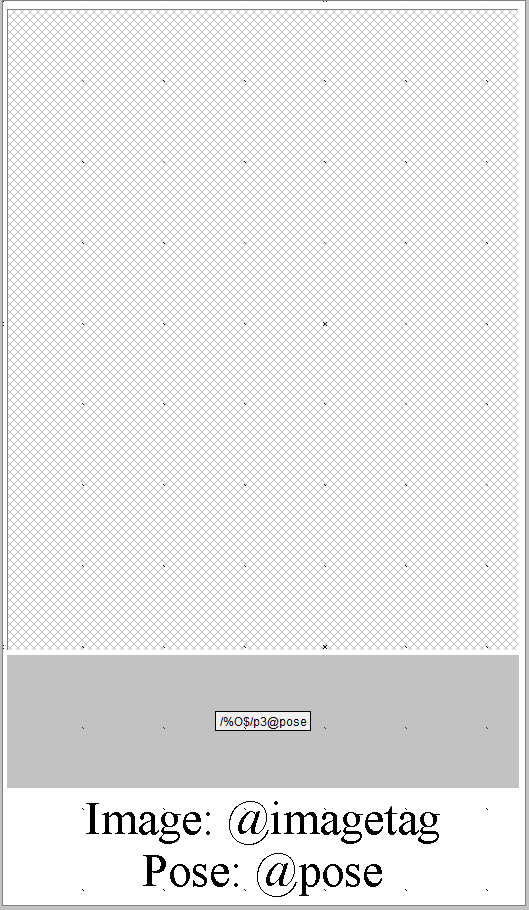
Figure 2: The fixed size item template
To create the fixed size item template
Click New to create a new fixed size item template
Set the desired explicit size of the individual preview area
Add an image hole
Add the Barcode with the proper syntax: /%O$/p3@pose
Add the Pose label and Image information
Save the template in a universally accessible path
Caution
Barcode syntax is extremely important and if not handled correctly may cause the information to not be recorded correctly.
For more information about the Pose Barcode syntax: Pose Barcodes
The Item Sheet Background
The item sheet background determines the position of the individual poses (the item template) together with other text, data, and graphics that can be placed ‘in the background’. The item sheet background used in Figure 1 above is reproduced below.
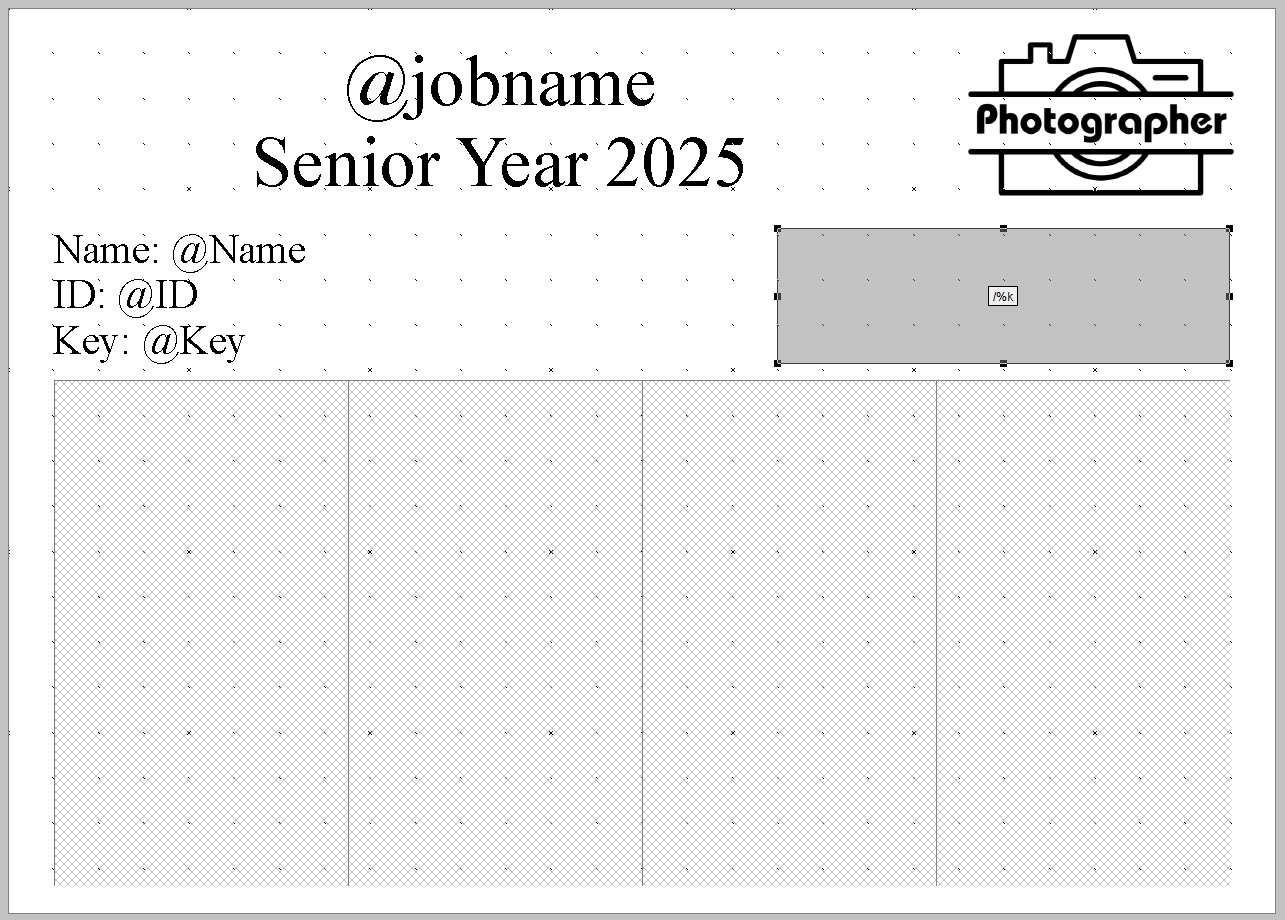
Figure 3: The item sheet background template
To create the item sheet template:
In the Template Designer, create a new Item Sheet template
Set the overall size of the proof sheet, 5×7 in this example
Add a grid for the item templates to display in. It is important to ensure that the area available is the exact size or larger than the fixed size item, as they will NOT scale to match
Add any other desired Graphic elements, and Subject or job data to the pose sheet
Save the template in a universally accessible path
Forming the Sheet
The same steps to form a basic proof sheet or Item template are followed to form a multiple pose sheet.
In Item Sheet Mode, create a new item sheet
Select the desired Folder(s) and Subject(s), and click Next
Select the desired Item template and the Item Sheet Layout, and click Next
Choose the Desired Sort and whether to include unmatched subjects
Choose Images With Poses option
Choose Page Break on change of Subject
Click OK to render the Item sheet
CAUTION
If Page break on change of subject is NOT selected, multiple subjects could appear on the page meaning subject level information cannot be displayed.
FAQ
What is a multi-pose proof sheet?
A multi-pose proof sheet is a layout that displays multiple images of a single subject, each assigned a different pose number.
What templates are required to create a multi-pose proof sheet?
You need a fixed size item template and, optionally, an item sheet layout to create a multi-pose proof sheet.
What happens if I do not select 'Page Break on change of Subject'?
If this option is not selected, multiple subjects could appear on the same page. The item sheet template can only display subject-level information if one subject is included on a page.
How can I order proof-sheets?
Item sheets cannot be ‘ordered’ as such; you can’t order them with a barcode, text file or online. They are ‘formed’ by you directly in Item Sheets Mode.