ID cards are an important part of a school photographer’s workflow. Like other print products, ID cards can take full advantage of the various design elements available in the Template Designer.
In this example, users will step into the role of a school photographer tasked with creating a student ID, below. The design will incorporate variable student data and images, along with dynamic graphic elements that adjust based on specific criteria—demonstrating the flexibility and power of the Template Designer.
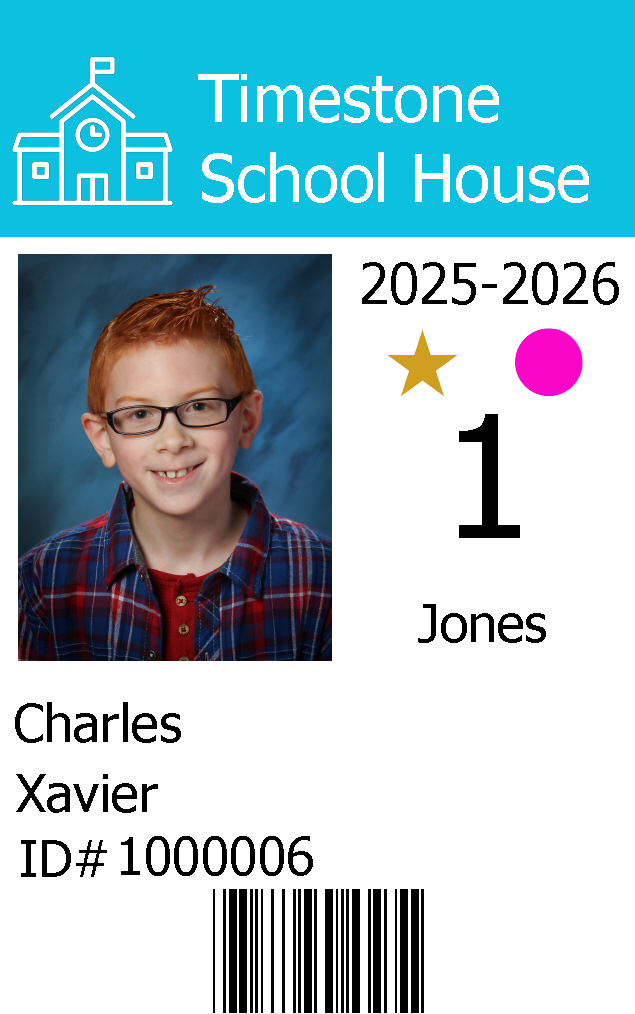
Figure 1: The completed ID design
To follow along, download the folder below, which includes the completed template and all image assets used in this project.
This article assumes the user is familiar with the basics of the Template Designer, importing subject data, and the timestone directories and their paths.
Further Reading: The Basics of NeoPack and the Template Designer
To review the basics of Timestone software’s Details Mode, importing images and data, or template designer, use the following links:
Deciding on information
The first step in the ID Creation process is deciding what data will be included on the ID and ensuring that whatever variable information the user wishes to include has a corresponding data field in the subject, folder, or job data.
In the case of this example, the following information needs to be included:
School Name
School Logo
Year
First name
Last name
ID #
ID Barcode
Grade
Teacher
Coloured bar behind school information that is grade-dependent
Athletic event pass (represented by a star icon)
Bus route (represented by one of three coloured circles)
Fixed text or variable fields
If the ID template is to be used for just one job, data such as the school name, logo, and year can be added directly to the template as static, fixed text. This is the case in the example ID card above. If the template was to have been used across multiple schools, those same fields would have been added as dynamic, variable text instead.
Other elements on the ID card are variable by nature and should be linked to subject or folder data using the Template Designer's variable text and graphic tools.
Creating Custom Fields
To create custom fields:
Open the corresponding job in Details Mode
Navigate to Edit> Fields…
Select the proper tab for the field: Subject, Family, Folder, or File (Job)
Click Add to add a new field entry
Then select the Type of field and whether it is one of the timestone special field types.
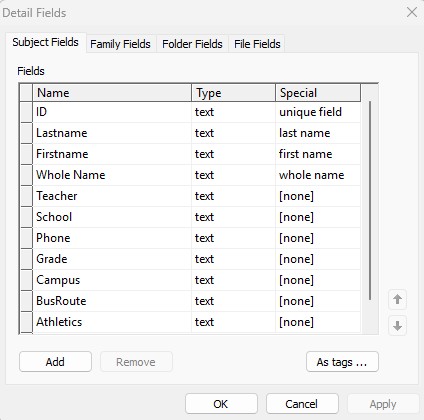
Figure 2: The Detail field dialog window.
NOTE
In this example, all fields- including those used for variable graphics- are set up as Text Fields. The reason for this approach will be explained later in the article.
The subject data can be imported at this time or after the creation of the template.
Creating the Template
Once the Data fields are set in Details mode, the user can begin creating the ID template. For this example, the user will be creating an ID based on the following design sample. Where the green squares represent the subject image and ID Barcode.

Figure 3: ID card design
Once in the Template Designer Mode, the user should create a new fixed-sized item template and set the appropriate dimensions on the toolbar.
For this example, the user is using a CR80 ID card with a standard size of 2.12 × 3.38 inches.
CAUTION
Timestone’s sizeing fields only allow up to 2 decimal places. For this reason it the user should only round up if the design and intended printer allows for content to be printed with full bleed. This may effect the placing of elements like Barcodes, since cropping can effect the ability of the object to be scanned.
The user can then begin to place elements onto the template. This can be done in any order.
TIP
If the user has a graphic example or is trying to match an existing ID design, An image of that sample can be placed as a graphic onto the template to be used as a guide and then removed at any time before the ID template is used.
Placing the Image hole
To add the subject’s photo to the ID, the user will need to insert an Image Hole.
To place an image hole:
Click the Add Hole icon on the toolbar.
Click and drag over the desired area
In the pop-up dialog, select the Image (without Item Design) radio button.
Click OK to place the image hole on the template.
Once placed, the image hole can be resized and positioned manually or adjusted precisely using the Size and Offset controls in the toolbar.
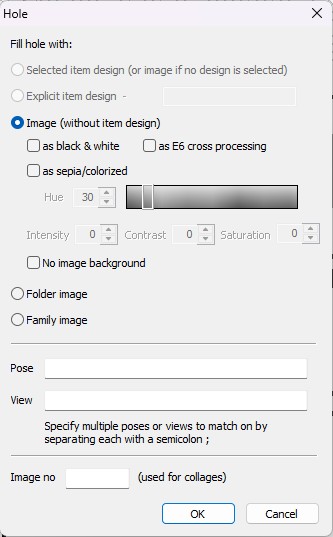
Figure 4: The image hole dialog window
CAUTION
Images must be placed in the corresponding job folder inside image directory for them to appear in the rendered ID.
Add Text Blocks
Next, the user will add all necessary text elements to the ID card, choosing the appropriate font, style, color, and alignment for each.
To add a text element (whether static or variable):
Click the Add Text tool on the toolbar.
Click and drag over the desired area
In the text dialog window, select the desired font and styling
Enter the text into the preview area
Click OK to place it on the design canvas.
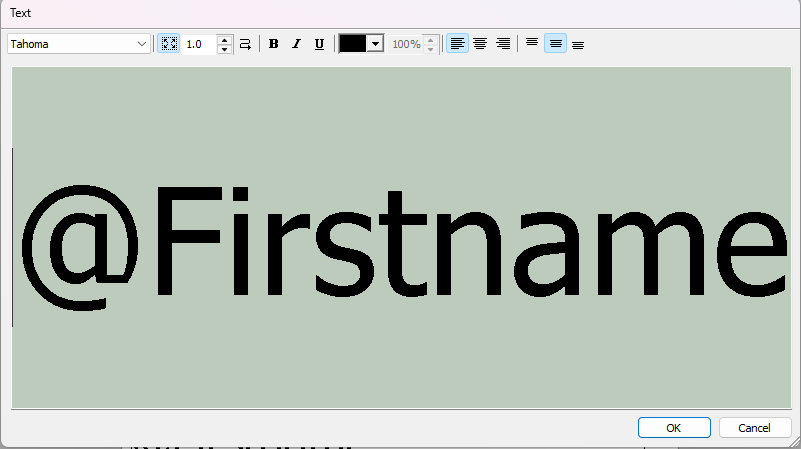
Figure 5: The Text dialog box
Adding Variable Text
To include dynamic text, the user will enter a variable code, or @code, which pulls data directly from the subject, folder, or job-level fields. The format for a @code is @Fieldname
In this example, the following @codes are used, each linked to a corresponding data field in Details Mode:
@ Code | Data Field in Details Mode |
|---|---|
@Firstname | The subject’s first name field |
@Lastname | The subject's last name field |
@ID | The subject’s ID number field |
@Grade | The subject’s grade field |
@Teacher | The subject’s teacher field |
@Year | The file/job level year field |
Figure 6 below shows what the ID should look like at this stage of the design process. In addition to the variable fields, several static elements — such as the school name and the ID# text before the @ID variable — have been added to the template.
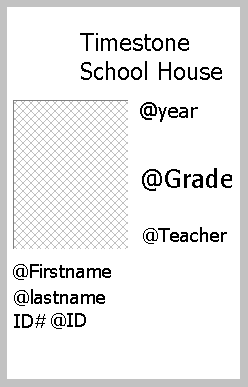
Figure 6: In progress ID template
Add Barcode
Most student IDs now include a barcode that can be scanned for check-in, library access, or lunch purchases. In this example, the barcode will represent the student's ID number.
To add a barcode to the design:
Click the Add Barcode icon on the toolbar.
Click and drag over the desired area
In the setup dialog, choose the appropriate barcode type
Enter the text to be encoded—in this case, the student ID using @ID
Set the desired characters per inch, as well as the color and alignment of the barcode.
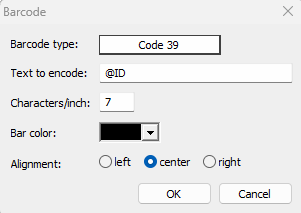
Figure 7: The Add barcode Dialog box
CAUTION
Always verify that the barcode settings are compatible with the scanner and printer setup.
For example, the combination of the subject ID length and the selected characters per inch must fit within the designated barcode area on the ID. Keep in mind that barcodes also include start and stop characters in addition to the actual ID number, which can increase the total barcode length.
If the barcode is too compressed or improperly sized, it may not scan when printed.
Add Graphics
Next, the user can begin adding graphic elements to the design—starting with any static graphics, such as the school logo.
Whether a graphic is static or variable, it must be placed into the template and saved in the appropriate graphics directory folder to ensure it displays and prints correctly.
To insert a graphic:
Click the Add Graphic icon on the toolbar.
Click and drag to define the area where the graphic will appear.
A file browser window will pop up—select the desired graphic file.
Click OK to place the image into the template.
Add labeled image holes (Variable Graphics)
In this example, three graphic elements will be set up as variable graphics using the Labeled Image Hole option. This allows the template to display different images based on the subject’s data.
The variable elements include:
A colored bar at the top of the ID, positioned behind the school information. The color changes based on the subject’s grade.
A bus route icon, represented by one of three colored dots (Pink, Green, Blue). This appears only for students who ride the bus and remains blank for others.
An athletic pass icon, shown as a gold star, which appears only for students with pass access.
These elements will be controlled by corresponding data fields and linked to graphic files stored in the designated graphics directory.
To add a variable graphic to the template using a Labeled Image Hole:
Click the Add Labeled Image icon on the toolbar.
Click and drag over the desired area on the canvas.
In the Labeled Holder dialog box, enter the appropriate @ code (e.g., @BusRoute) into the label field.
Click OK to place the element.
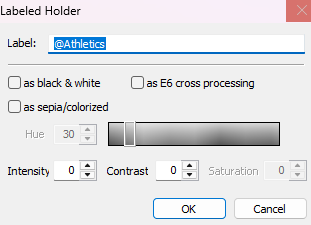
Figure 8: Labeled holder dialog box with the image set for the Athletics field
NOTE
The data entered in the corresponding field must exactly match the file name of the graphic with or without the file extension.
Additionally the graphic files must be placed in the corresponding sub folder within the Graphics direcotry to display properly.
Data Fields for Variable graphics
There are two ways to associate variable graphics with subject data in Details mode using the field type setting:
Graphic Field Type: Allows the user to manually import an image file directly into the data field, which can then populate a labeled image hole. However, these graphic fields cannot be filled in bulk using a .csv import or the Populate Field option.
Text Field Type (Recommended for Bulk): For mass importing, the field type must be set to text. Enter the exact filename into the field. The system will use this text to locate and insert the corresponding image from the graphics folder.
The text field type method is used in the current example to allow flexible and scalable use of variable images based on subject data.
After placing all the graphic elements on the template, the user can fine-tune their position and size to better fit the layout.
For example, since the colored bar was added after the school name and logo, it will appear on top of those elements. To correct this, use the "Move to Bottom" icon on the toolbar to send the colored bar behind all elements of the design, including the text and logo.
Once all graphics are placed and properly arranged, the template should resemble the example shown in the image below.
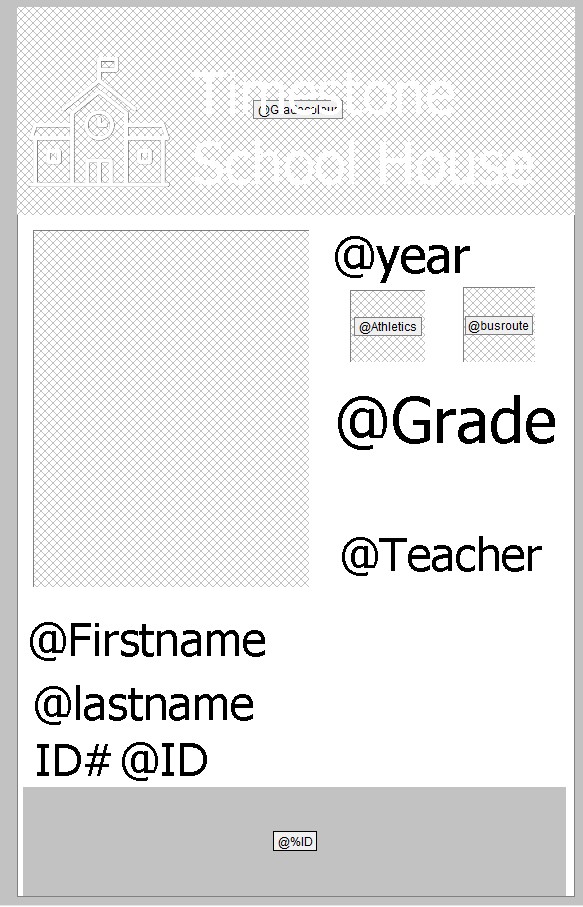
Figure 9: The complete ID template.
Saving the template
Once all elements have been placed and arranged as needed, finalize the design by setting an item description in the Properties panel. Then, save the template into the appropriate pathed folder within the Templates Directory.
Printing the ID design
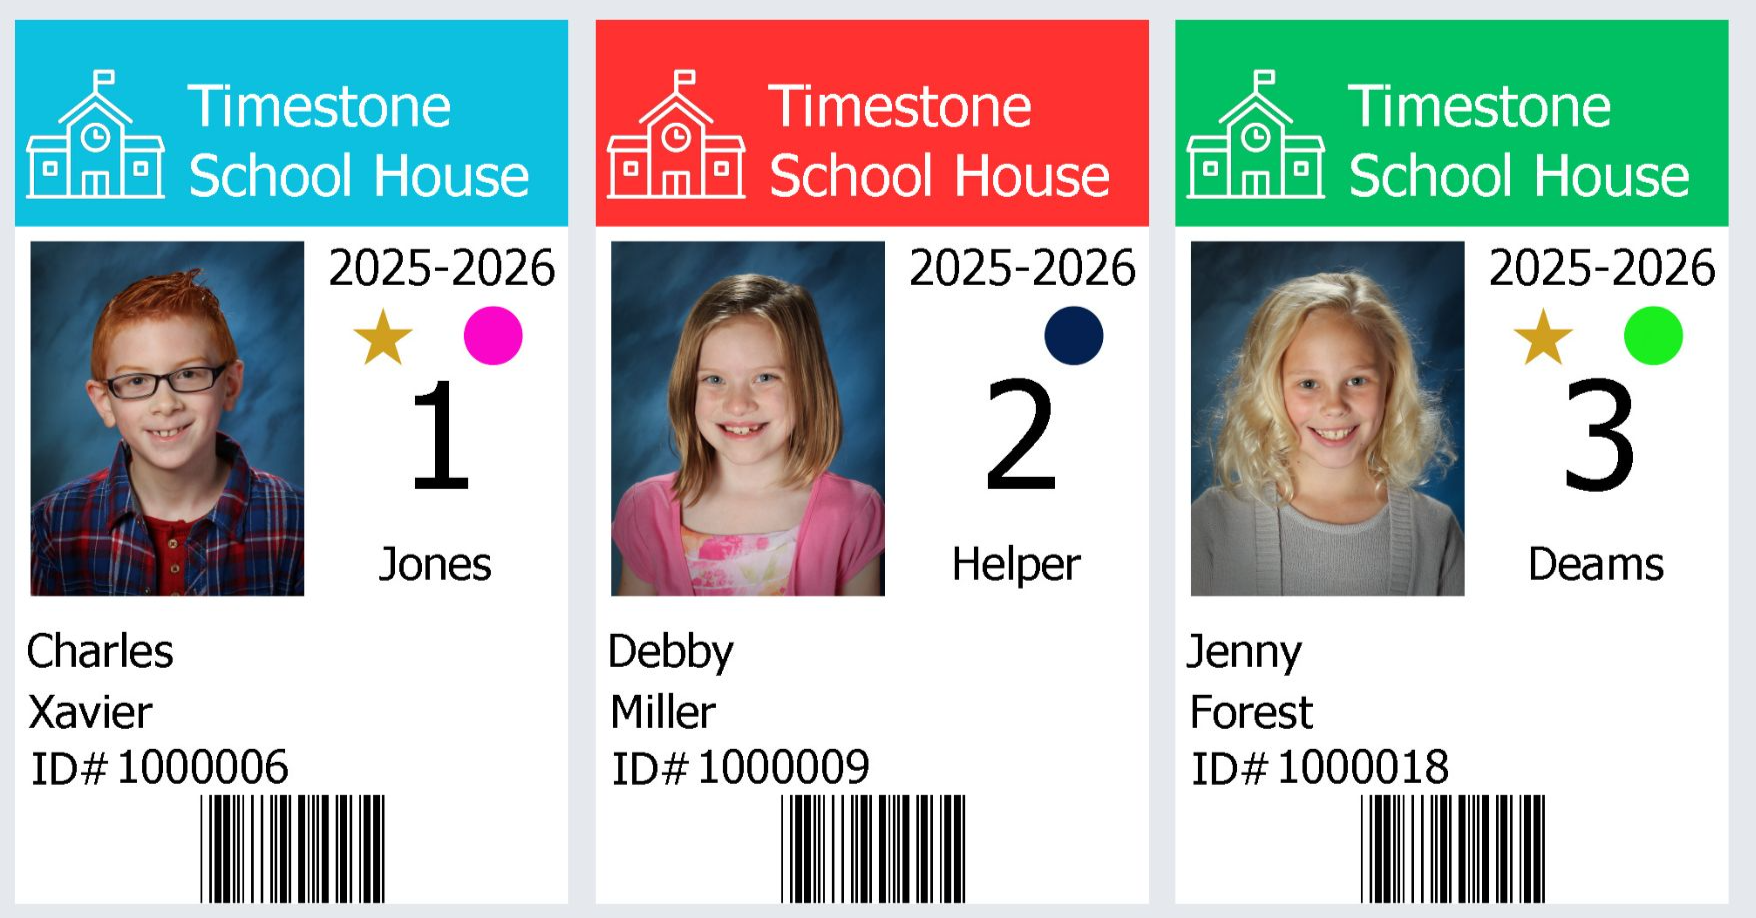
Figure 10: An example of three rendered IDs using the completed template.
While there are several ways to render and print student ID cards, the fastest method for processing an entire school or class is through Item Sheet Mode.
Once the template is complete and the images are imported, open the job and navigate to the Item Sheet Mode. Using the New Item Sheet icon to initiate the render process, then follow the steps below:
Selecting Subjects to Include and Naming the Item Sheet
On this screen, choose which folders or individual students to include in the render.
You can select an entire folder (e.g., a class or grade) or manually pick individual subjects.
It’s also recommended to add a description to help differentiate this sheet from others—especially useful when rendering multiple groups.
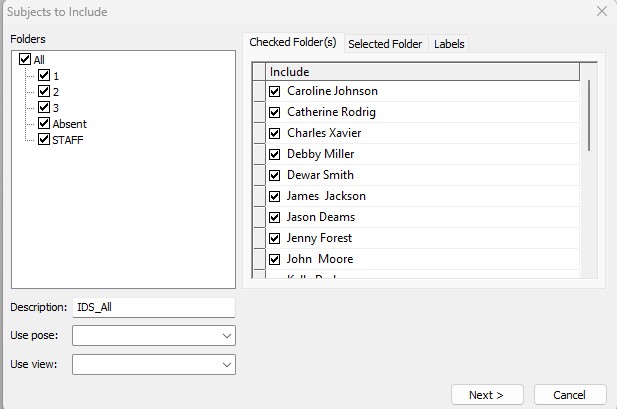
Figure 11: The subjects to include dialog window.
Click Next to continue.
Selecting Template and Arrangement
Select the desired Item template, in this case, the Student ID TSH (Timestone School House).
The user has options to select a layout background, but for this case, just set the Arrange settings to 1 across and 1 down to have a single subject ID per page.
Click Next to proceed.
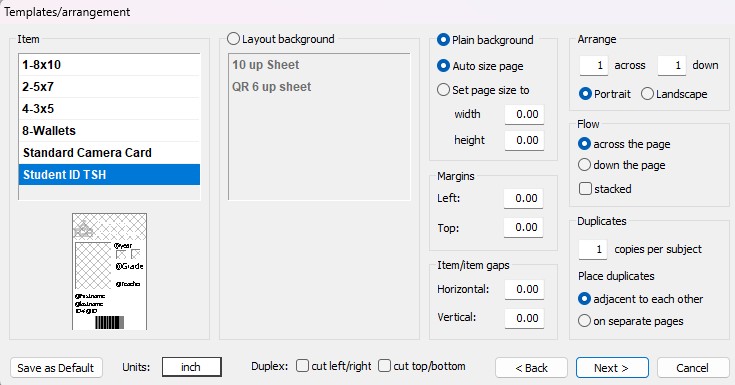
Figure 12: The template and arrangement Dialog window
Setting the Sheet page options
Set the sort order to determine how IDs are organized. In this example, IDs are sorted by:
Folder (e.g., Grade)
Teacher
Student Name (Alphabetically)
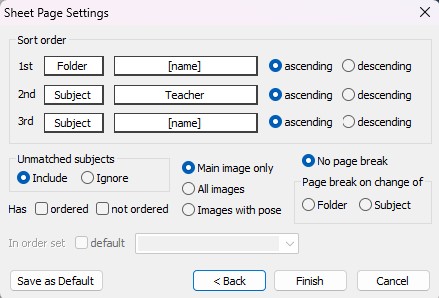
Figure 13: Sheet Page settings
Click Finish to complete the rendering process.
This will complete the render with one student per page. The ID card Item sheets can then be mass printed via the software, “printed” to a PDF, or “printed” via Bitmap to have each card named for the student and saved as an individual JPG.
TIP
Rendering the item sheet using the Bitmap option is a quick and effective way to create a "leave-behind" set of extra ID cards for the school. However, since the output is flattened image files (e.g., JPGs), school staff will not be able to edit or adjust student data on their end.
Printing IDs Via CapturePost
If the user is printing IDs in the field using CapturePost, it's essential that the template and graphics are placed in the correct folder structure.
Specifically:
The template must be stored in a folder named: jobname#Templates
The graphics must be stored in a folder named: jobname#Graphics
Both of these folders must be placed adjacent to the TNJ file, just like the jobname#Images folder.
CapturePost relies on this structure to locate and load the necessary resources. If the folders are not placed correctly, the system will not be able to render or print the ID cards.
The diagram below shows a simple folder layout that a photographer could copy to a local drive before heading into the field, ensuring all required assets are available and properly linked.
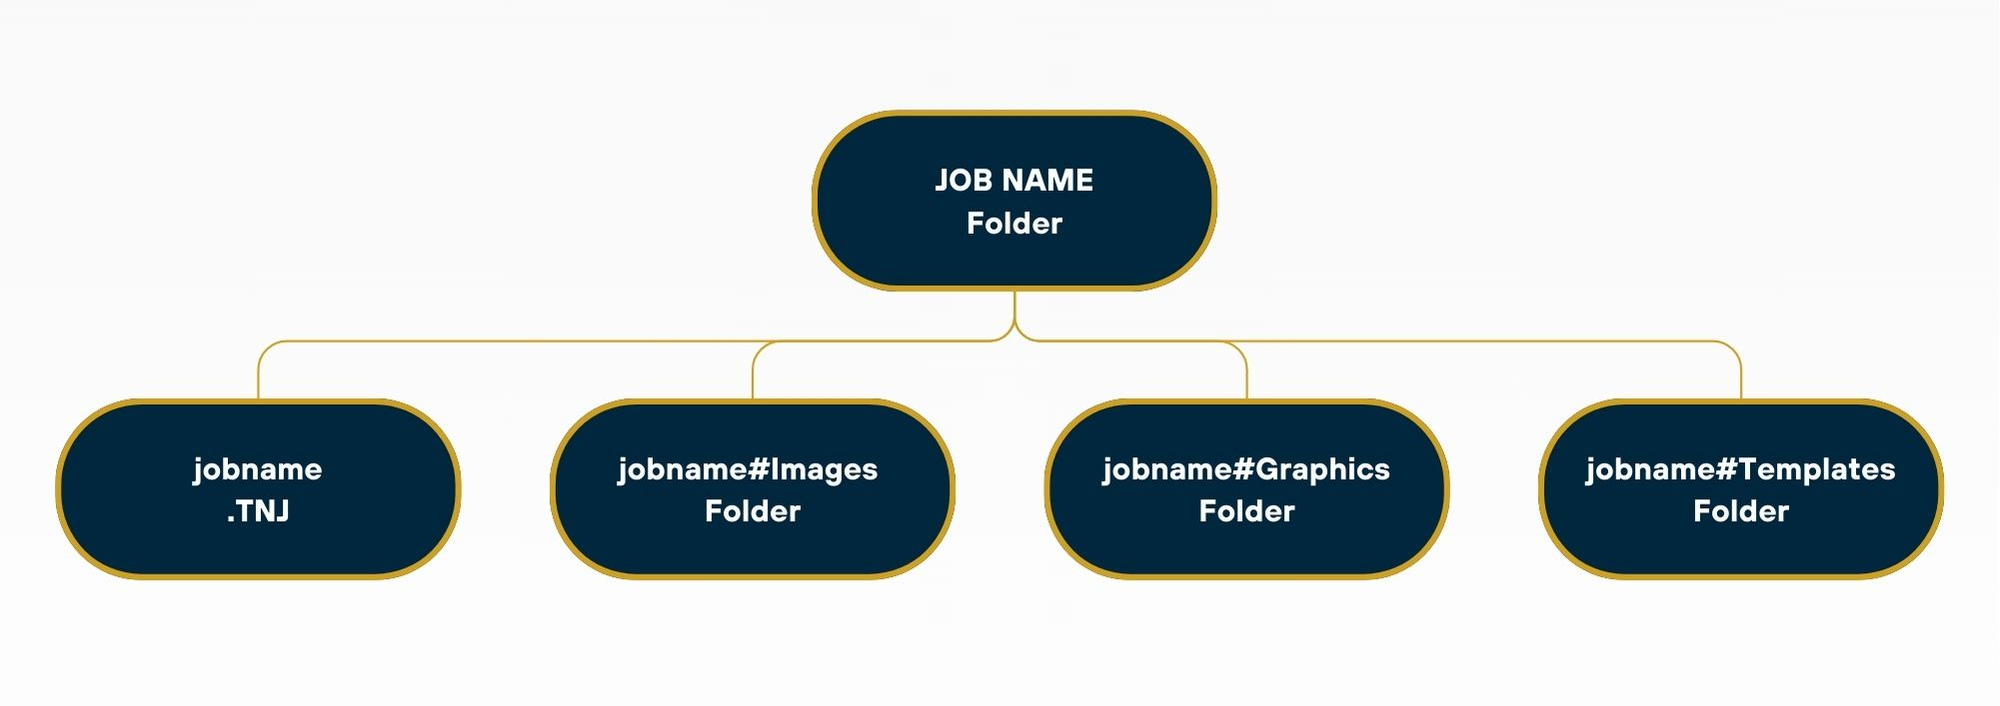
Figure 14: Suggested CapturePost Job folder with the required subfolders to print IDs in the field.
Further Reading: Printing IDs In CapturePost
A useful feature of CapturePost is the ability to print IDs or other small items on-site at the time of photography.