“Build your Own” packages, also known as “Create your Own” or “Pick Your Own” packages, are customizable packages that allow the online customer to change the configuration of products in the package. For example, the photographer may wish to offer a package comprising of 4 8”x10” sheets where the customer has the ability to configure each sheet as either 8×10, 2-5×7s, 4-3×5s, or 8-wallets.
The photographer creates these packages by utilizing item templates, pack layout templates, and item tags.
Examples
The IOS demo website contains several examples of the end-user experience with ‘Build Your Own Packages’.
Examples
For each of the two examples below, go to the Blue package category and select any of the ‘Create Your Own’ packages.
Sample templates
To assist in creating a “Build Your Own” package, the user can choose to download the templates below or create custom templates using the instructions below.
Creating the templates
Before creating a “Build Your Own” package, the user must select a single sheet size for all of the options to be placed upon. For this example, the sheet size is 8×10 inches. Once the sheet size is decided upon, the templates can be set up.
For each customizable unit or sheet that the user intends to offer to the customer, the user should create a separate Pack Layout template (plt).
To create the unit templates:
In NeoPack’s Template Designer, create a new pack layout template
Set the Canvas size to 8×10 inches
Add an image hole set to “Selected Item Design.”
Under File> Preferences, add a Key, an Item Tag, and a default item
For the Key, choose something that can be iterated easily for the maximum number of sheets allowed in the Build Your Own package. In this example, “8×10o#”
For the Item Tag, it is important to choose something that will not be accidentally called upon for another product, “pick” for Pick Your Own in this example. This tag should be kept the same for all pack layout templates (plt files) and item templates (pit files).
For the Default Item, the user can choose to display any of the item designs that will be made in the next step.
Save the Template As “8×10 for Unit #”
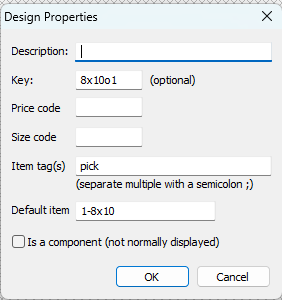
Figure 1: The design properties window (Step 4)
The user can then duplicate this newly created template for the number of units they wish to offer to the customer, remembering to change the number in the file name and key to reflect the appropriate number template. It is important that the user does NOT change the Item Tag associated with the Build Your Own, “pick” in this case, or the options will not display properly.
Now that the desired number of unit/sheet templates (plt) is made, the user must create the fixed-size item templates (pit files) for the desired options. In this example, since 8×10 is the given sheet size, all options must be created on an 8×10 inch item template regardless of the desired print size.
To create the option templates:
In NeoPack’s Template Designer, create a new fixed-size item template
Set the Canvas size to 8×10 inches
Add the desired number and size of image holes to the canvas
Under File> Preferences, add the appropriate Item Tag. It is important to use the exact same tag that was used on the Pack layout templates, “pick” in this example. This should be kept the same for all pack layout templates (plt files) and item templates (pit files)
Save the Template as whatever the user wants the customer to see. In this example, the options are 1-8×10, 2-5×7, 4-3×5, 8-wallets, all with the extension “.pit”
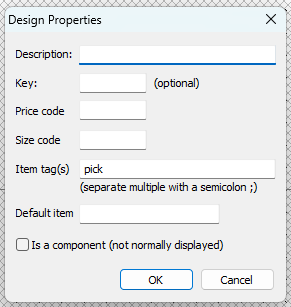
Figure 2: The design properties window
Optionally, the user can create a Package template to more clearly display that this package allows the customer to select their own sheets.
There is an example template included in the download above, and another article dedicated to creating and applying these templates to Packages in IOS.
Further Reading: Package Templates in IOS
Unlike Customer Versions of Templates, which are tied to a particular product, Package Preview Templates, Package Templates, are a standalone template that is used to depict an entire package, regardless of how many products are in the package
Creating the products
In tsAdmin, navigate to the products tab and add a template for each unit of the intended package. The products can be reused by further ‘Build Your Own’ packages. For example, having defined 4 products as shown in the screen grab below, the same products can be used for 1, 2, and 3 unit packages if needed.
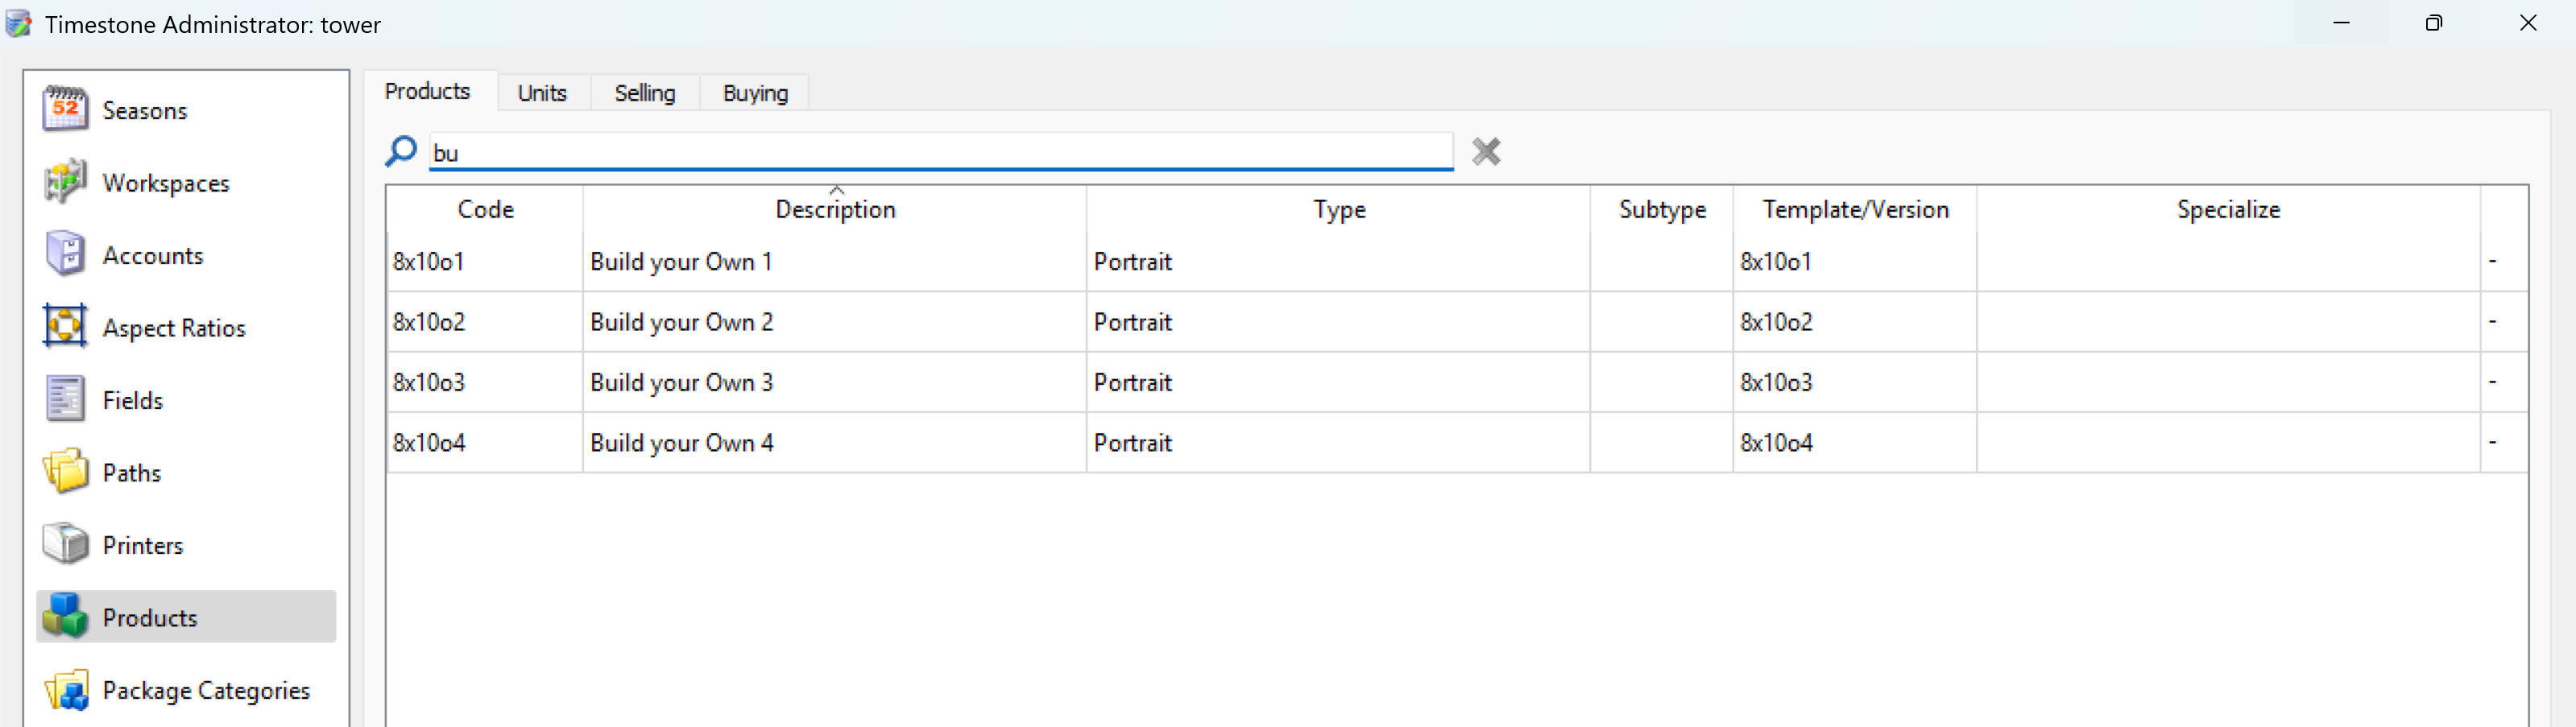
Figure 3: Setting up products for a “Build Your Own” Package
Creating the package
Once the products are created, they can be added to a package in the normal way.
To create the “Build Your Own” package:
Navigate to the Offers/Packages tab in tsAdmin and select the appropriate offer
Select or create the “Build Your Own” package, giving it an appropriate package code and title, such as “BYO4” and “Build Your Own (4 Sheets)” respectively, in the example below
In the Comprising of area, add the appropriate number of sheets using the applicable product for that sheet to the package
Submit the changes when complete to save the new package
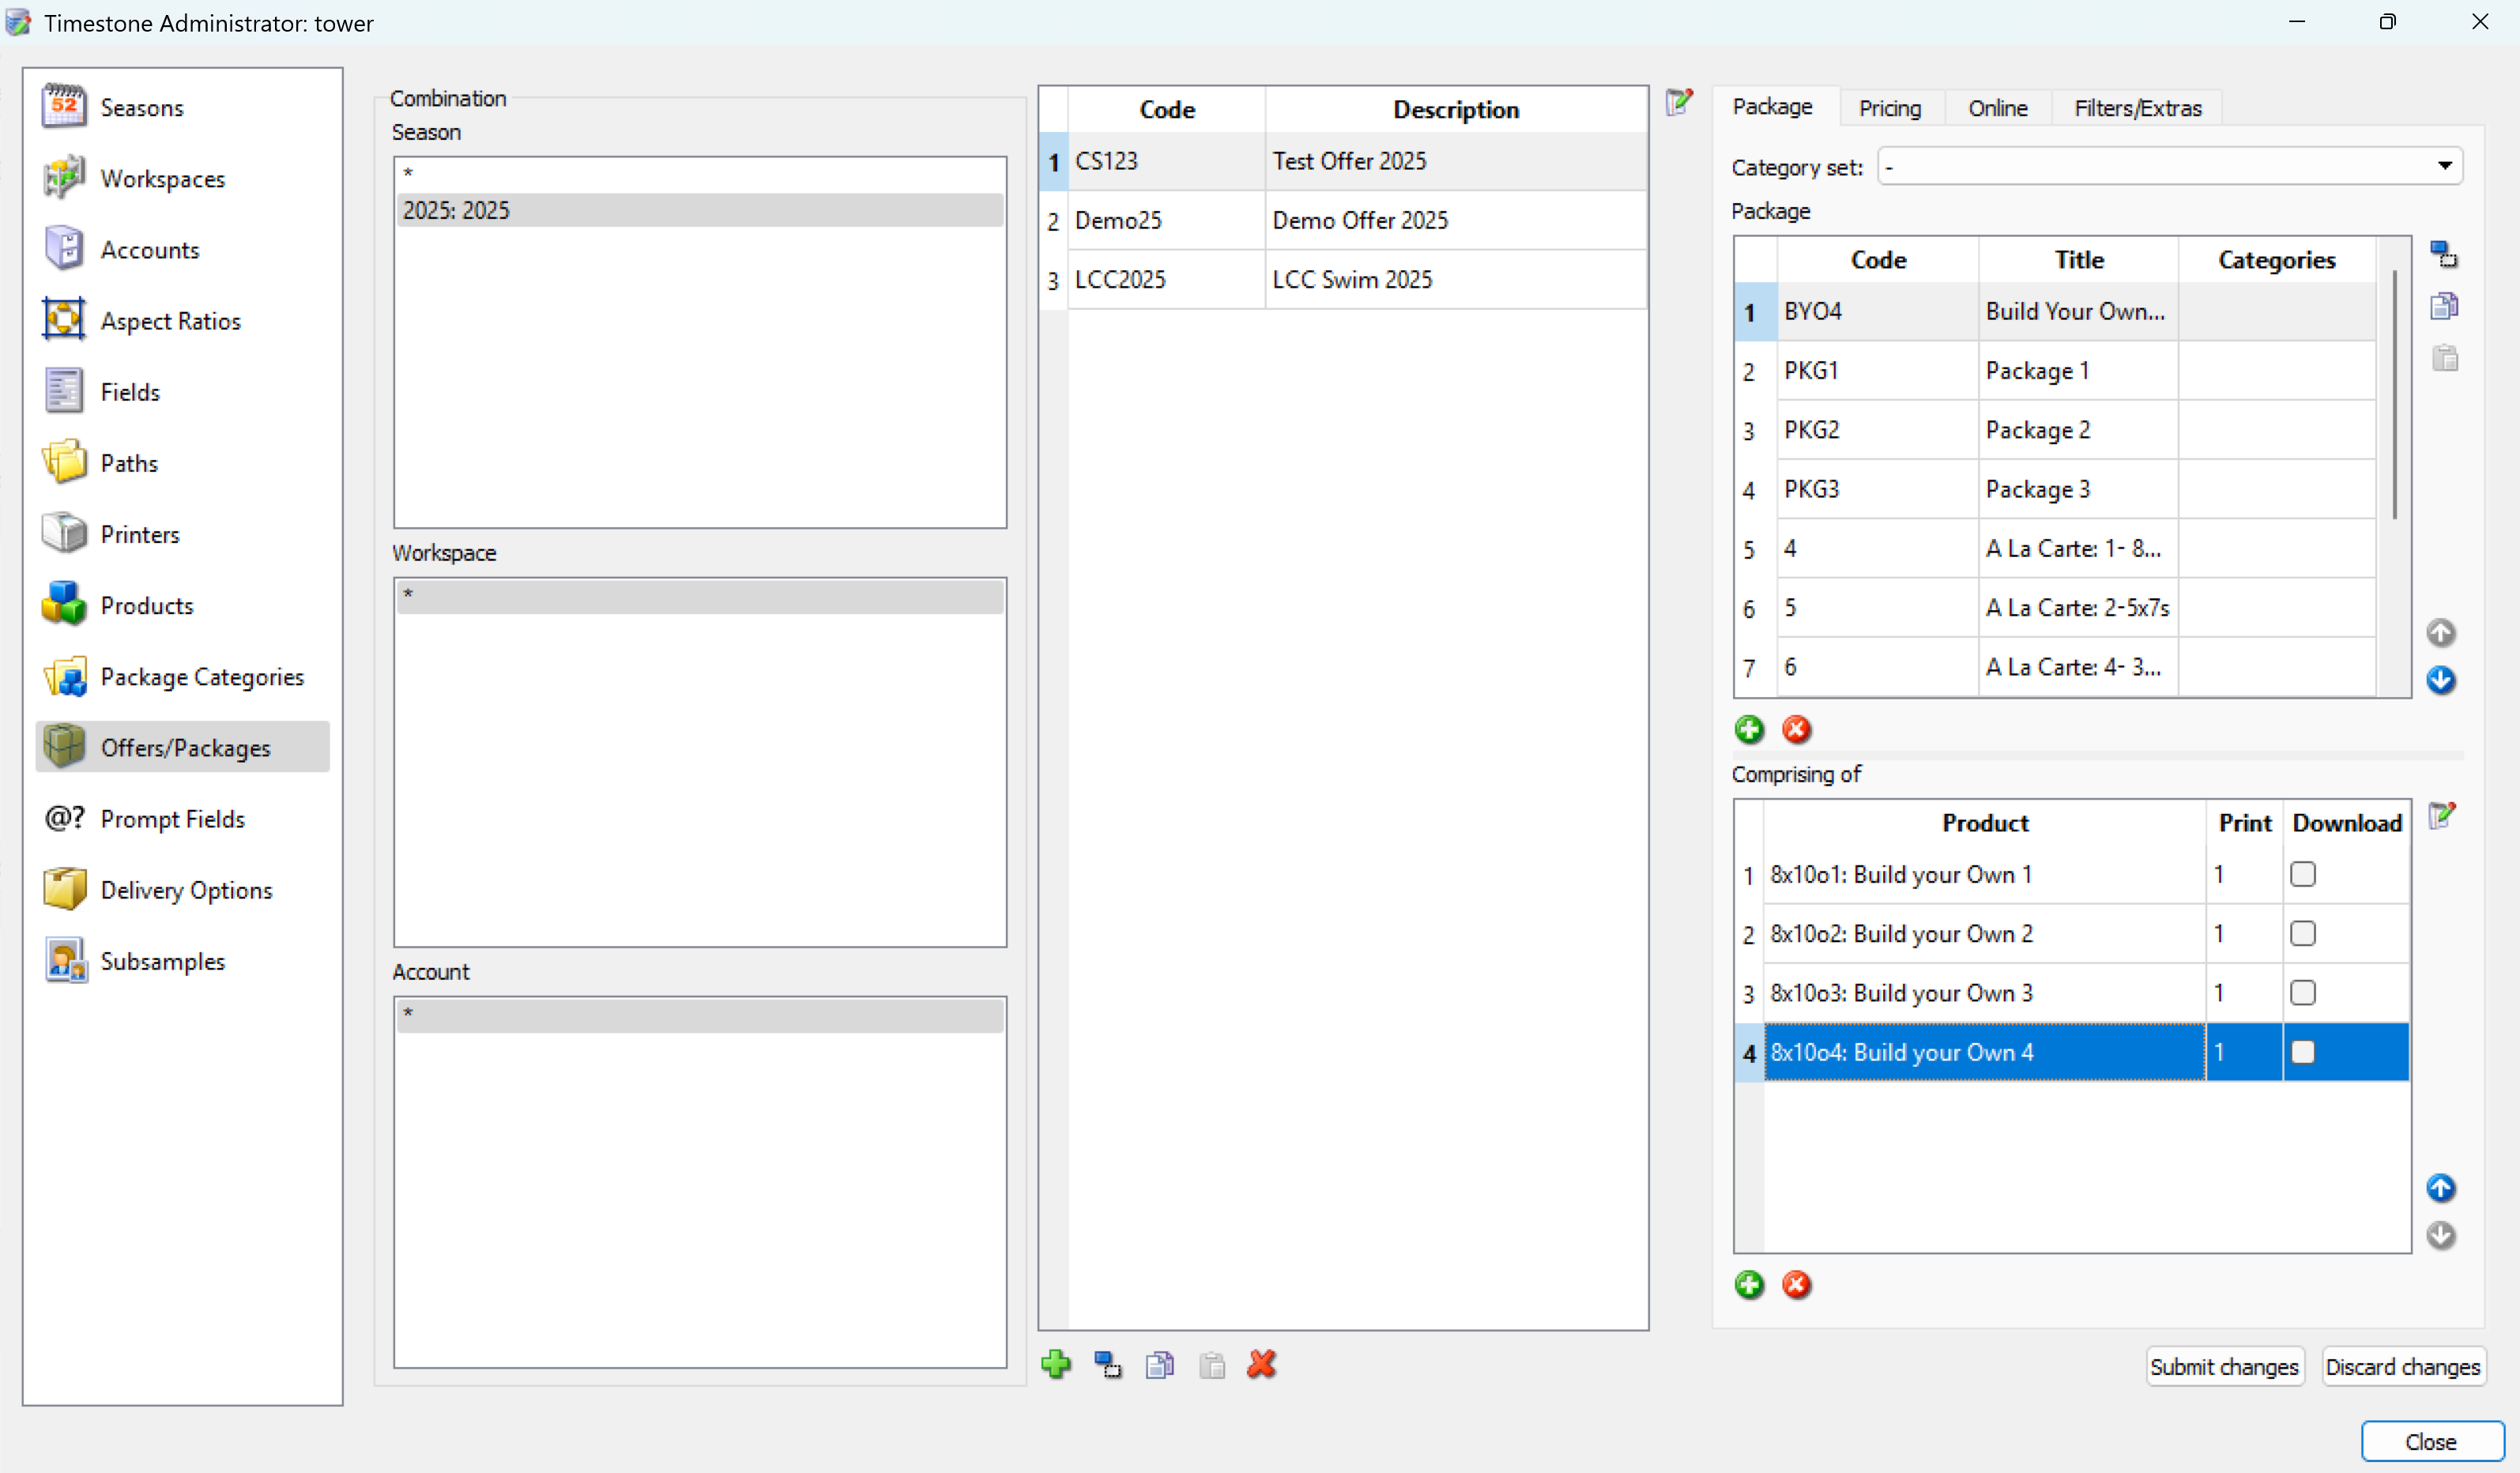
Figure 4: The Offer/Package creation settings in tsAdmin
TIP
It is also common practice to create a package template to provide a more descriptive preview of the ‘Build Your Own’ package. Customer versions of the pack layout templates can also be used for this purpose however keep in mind how the item options will appear as the customer selects the different options to configure each unit.
Further Reading: Package and Customer Templates
Package Preview Templates (more commonly referred to simply as Package Templates) are a stand-alone template that are used to depict an entire package regardless of how many products are in the package
While a template defaults to a printable version, it is possible to create customer and preview versions of any pack layout templates. Customer versions of templates are used in the Timestone Internet Ordering System (IOS) when live rendering is chosen as the option to display Products.
FAQ
What are 'Build Your Own' packages?
'Build Your Own' packages are customizable packages that allow customers to configure each sheet in the package to different print layouts, such as 8×10, 2-5×7s, 4-3×5s, or 8-wallets.
Is it necessary to use the same item tag for all templates?
Yes, it is important to keep the item tag consistent across all pack layout templates and item templates to ensure proper display.
Can the same products be reused for different packages?
Yes, products can be reused for multiple 'Build Your Own' packages; however, each unit in the package needs its own template.
Is there a specific sheet size that must be selected for the options?
No, the print size is not specific; however, a single sheet size must be selected for all products in the package.