Jobs are uploaded to the Timestone Internet Ordering System via the tsIOS utility. Apart from uploading the job and (if present) images, tsIOS is used to set several parameters pertaining to how the job behaves once online.
The installer for tsIOS is combined with that of Fulfill and may be downloaded from the Timestone Software website. A license is not required.
Launching tsIOS
tsIOS connects to both the local timestone database and the online site. As such, the user will need to enter connection parameters and credentials for both these objects in the tsIOS connect window.
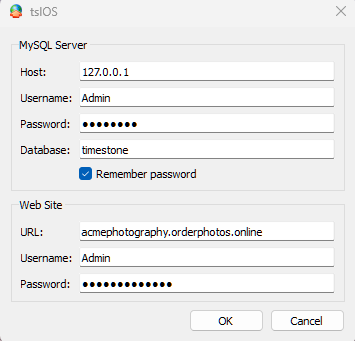
Figure 1: tsIOS connection window
TIP
The connection window of tsIOS is ‘remembered’, meaning once the app is shut down and relaunched the the user does not need to re-enter the parameters. An option to Remember password is also available.
Credentials needed for tsIOS
It is advised to enter the same credentials as those for connecting tsAdmin.
Host: The name or IP address of the MySQL server
Username: The username as used to connect to tsAdmin
Password: The password as used to connect to tsAdmin
Database: The local database (default is ‘timestone’)
Credentials for connecting to the website are provided when the website is created. They are the same credentials used to connect to the control panel.
Site: The full website address, eg, https://acme.orderphotos.online
Username: The username as provided
Password: The password as provided
Uploading a job
To upload a job to IOS:
Open the tsIOS app and log in as described above
Click the Add New Job button, a Green plus icon in the lower left-hand corner of the window; this will launch the New Job window.

Figure 2: The New Job interface
Select the Job to upload and select the desired Offer.
The selected job will appear under the Friendly name column with a green pause icon. This means that ordering on the job is not yet live or is paused.
For a quicker setup, there is the option to copy settings from an already live job to the newly selected job.
Click on the job name to make any changes to the desired offer, processing, shipping, image handling, and so on.
Once all settings are confirmed, click Upload.
This will prompt a loading bar to appear while tsIOS uploads the job data, images, backgrounds, graphics, and templates to the site.
When complete, the pause icon near the job name will then turn to a green play button, indicating it is live on the site and available for ordering.
TIP
Ordering can be paused at any time by clicking the green play icon, changing it to a Pause icon, and clicking Upload…
Job Settings
tsIOS offers a range of settings to control how each job functions online. These include:
General
Image Handling
Checkout
Provider
Text Strings
Job Keys & Identify
Switching
These options allow the user to select the desired Offer, specify how orders are to be processed, set the tax rate for purchases, select the desired delivery options, and much more.
General Settings
Within the General tab, the user can make changes to the offer, the expiration date of the job ordering window, and the method of Order Processing.
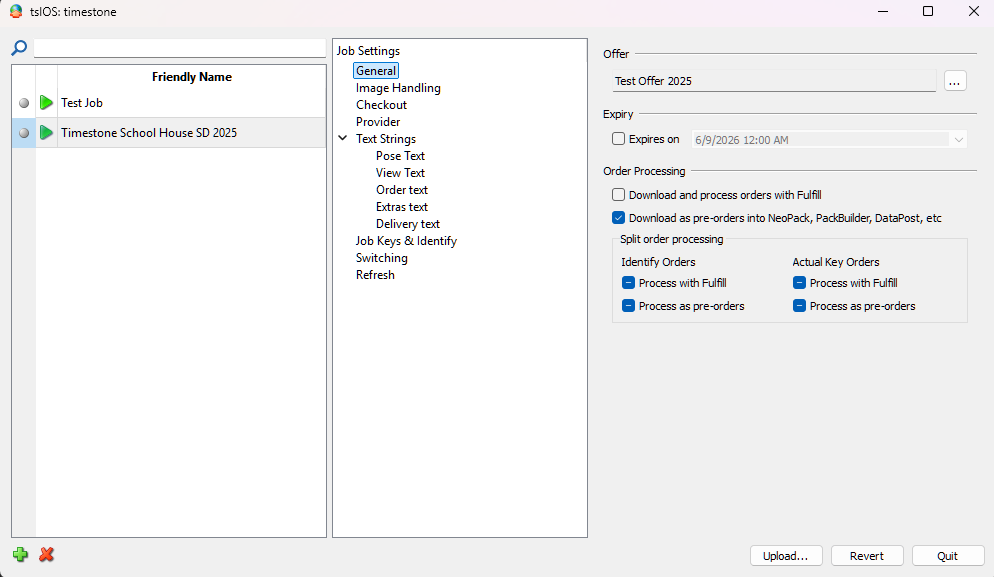
Figure 3: The tsIOS General settings menu
Changing the offer is as simple as clicking the “ … “ button next to the current offer applied to the job and selecting the desired offer from the list.
It is not possible to upload a job without an offer selected.
This option allows the user to set an expiration date and time for viewing and ordering on a given job.
Once the expiration date is reached, the job will still be online but in a ‘paused’ state. A customer will not be able to commence an order however if the customer had commenced the order before the expiry date, they will be able to complete it even once the expiry is reached.
When configuring the order processing, the user can choose between two methods of order handling:
Download and process orders via Fulfill
Download into NeoPack (or another application with Orders Mode)
Split Order Processing
Split order processing options are also available, allowing both of the above options for the same job simultaneously. A typical use case is to have Identify Orders to be processed as pre-orders into NeoPack, while Subject Key orders are sent to Fulfill.
Further Reading: Order Processing
Orders and options in Fulfill
Image Handling Settings
When uploading a job via tsIOS, several options are available to control which images are to be uploaded and how the Packages are to be displayed.
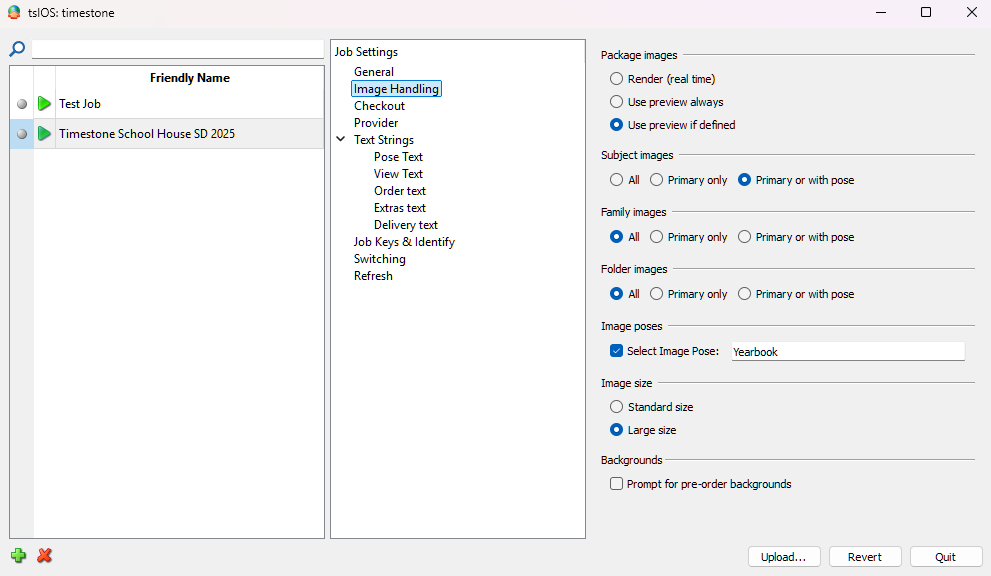
Figure 4: The Image Handling menu
For package images, the user can choose one of the following options:
Render in real time - packages are rendered onsite, and images are displayed in the printing templates
Always use an image preview - uses a fixed graphic to depict the packages
Use a preview if one has been defined - uses the Package Template if specified, otherwise uses the image preview (fixed graphic), or if no preview at all will use render realtime.
A thorough discussion of the three options is available here:
For subject images, the user can decide how many or which images are shown to the customer; the application can display:
No images
All images associated with a subject
Only the primary image
The primary image and/or any image assigned a pose. The user can upload all poses, or a particular pose by entering the pose number or label into the associated field (Many poses can be entered separated by a semicolon “;” or a pose may be excluded by preceding it with a minus sign “-”)
These same display options are also available when working with images assigned to Families or Folders.
A thorough discussion of the three options is available here:
To allow customers to select a specific image pose (such as a yearbook pose for seniors), the user can:
Check the box labeled Select Image Pose
Enter the desired pose name into the provided text field
TIP
This will propt the user to pick their pose from the available images. The customer can choose to dismiss this step and proceed to ordering area.
Using IOS for Yearbook Pose selection is discussed here:
It is also possible to choose what size file the image preview is on the site. The user can select between a Standard size and the Full image size.
If the user wishes to offer background options for customers to choose from, check the box adjacent to Prompt for Backgrounds.
Checkout Settings
The Checkout tab allows the user to configure how taxes, payments, and delivery options are handled during the ordering process.
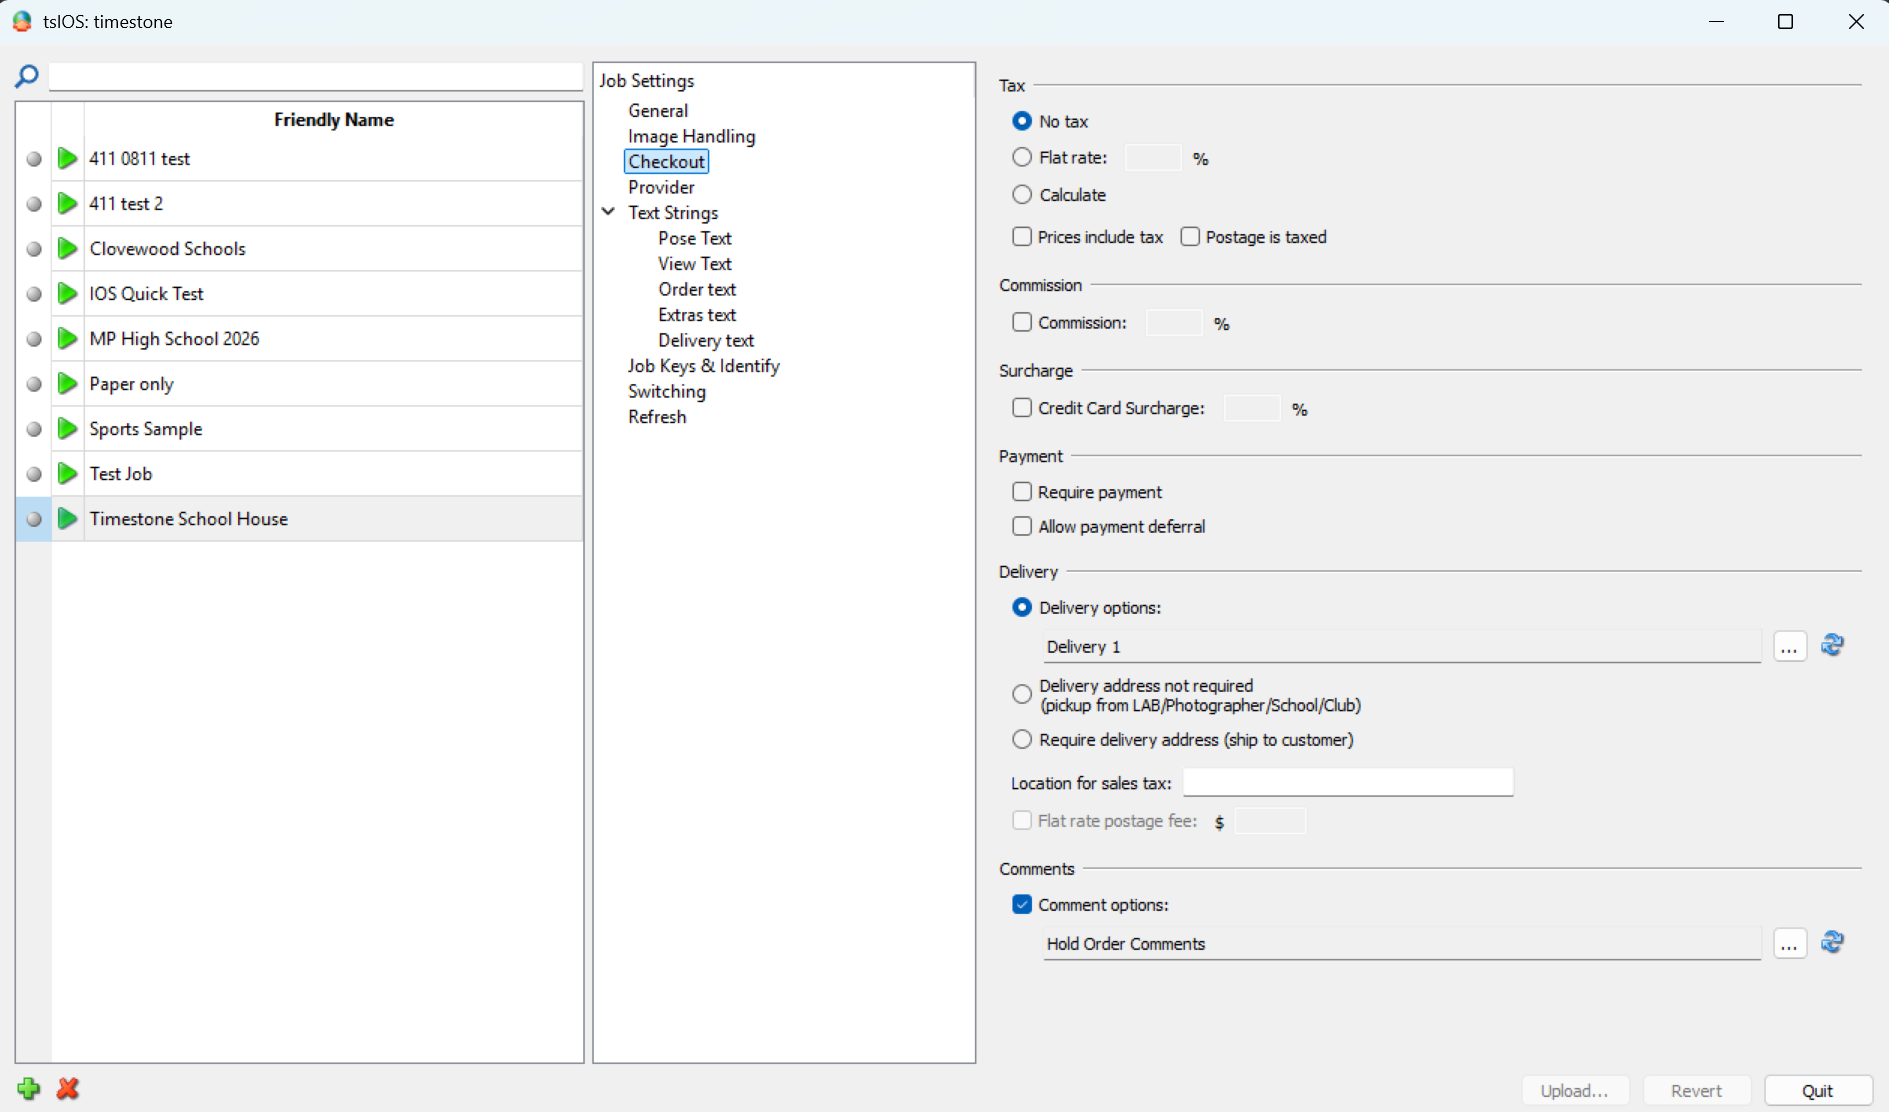
Figure 5: The Checkout settings menu
The user can choose from several options for tax calculation:
No tax
Flat tax – In this case, the user should enter the desired tax rate in the provided field
Calculate – Determine the appropriate sales tax percentages based on the Delivery location of the online order, only applicable to studios within the United States
Further Reading: Calculate Sales Tax
With the Calculate option selected, the system can determine the appropriate sales tax percentages based on the Delivery location of the online order. A video accompanies this article.
Additional tax options include:
Whether product prices include tax
Whether postage should be taxed
If applicable, the application can determine a commission percentage based on the percentage provided in the applicable text field.
There are two payment options available:
Require Payment
Allow Payment Deferral - seldom used
Further Reading: Payment Providers
Timestone Online Ordering supports a variety of payment processors globally.
An option to apply a Credit Card Surcharge as a percentage of the order total.
The surcharge is automatically calculated and added at checkout.
There are three delivery options:
Delivery Options allows the user to select a set of custom delivery options that have been defined in tsAdmin.
The Deliver address not required option does not allow the customer to select a direct ship method and, therefore, does not prompt the customer for a delivery address.
The Require Delivery Address option forces the customer to input their delivery address. A flat postage fee can then be applied.
With Calculate selected, the Location for sales tax field allows the user to provide a job-level zipcode to be used for sales tax within the US.
Further Reading: Delivery Options
IOS supports three different methods of handling the delivery of online orders.
Similar to Delivery options, the user can create a set of comments, defined in tsAdmin, for the customer to select from online.
Further Reading: Comment Options
By default, customers can freely type a comment or note for an order as part of the checkout process. Comment Options enable the photographer to offer a selection of pre-set comments for the online customer to optionally append to an order.
Provider Settings
Provider codes are often used by labs uploading jobs for several photographers. The provider code (and name) is used in several ways, such as helping to identify which photographer an order belongs to.
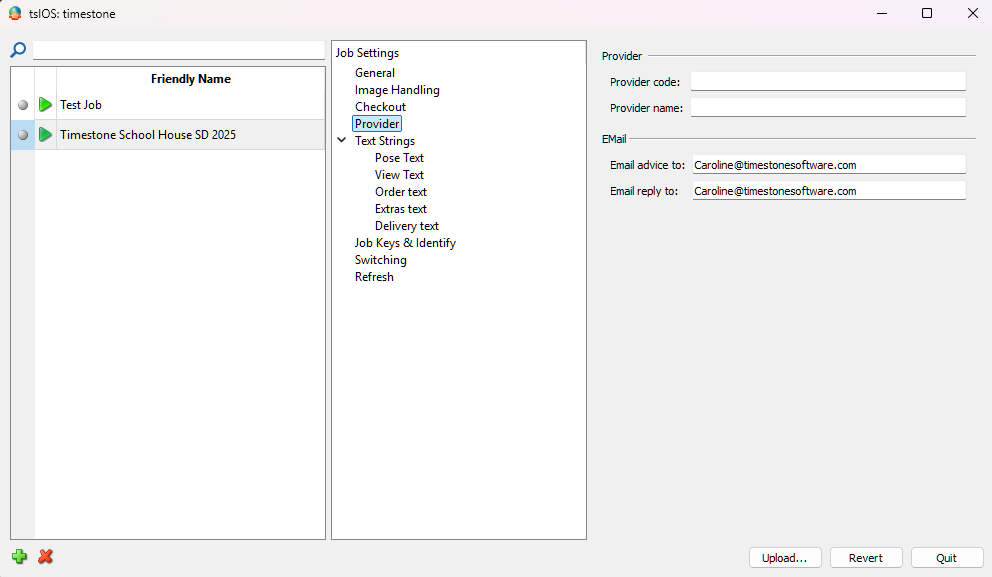
Figure 6: The Provider settings menu
Emails
IOS automatically sends customers an order confirmation email upon the successful payment of an order. The FROM address of these emails is set as a site configuration parameter.
Two further email parameters can be set on a job-by-job basis in tsIOS.
Email Advice to — An email address to which the photographer will receive a copy of the Order Confirmation email
If left blank the photographer will not receive an email
Email Reply to — An email address used if the customer replies to their Order Confirmation email
If left blank the FROM address is used
Text Strings
This section allows the user to display custom text to the customer for the different aspects of viewing and ordering.
TIP
The user can opt to provide the text string in alternate languages, by checking the Translate string into multiple languages box, selecting the desired language and inserting the translation.
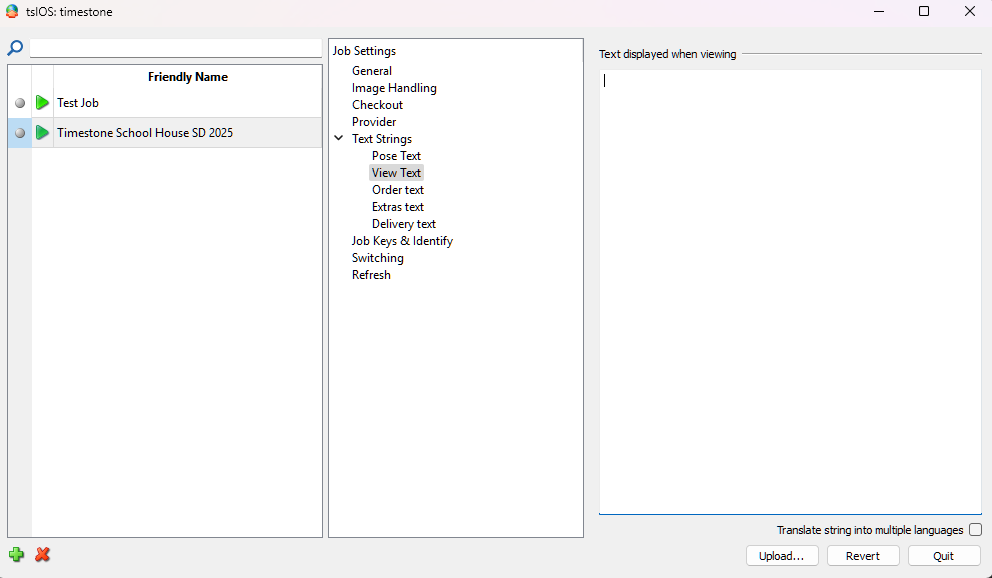
Figure 7: The (view) text string entry window
Types of text string:
Pose Text
View Text
Order Text
Extra Text
Delivery Text
The Delivery String also offers a standard message of “Please allow ____ days for delivery,” where the user can input the desired number of days.
TIP
Many users prefer to use snippets to display text on the website rather than text strings in tsIOS since snippets support variable data through the use of @ codes.
Additionally, snippets can be made conditional meaning they will appear (and disappear) depending on factors the user sets. One such use, amongst many more, is to have snippets change depending on the language the customer selects.
Further Reading : Snippets
Snippets and popups are an important part of IOS enabling the photographer to display messages and banners on their site.
The ability to make these objects Conditional means they can be displayed in different circumstances.
A powerful feature of snippets is the ability to display variable data through the use of @ codes
Job Keys & Identify
The Job Keys and Identify tab allows the user to choose how the customer logs into the site to access the job, and how the system will interact with identify orders.
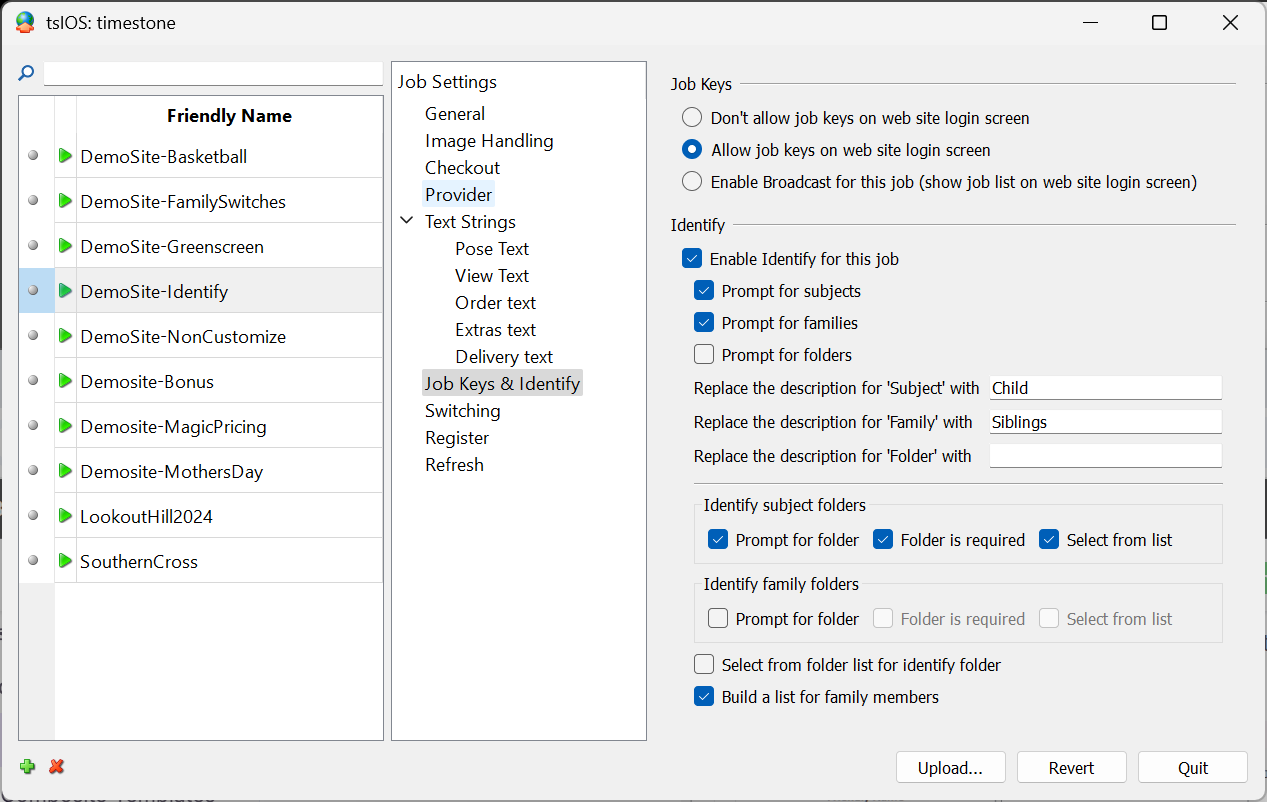
Figure 8: The Job Keys and Identify settings menu
Job Keys
The user can select from one of the following Job key options:
Don’t allow job keys on the website login screen
Allow job keys on the website login screen
Enable broadcast for this job — this will display a job list dropdown on the website login screen.
Identify
The Identify tab is mainly utilized in pre-ordering situations before the photography day. A differentiating feature is that all customers enter the site with the same Access Key - a job key.
ATTENTION
Since all customers use the same Access Key, Identify Ordering will never display images.
The Identify functionality enables the user to gather essential subject (or family) details—like name and folder (grade, team, or class) — and associate or Identify them with the appropriate subject (or family) record later, once orders have been downloaded.
To get started, the user must activate Identify for the chosen job by ticking the relevant box. Once activated, various configuration settings become accessible, allowing the system to request information about the subject, folders, and/or families from the customer. Furthermore, the terms Subject, Family, or Folder can be substituted with the user’s preferred terminology, such as replacing folder with grade or team.
The user can specify whether or not to prompt the customer for the subject’s folder, and if so, whether this is mandatory. To ensure accuracy and avoid typos, the customer can select the folder from a drop-down list.
See it in action
The settings used in Figure 8 above were used with the following job on the Timestone Software demo IOS site.
Switching
Switching settings allows the user to restrict or allow the customer to freely swap between keys at any level (subject, folder, family, or job) and order from each while only checking out once.
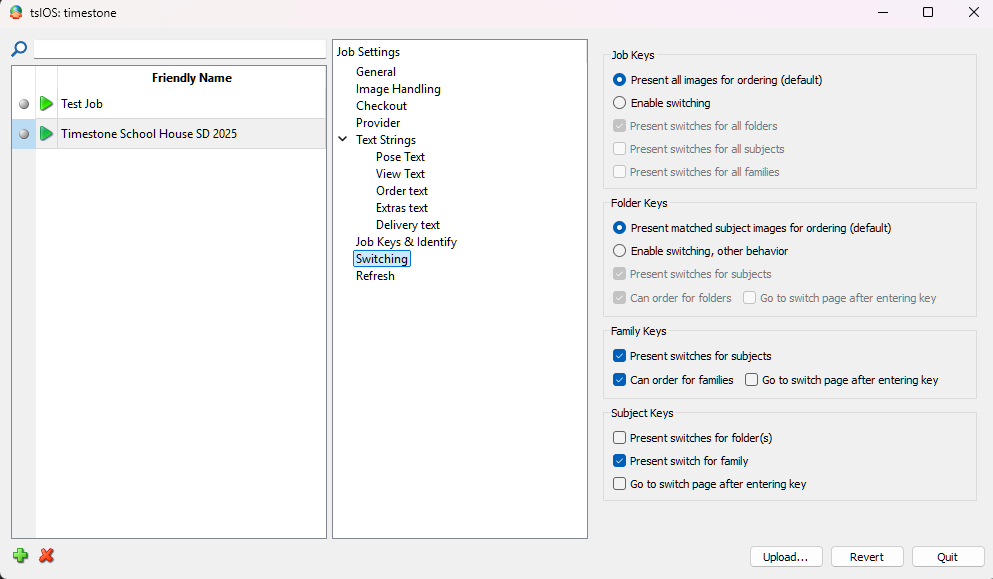
Figure 9: The Switching Settings menu
Further Reading: Types of Switching
When ordering in IOS, Family Switching allows the customer to ‘switch’ between each member of the family and even the family entity itself by entering any of the access keys without the need to enter each of the entity’s keys.
Refresh
The refresh feature enables any modifications made within the job or offer to be updated swiftly and effectively by simply ticking the relevant box and clicking upload.
This is frequently utilized when adjustments are made within a job to submit the latest version of the job details to the site.
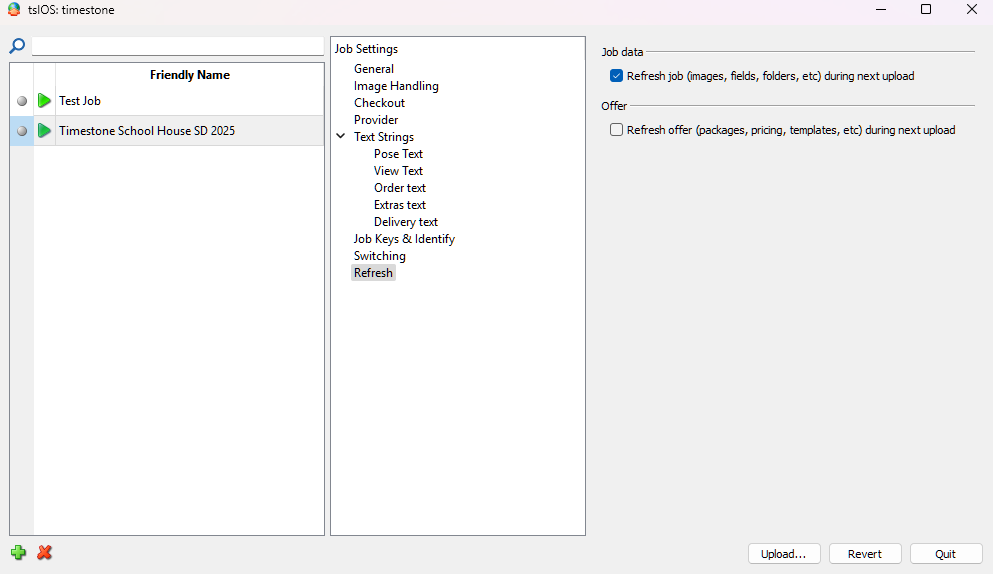
Figure 10: The Refresh options
When to refresh the job data?
The job will need to be refreshed whenever there have been changes to the job. Most commonly, this relates to when there are changes to the images or the data in the job.
Other examples include:
When images are introduced or modified, such as transitioning from pre-order to proof-order, or substituting a primary image with a different one.
When a subject was incorrectly placed in a folder designated for a class or team.
Additional fields have been incorporated for use in templates.
When modifications are made to folder or family names, and the user has the Select from list option enabled for folders or families.
When to refresh the offer?
The offer will need to be refreshed when changes have been made outside of the job. Most commonly, this could be when templates are changed or settings in tsAdmin are updated, and of course, if a change is made to the offer itself.
Other examples include:
When a template has been updated, or new templates have been added.
When changes are made to any package in the active offer.
When package templates are added or changed.
When any alterations are made in tsAdmin to an offer, its components, or its pricing.
When updating a sale or a dynamic price list.
When updating backgrounds for a given offer.
TIP
It is possible to make changes to multiple jobs and then just select upload once all the changes are completed to update the site all at once.
Pausing a Job
Pausing a Job will temporarily stop viewing and ordering from the designated job. The status of a job, Live or Paused, can be checked by looking for the status indicator next to the job name in the Friendly name column in tsIOS. Live jobs have a green play button indicator, and a paused job has a green pause icon.
To pause ordering on a job at any time, simply click the green play icon on the left-hand side of the job name; this will change the Icon to a Pause Icon. Then click Upload.
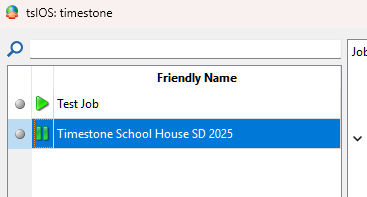
Figure 11: tsIOS window showing a live and paused job
Removing a Job from IOS
Jobs cannot be removed from IOS unless all orders have been downloaded.
To remove a Job from tsIOS, simply select the desired job from the friendly name column and click the Remove selected job icon, represented by a red X.
TIP
It is recommended that the user keeps at least one job (test job or otherwise) that has the user’s desired starting settings to be used as a template when uploading multiple jobs all with the same starting settings.
FAQ
What is tsIOS used for?
tsIOS is used to upload jobs and images to the Timestone Internet Ordering System and to set various parameters for how the job behaves online.
Is a license required to use tsIOS?
No, a license is not required to use tsIOS.
What credentials are needed to connect to tsIOS?
You need MySQL server credentials (host, username, password, and database) and website credentials (site address, username, and password) to connect to tsIOS.
How can I upload a job using tsIOS?
To upload a job, open the tsIOS app, log in, click 'Add New Job', select the job and offer, make any necessary changes, and then click 'Upload'.
Can I pause a job once it is live?
Yes, you can pause a job at any time by clicking the green play icon, which will change it to a pause icon.
What happens when the expiration date of a job is reached?
When the expiration date is reached, the job will be paused, and customers will not be able to start new orders, but they can complete orders that were started before the expiration.
How do I remove a job from tsIOS?
You can remove a job from tsIOS only after all orders have been downloaded. Select the job and click the remove icon.