Scope
A memory mate is defined as a product that combines the subject’s individual image with their corresponding team or group photo.
There are three main steps in making a memory mate:
Organizing the data and images
Making the template
Setting up the product

Figure 1: A memory mate
Before you begin
This article assumes the user is familiar with basics of template design, along with data and image handling
Further Reading: The Template Designer
Products are the result of templates created in the Timestone applications
Sample Template
To follow along, download the sample template below.
Organizing the images and data
Essentially, data and images need to be organized as follows:
Individual images matched to their subjects
The subjects be arranged into folders
Team or group images matched to their folders
The principle is then quite simple. When a memory mate product is ordered for a subject, their individual image is placed in the product together with the team or group image that has been matched to the folder they belong to.
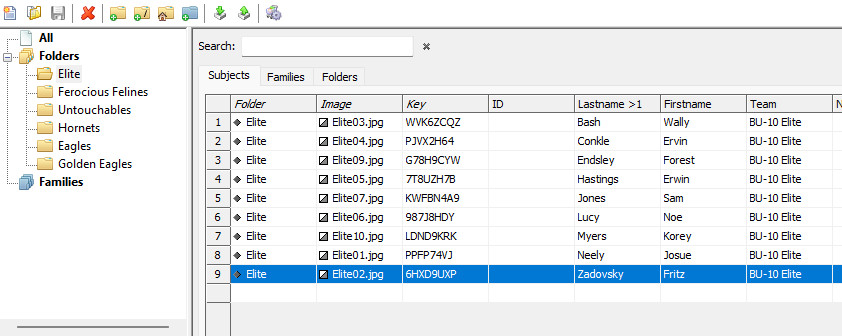
Figure 2: A sports job where each team's subjects have been arranged into folders
Matching the team image to the appropriate folder
It is assumed the reader is already familiar with the concepts and procedures of matching images to subjects. If however the user is not yet familiar with matching images to folders, the following will be useful.
Important to understand
A fundamental principle is that an image matched to a folder automatically ‘belongs’ to all the subjects in that folder.
Several methods are available to match a team or group image to the appropriate folder. These include:
Manually, in Match Mode
By importing a text fle
By using QR Codes
Using Face Recognition
The memory mate template
Essentially, a memory mate template contains two image holes - a standard hole for the subject's individual image and an image hole that calls the image that has been matched to the subject's folder. The latter is often referred to as a Folder Image.
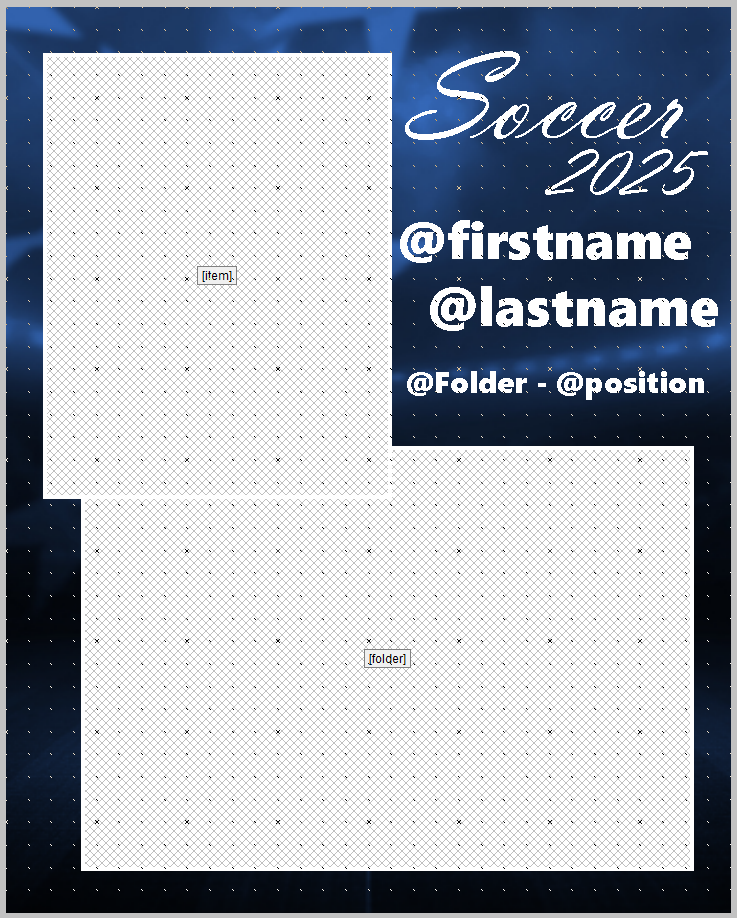
Figure 3: A simple memory mate template.
To create the template:
Start a new pack layout in NeoPack’s Template designer
Add the image hole for the subjects' individual image using the Add image hole tool
Add any text, graphics, and barcodes in the usual manner
Add a second image hole for the subjects' group image, selecting the Fill hole with: Folder Image radio button
Add the Product description and Code under File> Properties
Save the template
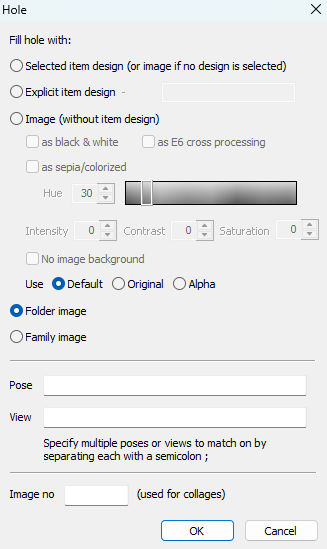
Figure 4: The Image Hole menu with Folder image selected.
Tip
As with all templates, it is possible to use conditional text, prompt fields, variable graphics, and other data-controlled elements to dynamically alter the appearance of the template.
Graphics, fonts, and colours can be changed based on data , or in some cases, according to customer responses captured via Online ordering
This allows the same memory mate template to be used for multiple teams or sports, provided the basic layout does not change.
Further Reading: Variable Elements on Templates
When inputting either fixed or variable text into a text box on any template, it can be set as Conditional, meaning it will only appear if there is information in a specific field.
Prompt fields, also called prompt text, allow online customers to personalize Products with their own data.
Dynamically format any text on a template by introducing a field or fields with appropriate formatting tags.
Rather than re-designing a template each time a graphic needs to change, the labeled holder references the graphic file from a data field.
Setting up the Product
Before the Memory Mate product can be ordered by any of the automated ordering methods, it is necessary to add the template as a Product in the Timestone Administrator (tsAdmin).
Setting up a memory mate as a product is much the same as any other portrait item.
To create the product:
Navigate to the Products tab in tsAdmin
Click the Green Plus Icon to create a new product
Enter a Code and Description
Enter the Type as Portrait
Enter the Template Key. This should match the previously entered key in the properties window of the template.
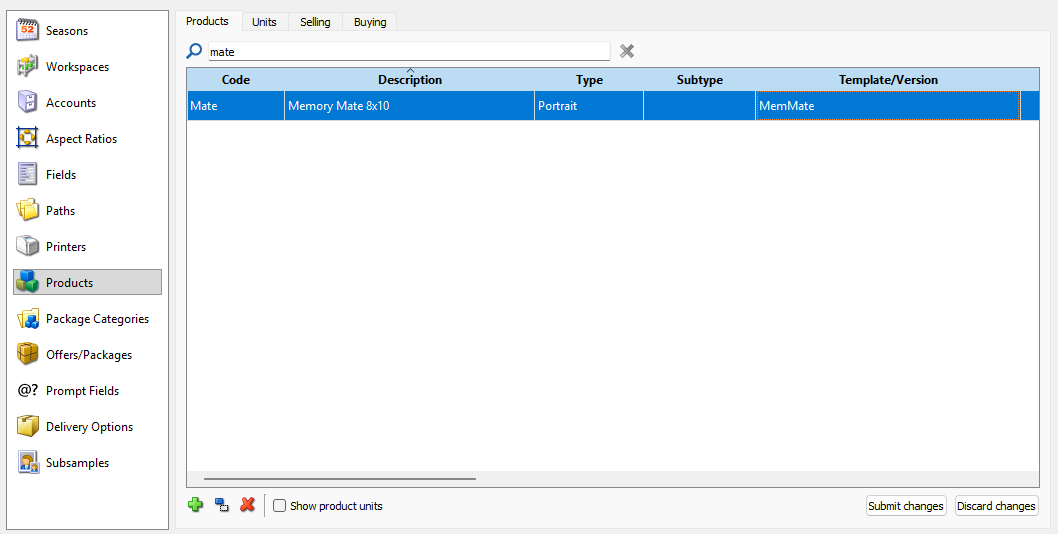
Figure 5: A memory mate product in tsAdmin
FAQ
How should I organize images and data for memory mates?
Individual images should be matched to the appropriate record, and subjects should be placed into folders by team to match each individual with the correct group image.
Does the product type matter when making a memory mate?
Yes, the product type should be set to Portrait. If the Product is set to a different type, the product will not be assembled correctly.