Timestone Software’s Face Detection technology can be used to automatically crop, align and size images, in bulk, to a consistent size and position.
It is available in all applications with Images Mode on computers where the Face Tools have been installed.
Activating Face Detect Tools
The auto-cropping and sizing tools are available in a Faces Toolbar that is displayed when the Crop Image Tool is selected or by selecting Images>Select faces tool from the menu.
NOTE
The Faces toolbar is displayed automatically whenever the Crop Images Tool is active.
Users who will not be cropping and scaling using Face Detection will have no use for this toolbar and may therefore prefer to not display it. The toolbar can be disabled in File>Options>Image faces/correct by un-checking the Show faces toolbar option.
Face detect tools are made available from the toolbar by selecting the Crop Image Tool icon, a cursor with intersecting arrows. This will add a second row to the toolbar with the Faces tools.
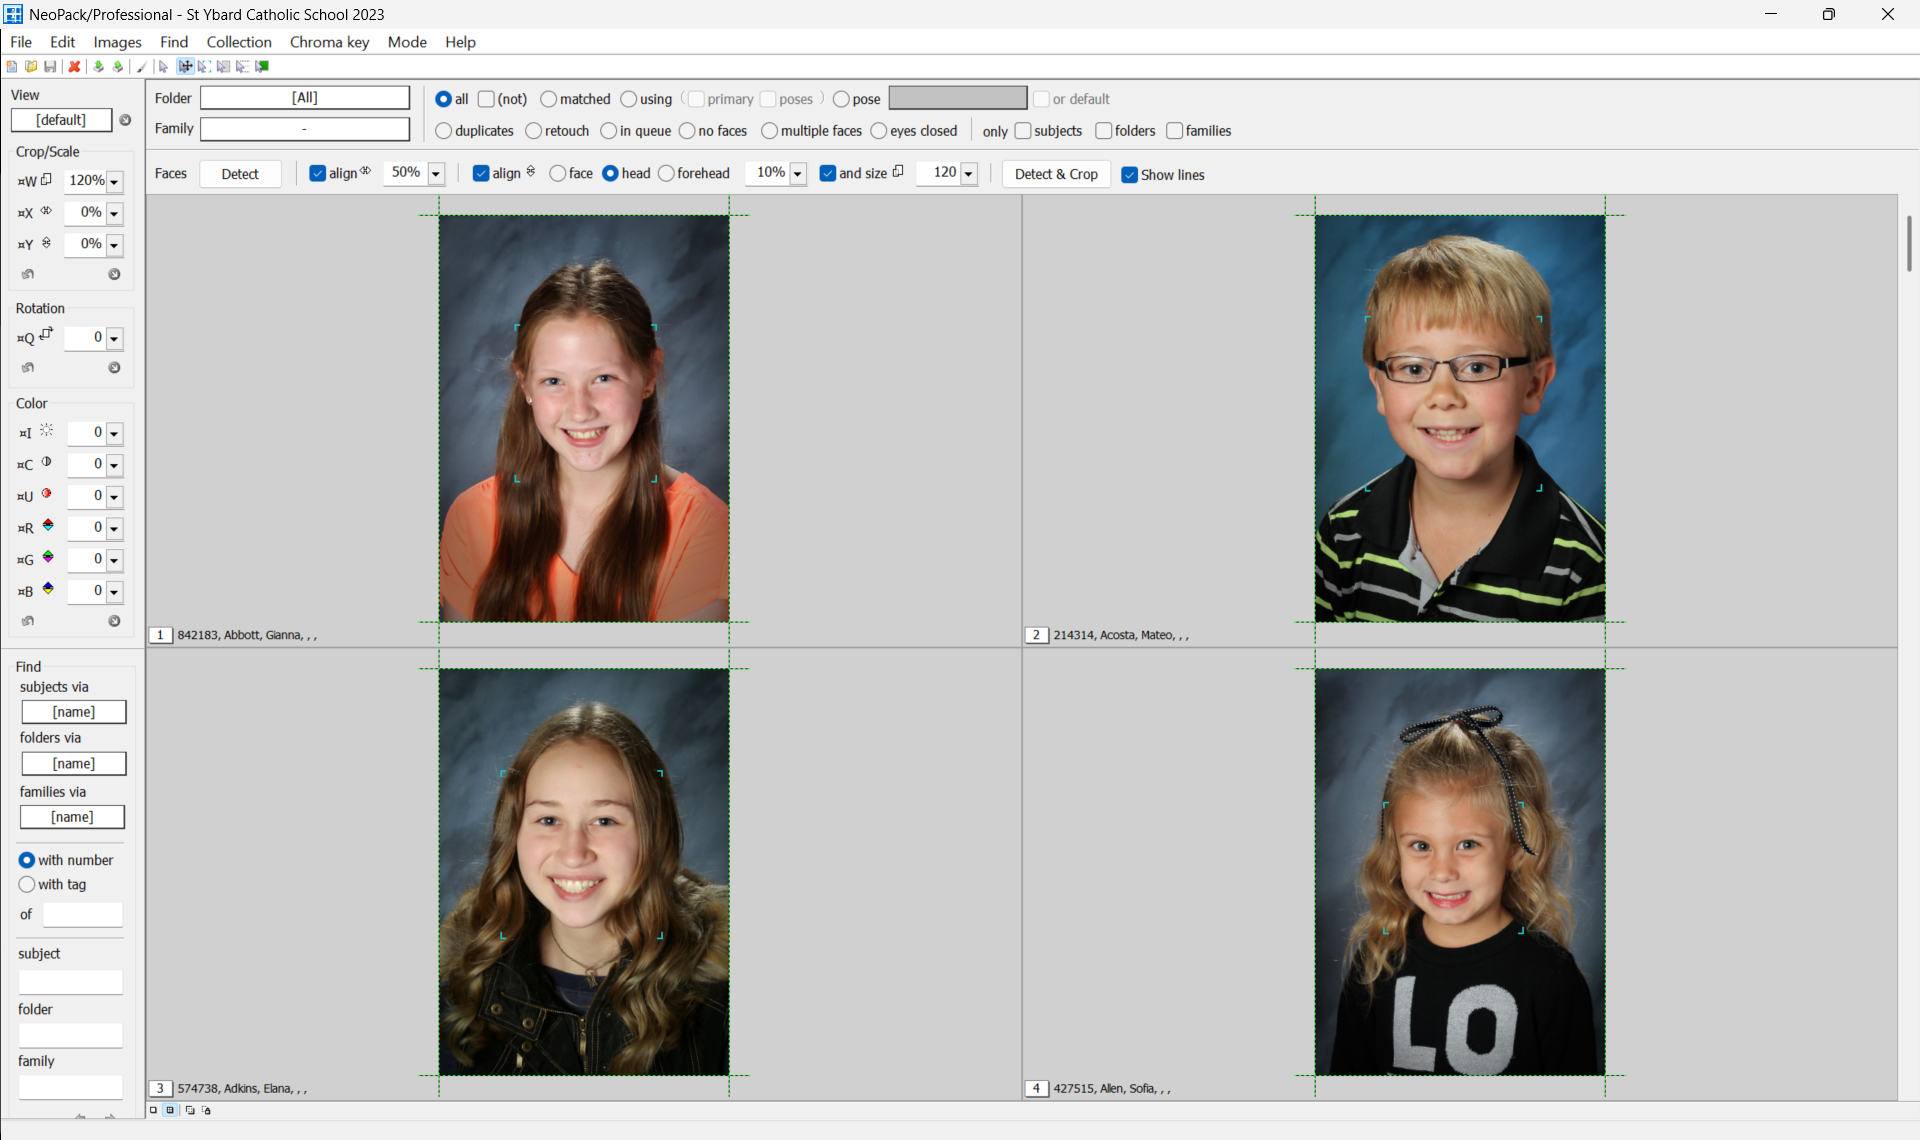
Figure 1: Images mode with the Faces toolbar showing
Quick Start
The procedure is likely best understood by practice - inputting values, analyzing the outcome, and adjusting as necessary.
With a job open in Image Mode and the Faces Toolbar active:
Select all images to be cropped
Enter 50% as starting values for the align left, top, and size parameters
Select face as the alignment option
Click the Detect & Crop button
Inspect the images and, if needed, adjust the values before clicking Detect & Crop again.
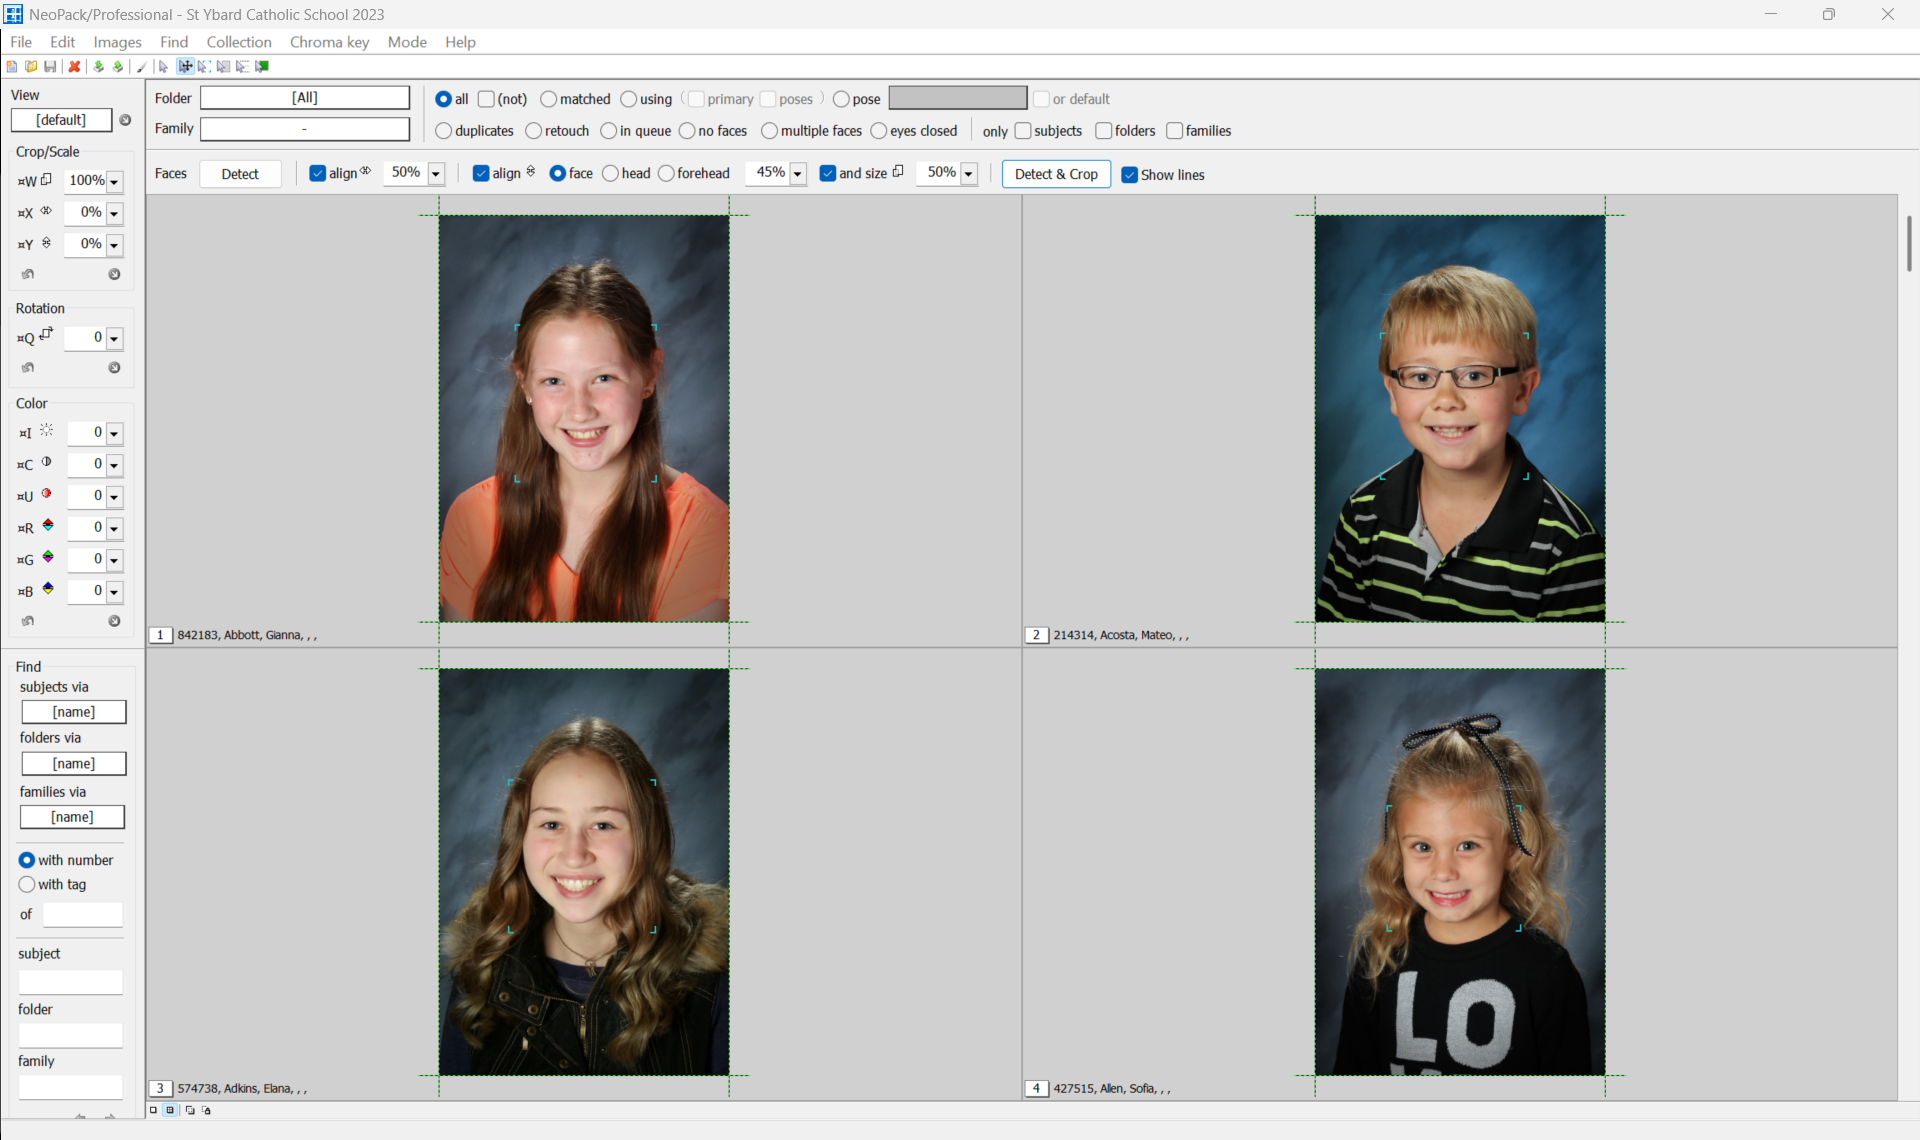
Figure 2: The images from Figure 1 cropped and aligned using face detection
Face detection
The Detect & Crop function will detect faces for any images where face detection has not yet been performed.
In brief, the following rules apply to face detection:
The original images must be accessible
Faces must be in the upright position
Images should only have a single face
Face detection is indicated by blue corner brackets. These guidelines may be shown or hidden by the Show Lines checking option in the toolbar.
Further Reading - Detecting Faces
Many users prefer to perform face detection on the images separately from the auto-cropping and sizing function.
Regardless of whether face detection is done prior or at the time of cropping, it is important the user thoroughly understand all aspects of the face detection process. To this end a detailed article is available together with a movie tutorial.
Automatically Cropping, Aligning, and Sizing Images
Once faces have been detected, the technology can be used to achieve consistent cropping and alignment based on user-defined parameters.
Align faces to the left or right
Align faces up or down based on the center of the face, the head, or the forehead
Size Faces
These three parameters are set with the corresponding tools on the Face Detect toolbar and are expressed as percentages of the total Canvas
What the Percentages Mean
An understanding of how the percentages entered by the user relate to the canvas size and the size and positioning of the face within the canvas will enable the use to enter better starting values into the toolbar and make suitable adjustments as needed.
Horizontal alignment
The start point is the left side of the canvas, with 100% being the extreme right-hand side of the canvas. Therefore, a value of 50% will place the center of the face midway along the x-axis. A value of 75% will place the face three-quarters of the way along the x-axis, and so on.
Vertical alignment
The start point is the top left of the canvas, with 100% being the top edge of the canvas. A value of 50% will therefore place the center of the face halfway up the canvas. A value of 33% will place the face two-thirds up the canvas, and so on.
Alignment of the face, head, or forehead
The user can indicate whether they want to use the center of the face, the head, or the forehead as the point of alignment.
ATTENTION
It should be noted the technology detects faces. The head and forehead are calculated from the size and position of the face.
It is recommended the user experiment with the three to determine which gives the most suitable results.
Size
The size of the face is expressed as a percentage of the total canvas area. A value of 40% indicates that the face area will occupy 40% of the total image canvas.
Visualization
To help visualize and understand the concept described above, it is helpful to remove the human elements and simply consider the face as a rectangle as pictured below.
Example 1 shows a face detection square set to approximately 70% left/right, 40% up/down, and 40% of the total canvas size.
Example 2 shows a face detection square set to approximately 50% left/right, 30% up/down, and 55% of the total canvas size.
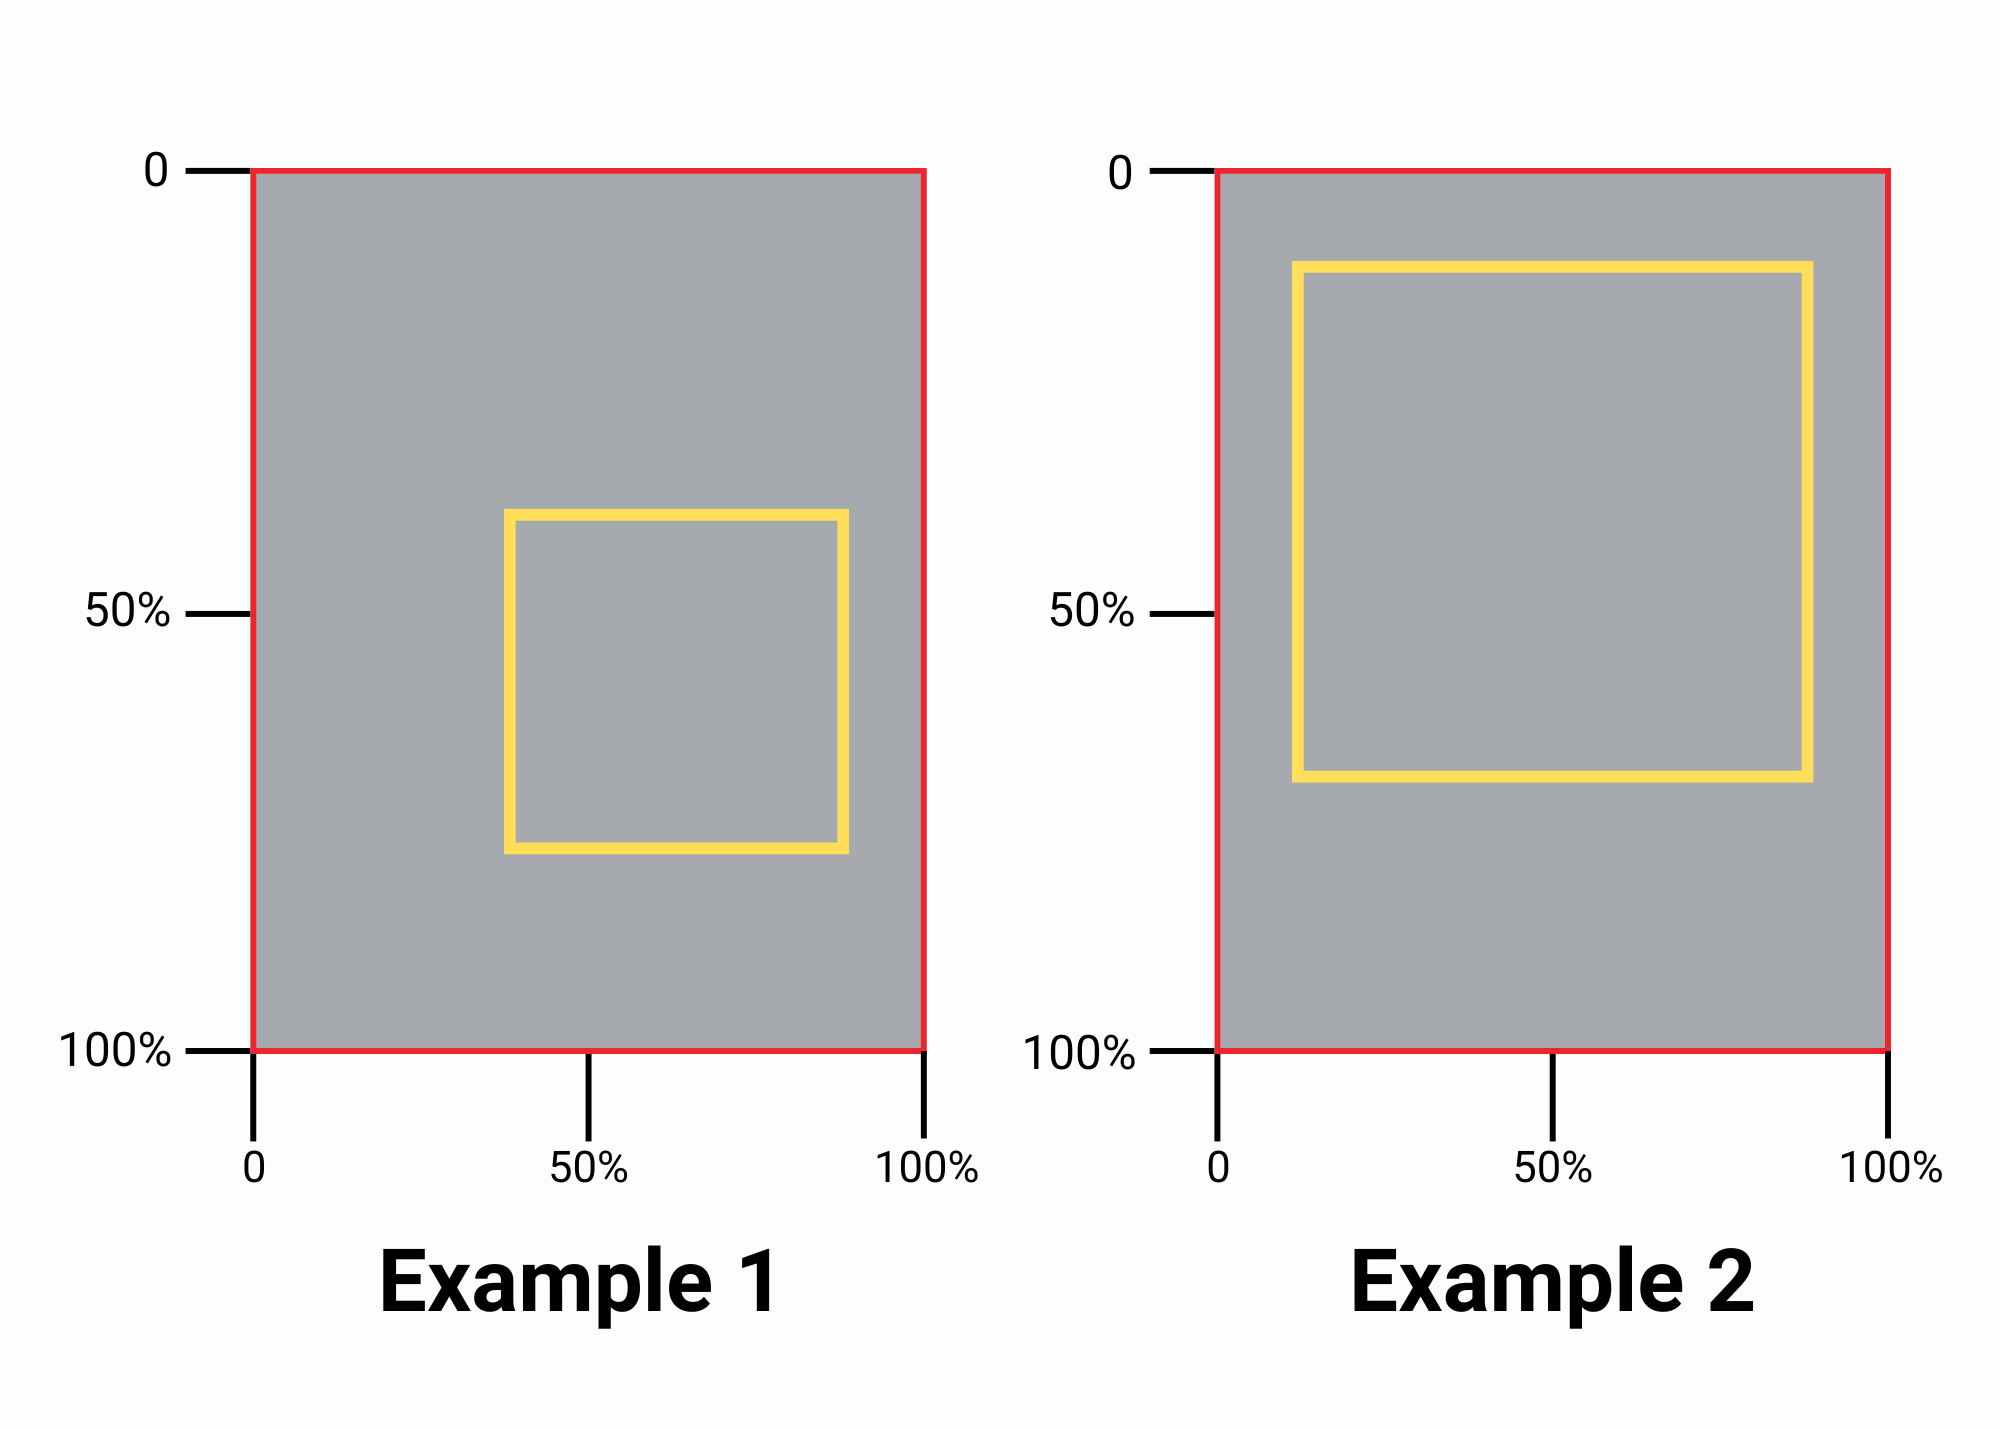
Figure 3: Conceptual examples of different parameter values